It started with a somewhat random text from my daughter, Ashley. She wanted to know if she could take my dog, Sport, on a solo backpacking trip. After a little back and forth texting, I invited myself instead. Playing the part of Sport is Terri. After a little bit more discussion about destinations, I suggested we do the 54 mile Benson Lake/Matterhorn Canyon Loop. I have wanted to do this trip for at least 15 years. And, I have wanted to return to Matterhorn Canyon ever since an amazing backpacking trip I took from Tuolumne Meadows to Twin Lakes in 1975. I was excited to share the canyon with Ashley. I did warn her that it would be strenuous. We are both marathon runners but backpacking has been an only an occasional thing for both of us. However, she was definitely game. Especially because this route had the varied scenery she wanted during the trip. It passes through thick forest, travels along beautiful alpine lakes, traverses the wide and long Kerrick Meadow, crosses over several high elevation passes and threads up two rocky canyons, Matterhorn Canyon and Slide Canyon, before descending into thick forest again.

Me in Matterhorn Canyon in the summer of 1975. Photo Credit: Ivan Lee
Among family and friends, I am known as the trip planner. All it takes is a vague suggestion for a trip and in 10 minutes flat I’ve got the itinerary, lodging, and menu planned. This trip was no different with the exception of the menu, which I will get to in detail a little later. Ashley and I settled on a 5 day trip over the Labor Day weekend. We would camp near Twin Lakes Wednesday, enter Hoover Wilderness from Twin Lakes on Thursday, and exit on Monday. We decided to do the loop counterclockwise because I wanted to walk up Matterhorn Canyon from the south. The camp spots were chosen with each day’s mileage charted out.
With only 5 days we would need to stick to the schedule (or better) or we would not make it out by Monday! I typically have a pretty relaxed approach to backpacking planning. I don’t mind carrying a heavy-ish pack for the kind of trips I usually take. But this time the goal was much bigger. In fact, I had not done a trip this big since 1975! So, I did a lot of research on hiking speed, calories burned, and meal planning. We needed to keep things light since we needed to average 11 miles per day. I found the website https://caseyfiedler.wordpress.com by an ultra-light hiker that covers everything you need to know about the calorie to weight ratio approach. I used that approach to plan our meals and snacks. We are not ultra-light hikers, neither of us have the latest and lightest equipment. But the food information was excellent. I developed an EXCEL spreadsheet to calculate the weight of the food and the calories for each day. It totally changed which freeze dried meals and what kind of snacks I chose for the trip. I will never look at backpacking food the same again! By the time I was finished we each had 3000 calories per day with an average calorie density of 150 calories per ounce and our total food weight was 5 lbs apiece. We were never hungry. We ate all the food except for a couple of snack bars and some of the gorp.I also estimated the time each day’s hike would take (It turned out we tended to be faster uphill than estimated but we were a little slower downhill). At the start of the trip our packs each weighed under 30 lbs without water. I added 4 lbs of photography equipment because that was important to me.
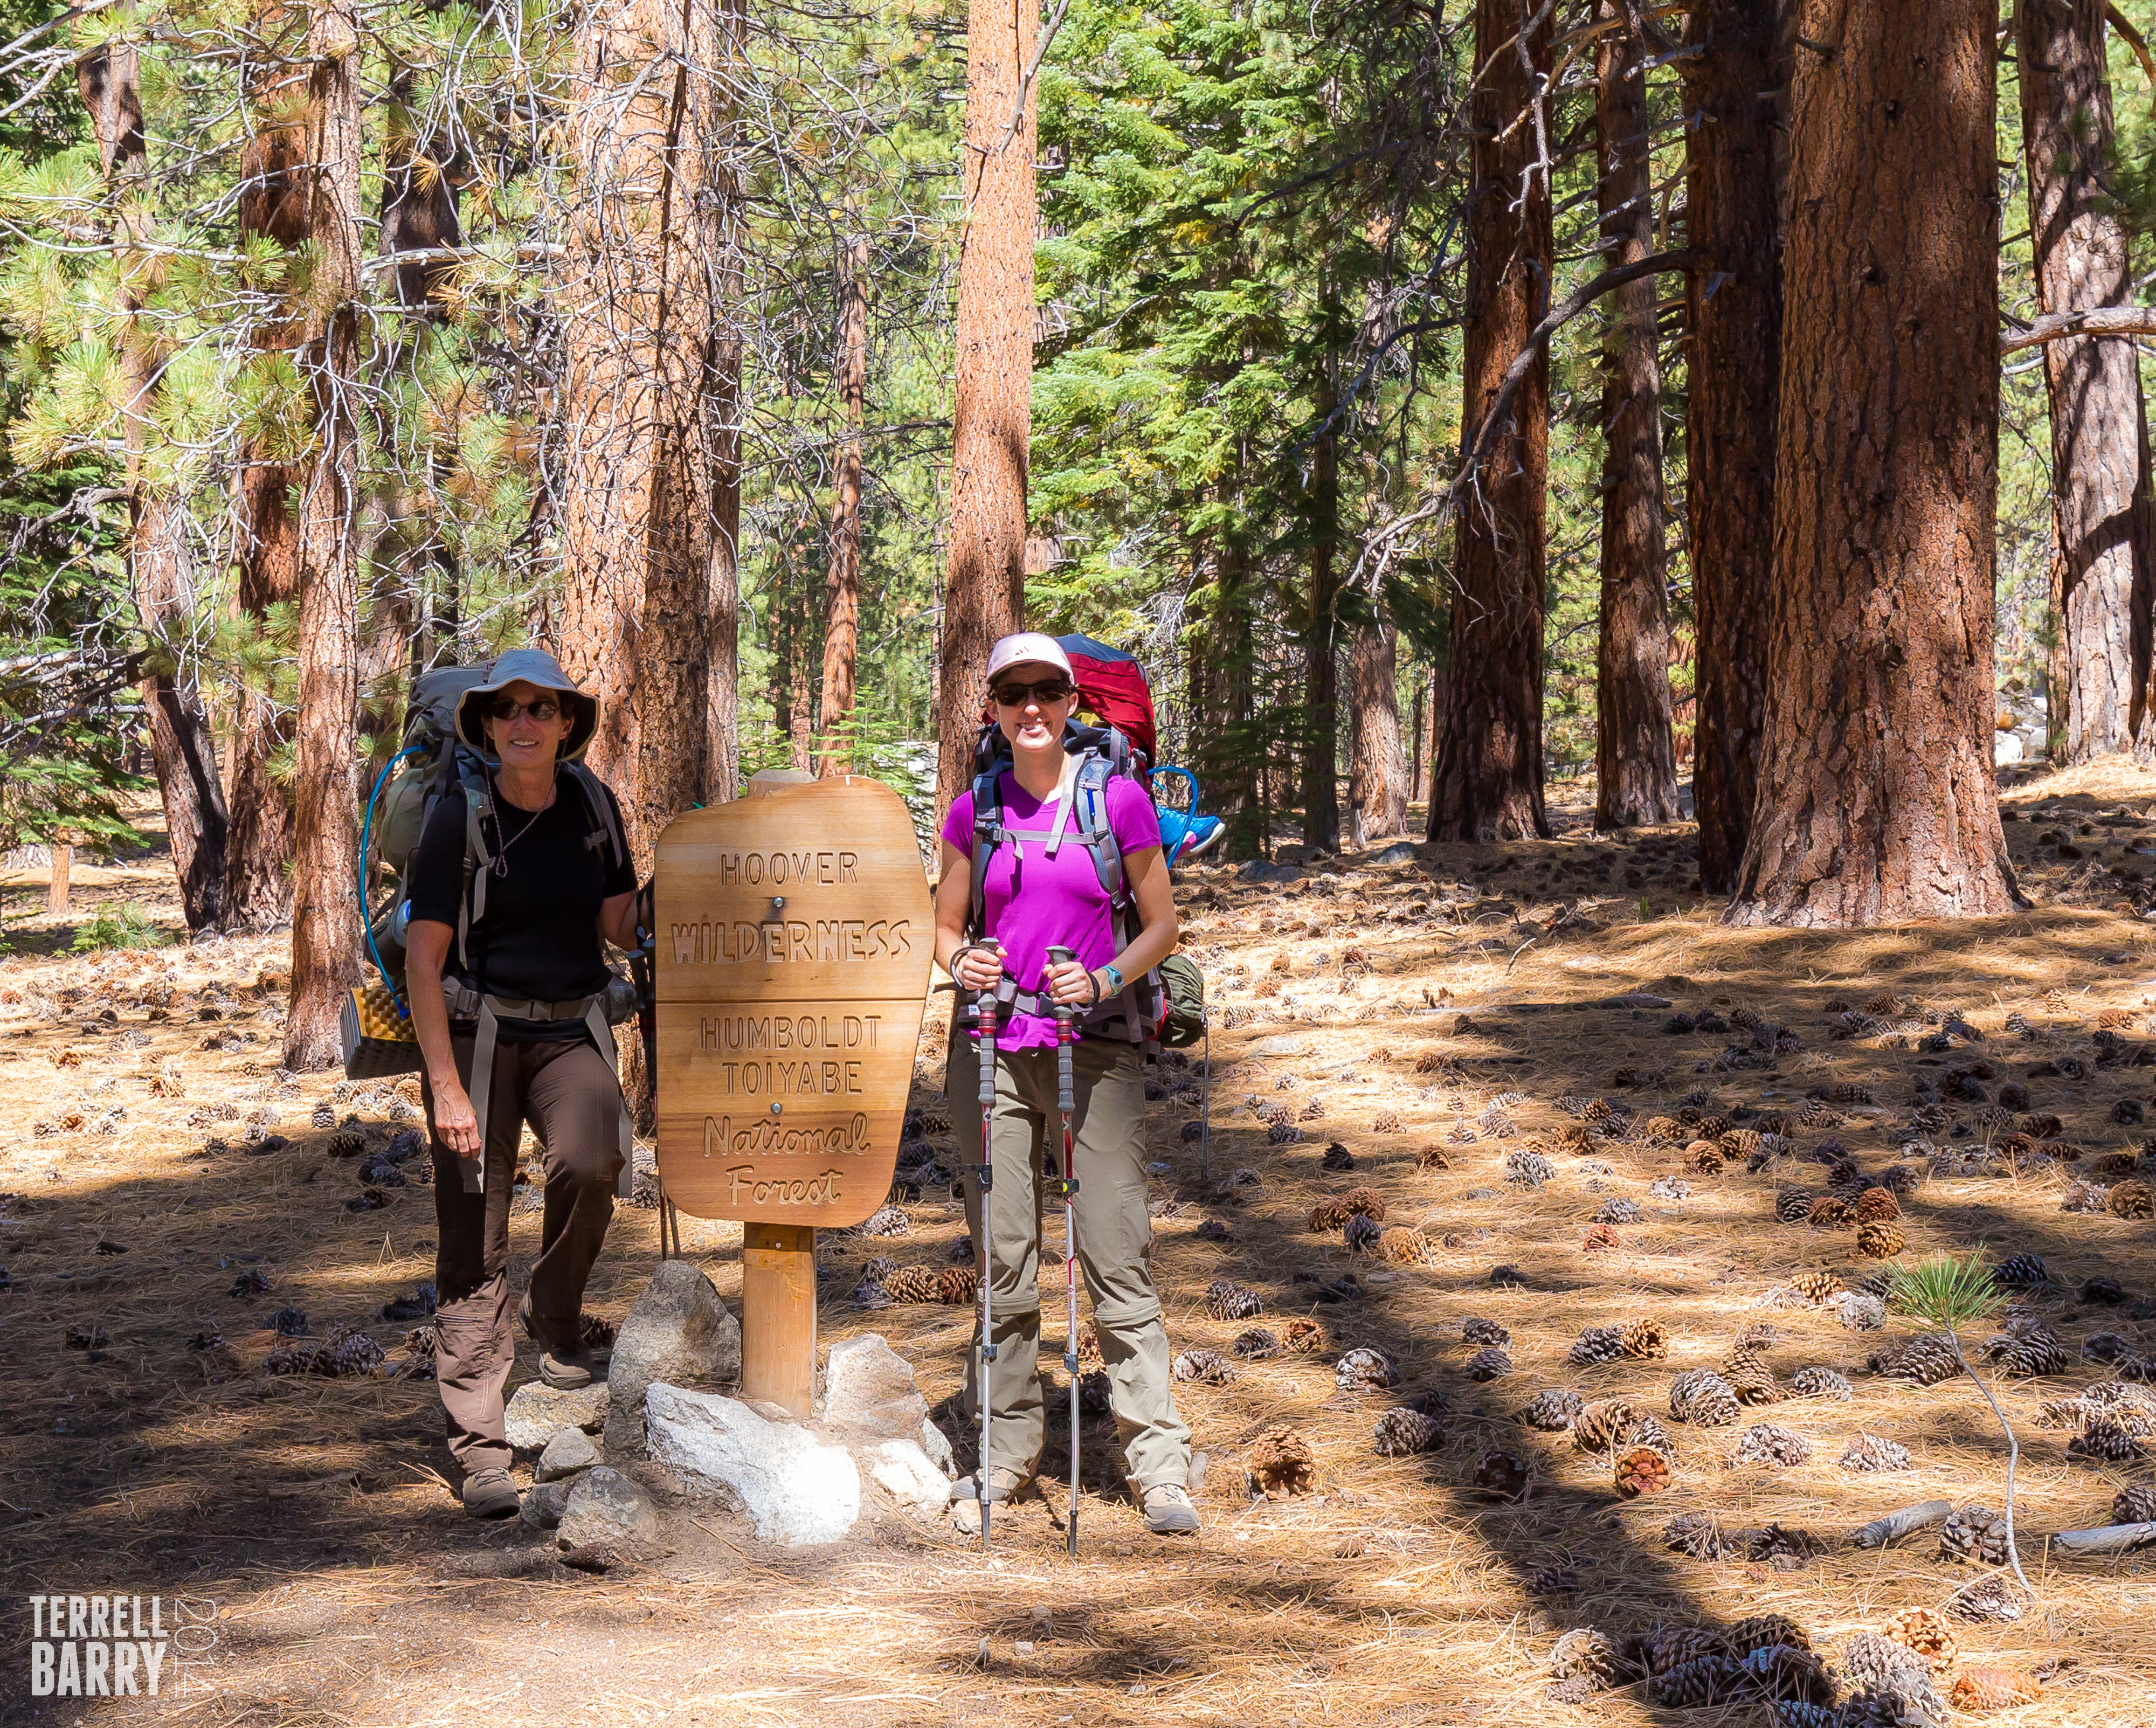
Entering Hoover Wilderness
Our first night was at Peeler Lake. This was the shortest day at 8 miles. We found a beautiful campsite on the southwest side of the lake. We had gotten a later start than we wanted so we arrived late. We were setting up camp and getting water in near darkness. Ashley did remark that night that everything about backpacking was harder than she remembered. But she is a tough cookie and took it all in stride.
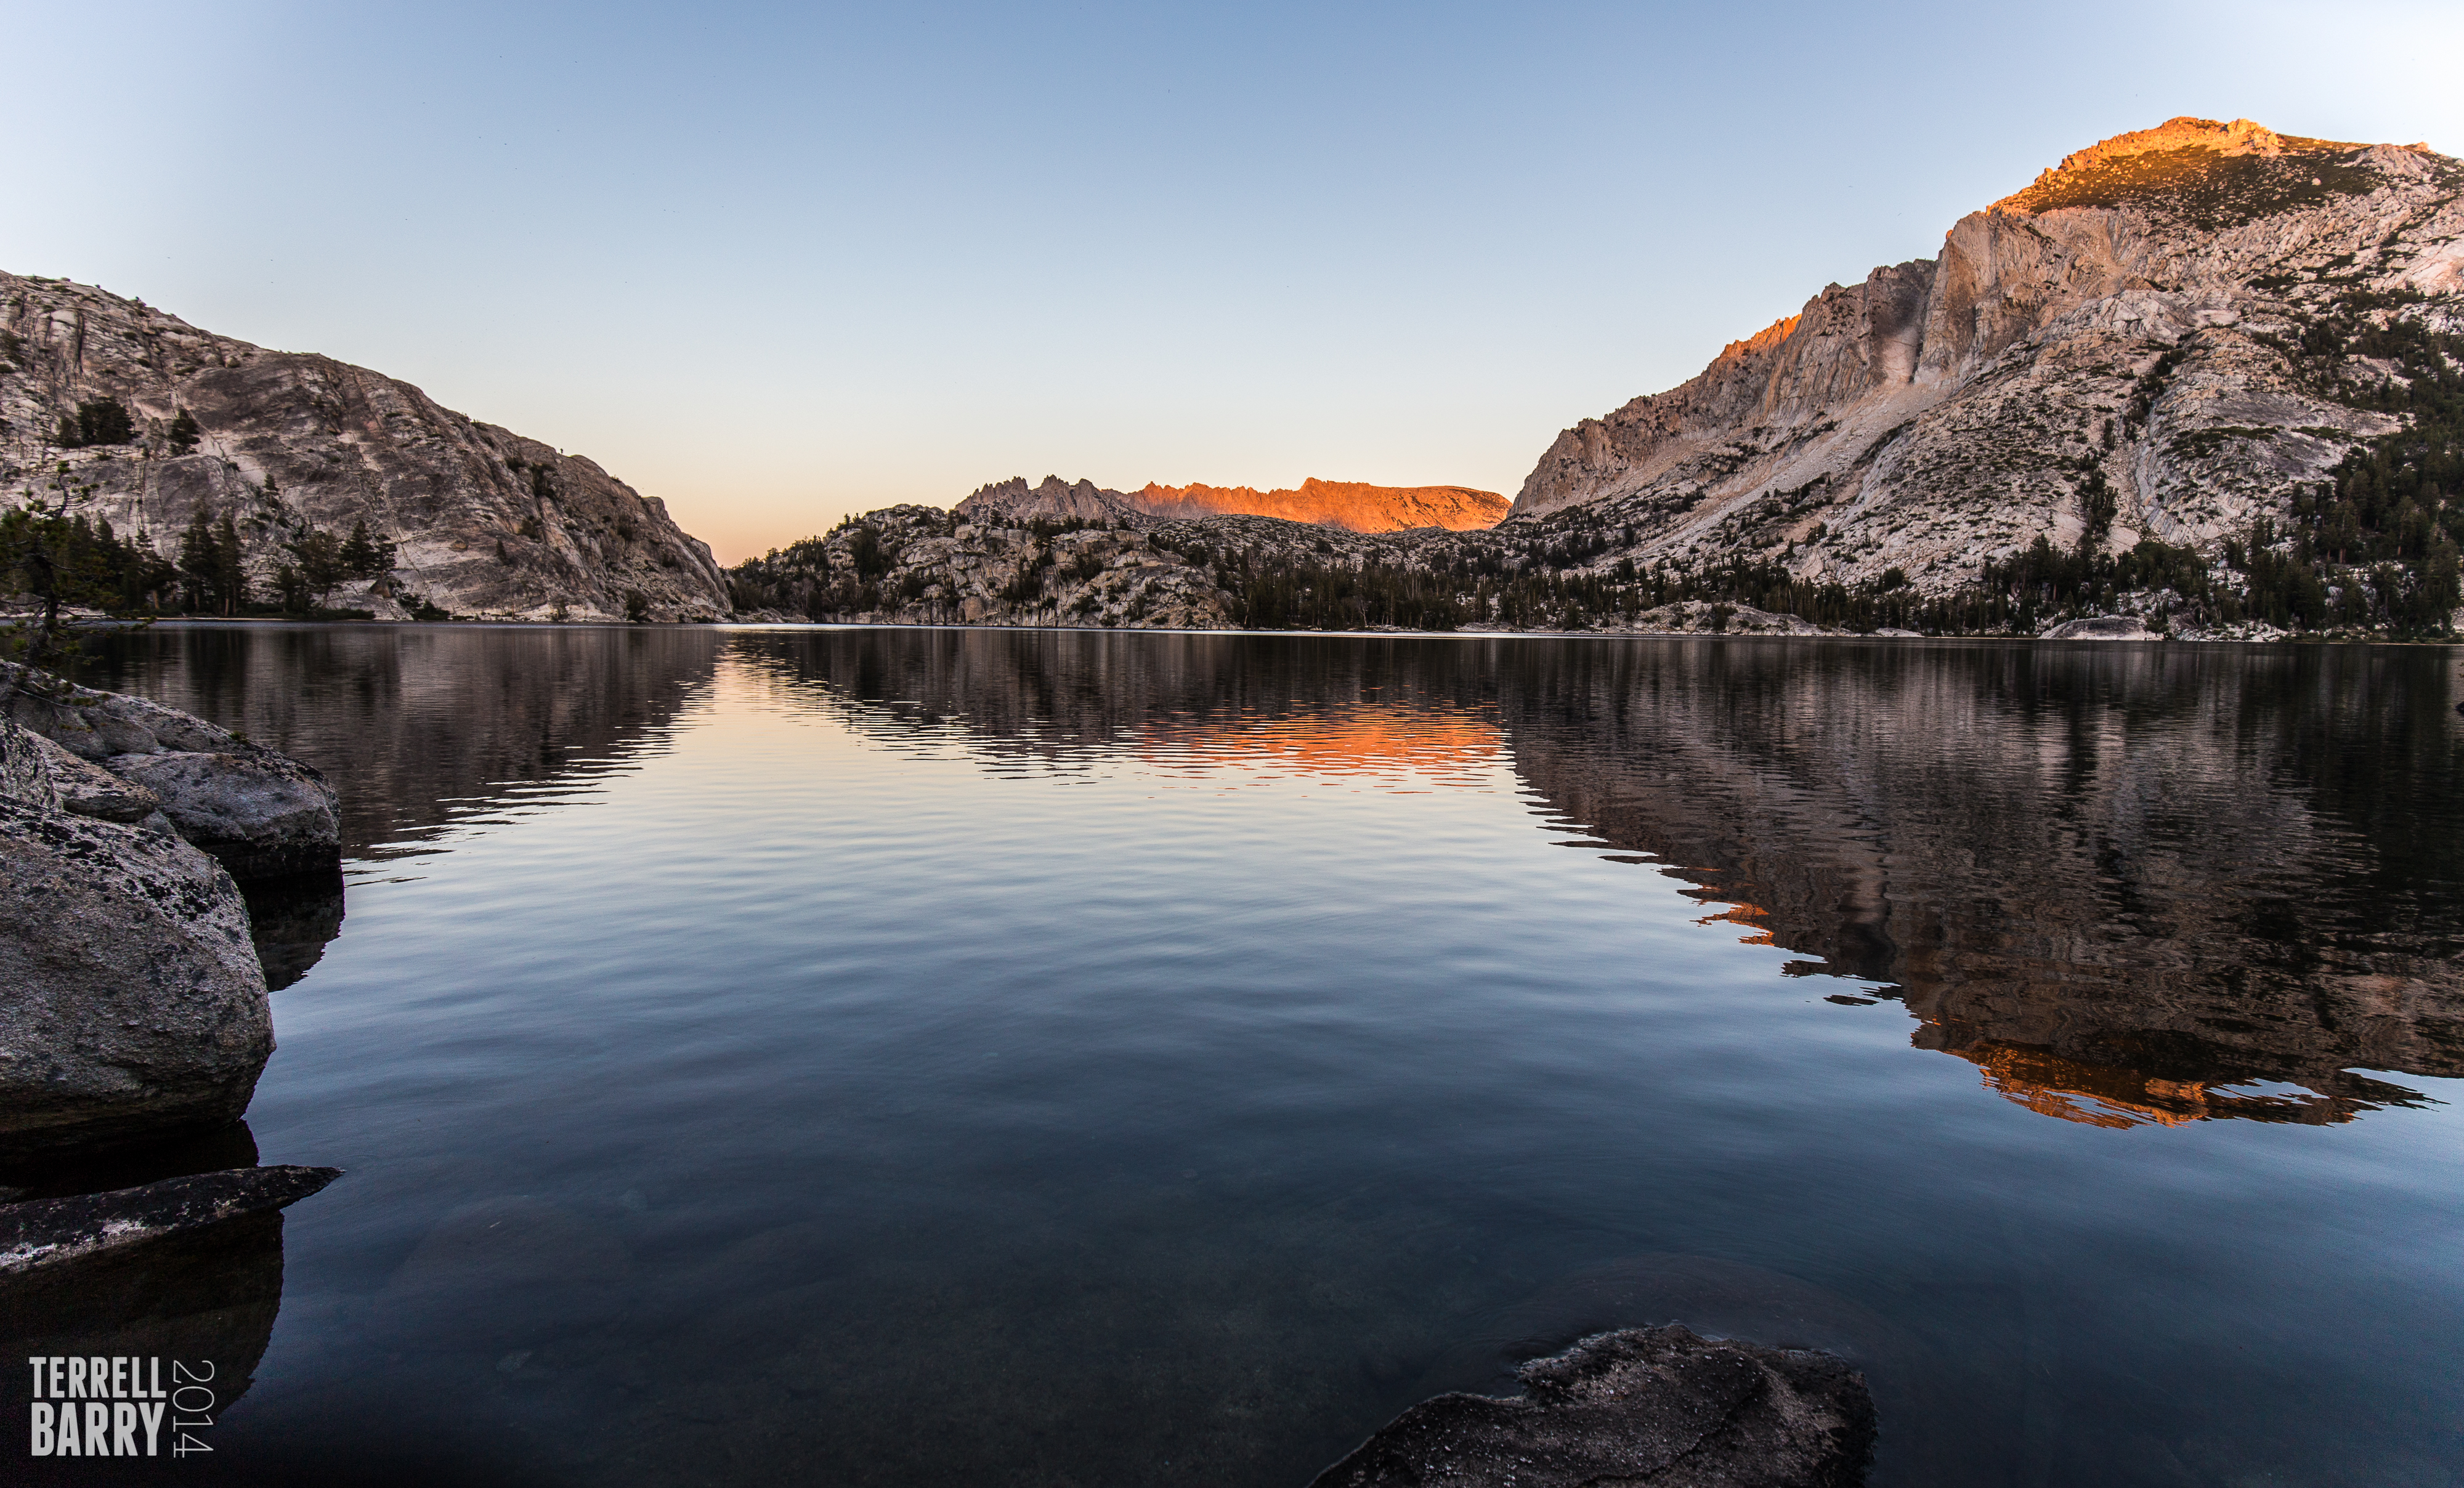
Peeler Lake at sunset
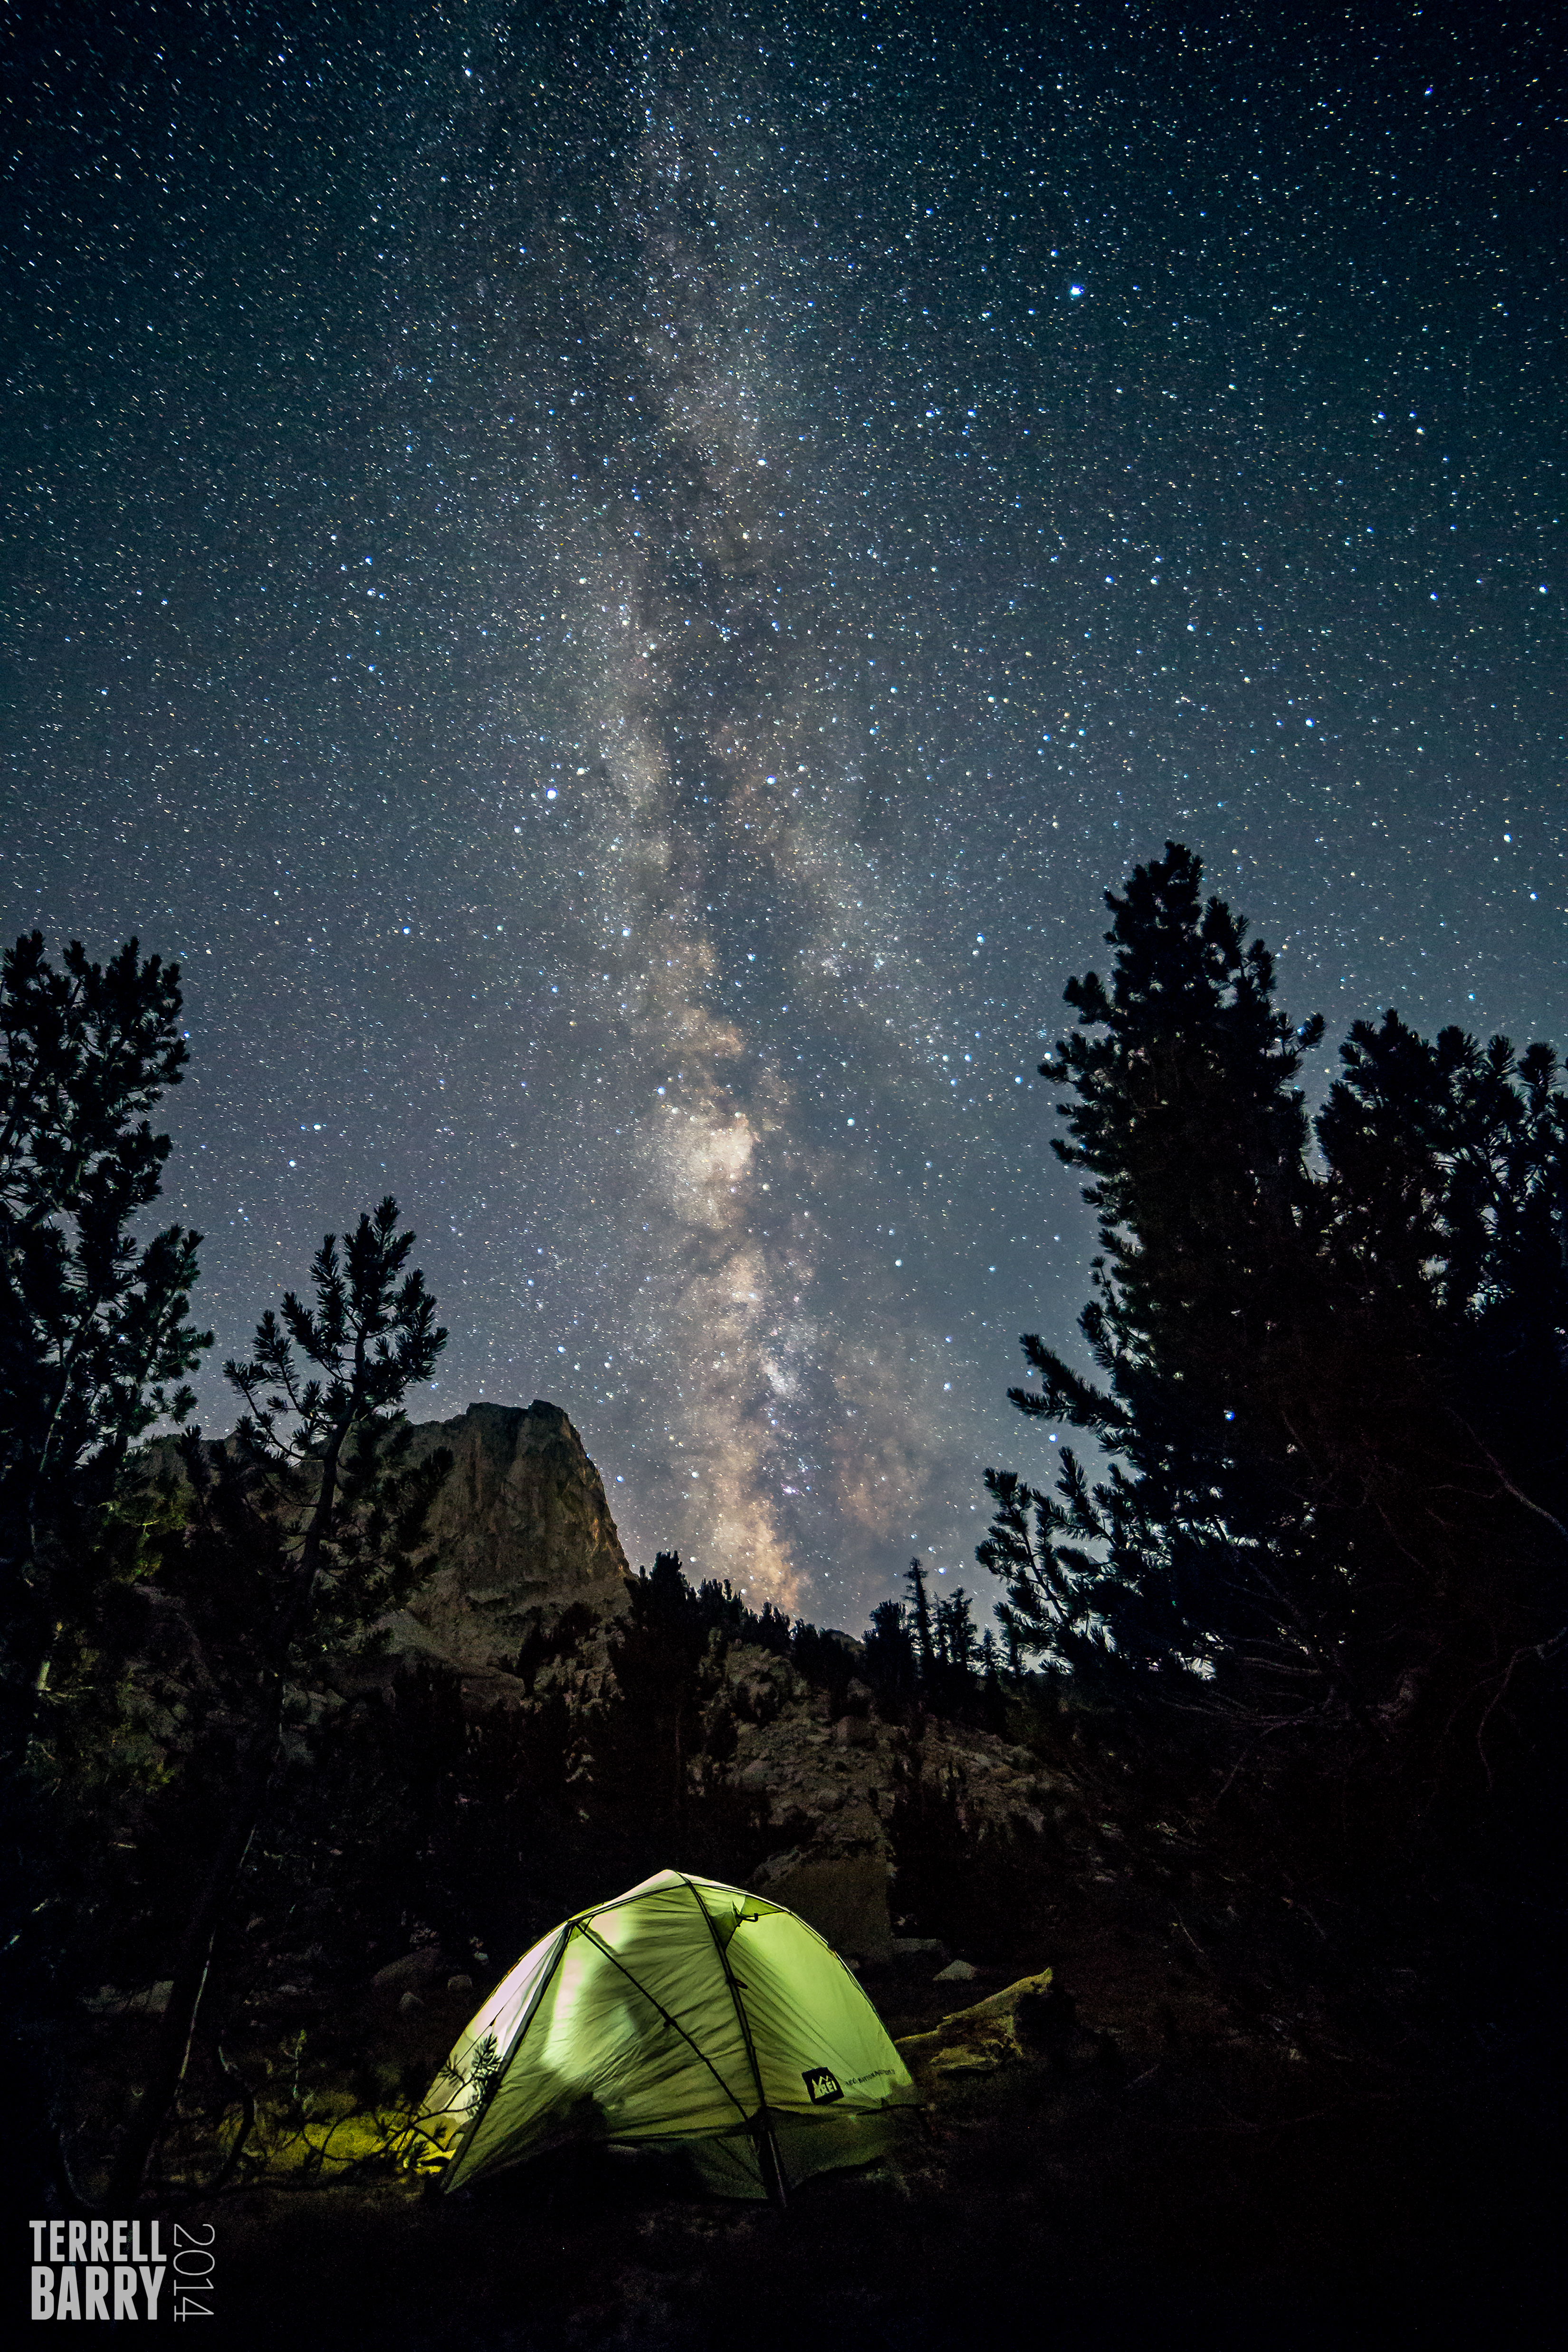
Once we were finished with dinner and the sun had set, I prepared to take my first Milky Way photos ever. I set up the tripod and camera and realized right away that I had not played with my new manual lens enough at home. I couldn’t get the remote to interact with the camera (that turned out to be operator error!) so I had to use the delayed shutter instead. Oh, well, I still got some shots I really like. In between one of the shots we saw a meteor so big it actually lit up the sky like firework. I wish I would have been lucky enough to get it in one of my photos. But just seeing it was amazing.
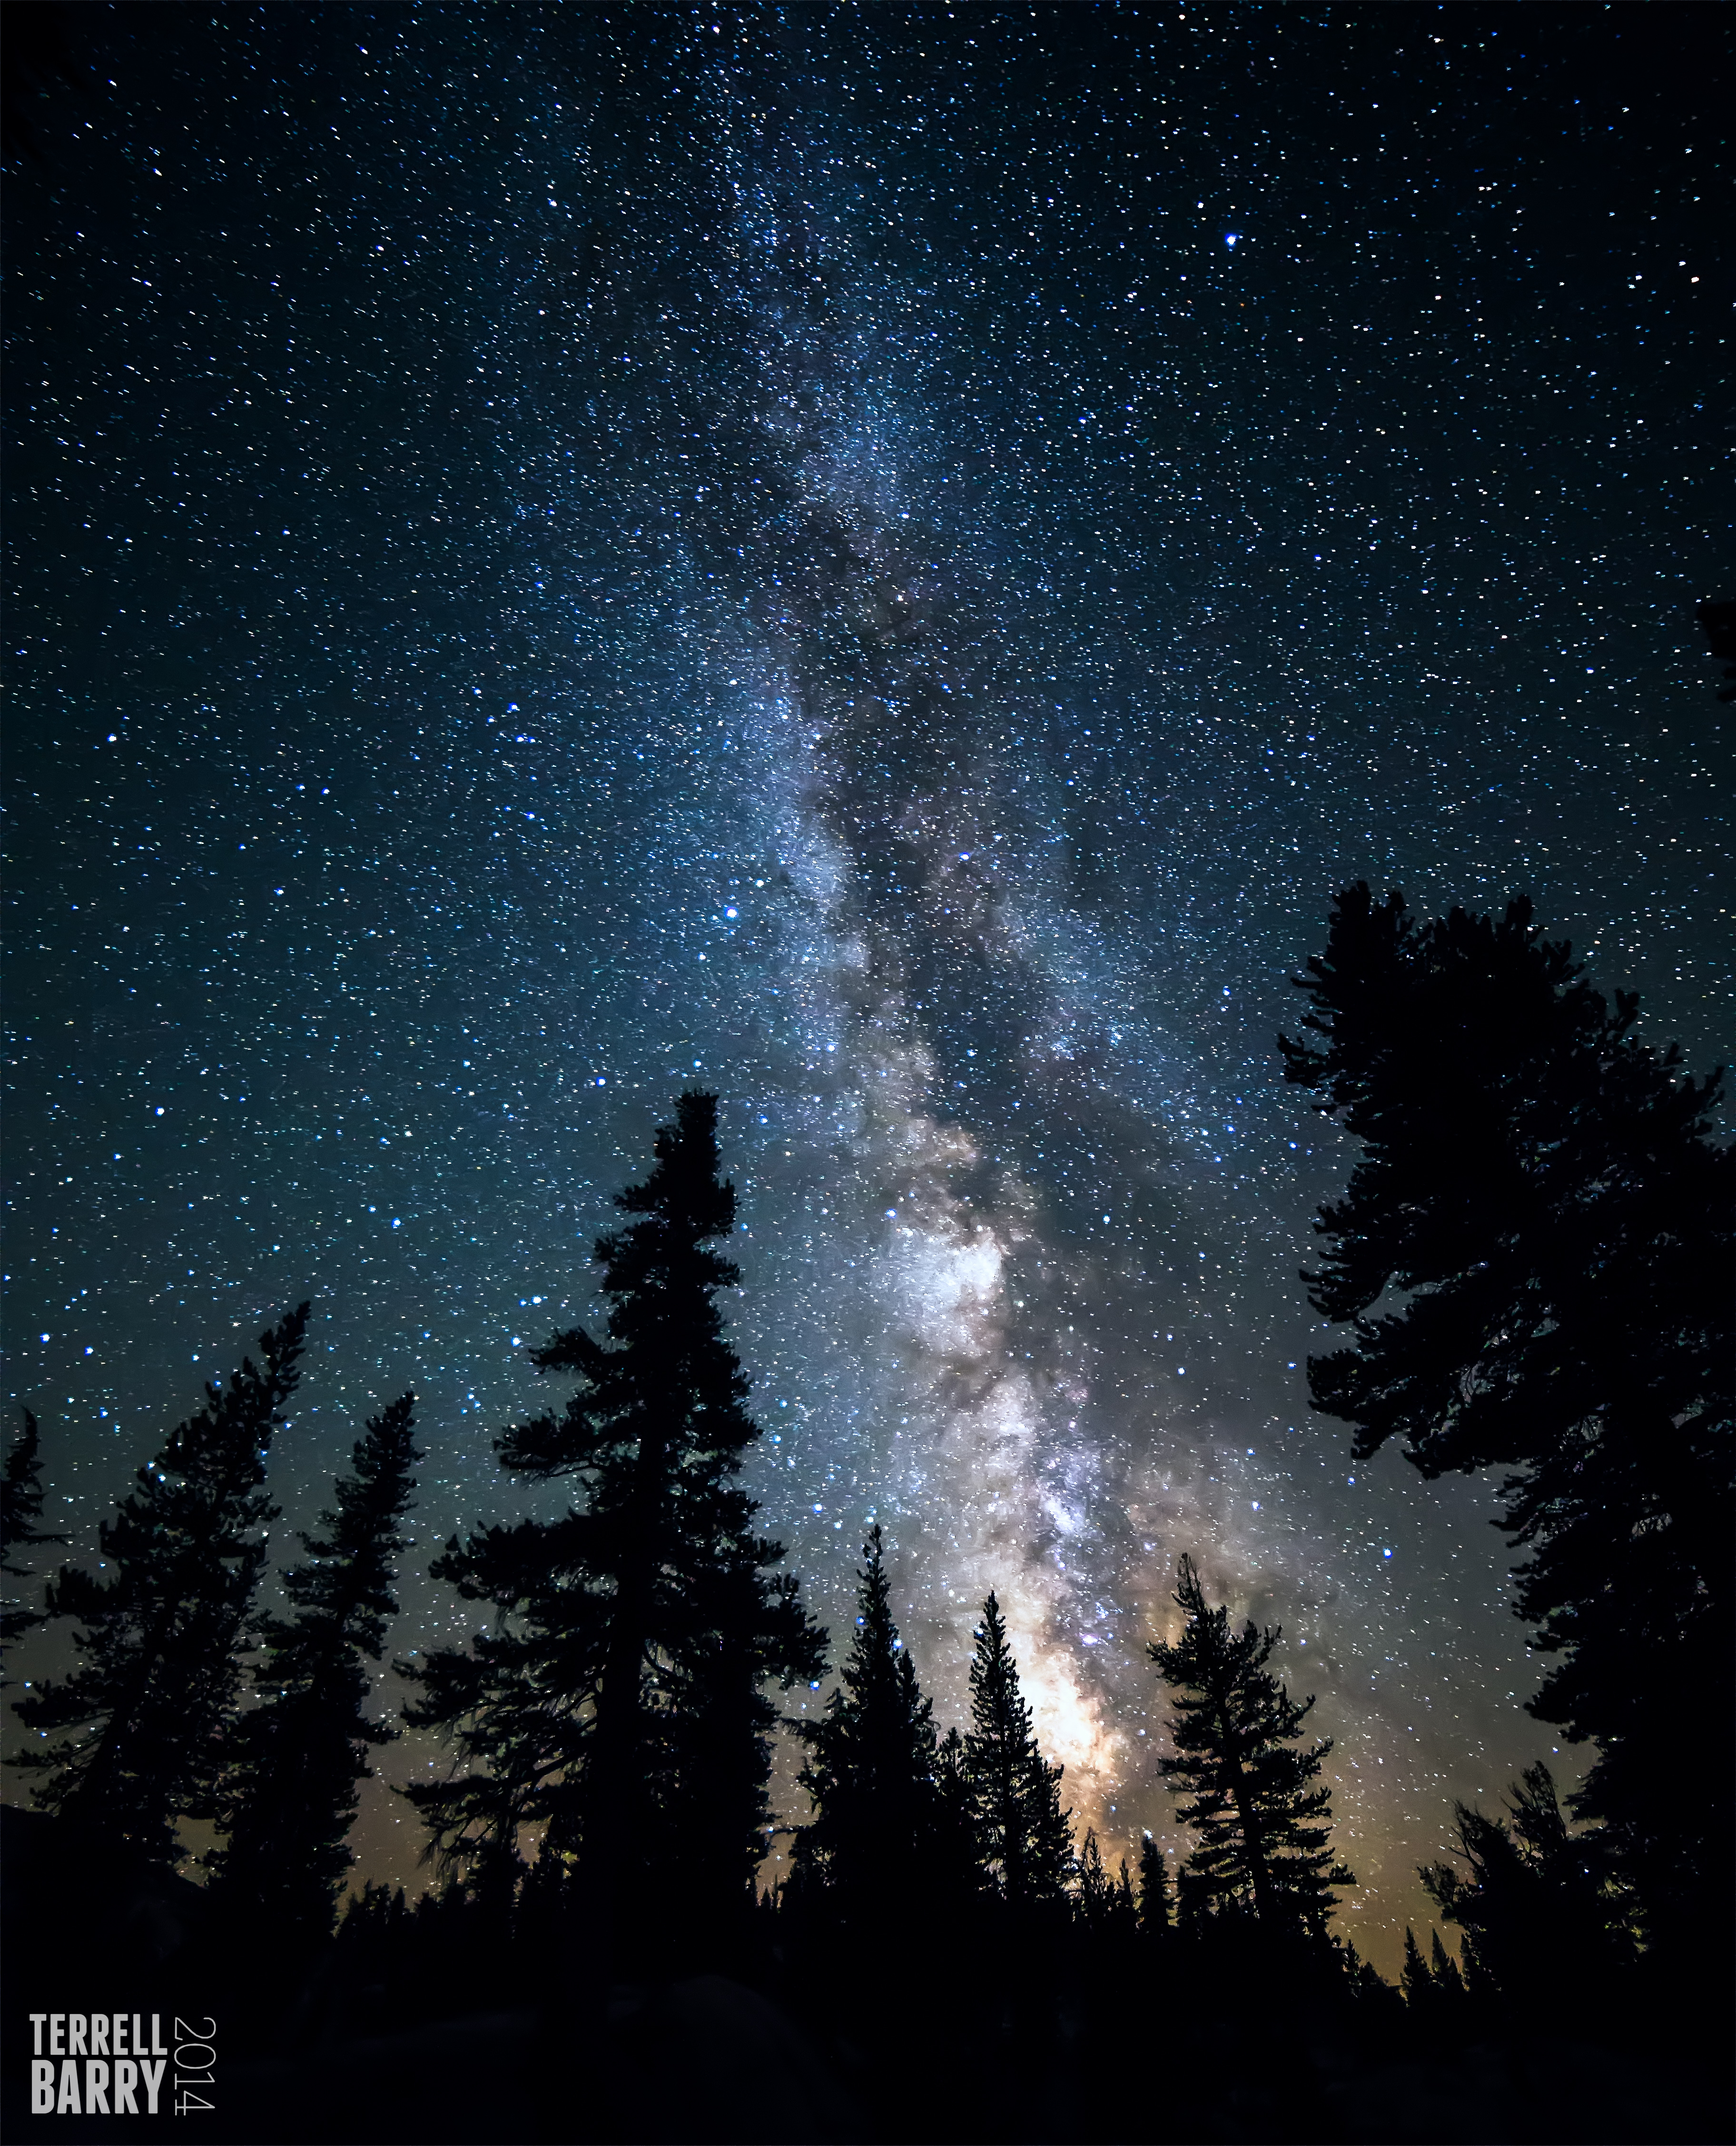
My first serious Milky Way photo!
The next day, Friday, we headed to Benson Lake. This is an alpine lake with a huge sand beach. The hike to Benson Lake was lovely. The route travels through Kerrick Meadows and over Seavey Pass. I will say this day was tougher than either of us expected. The elevation gain on the route was not huge and it was net downhill. But once we were over Seavey Pass it seemed like it took forever to reach the lake, even though it was only 3 miles.
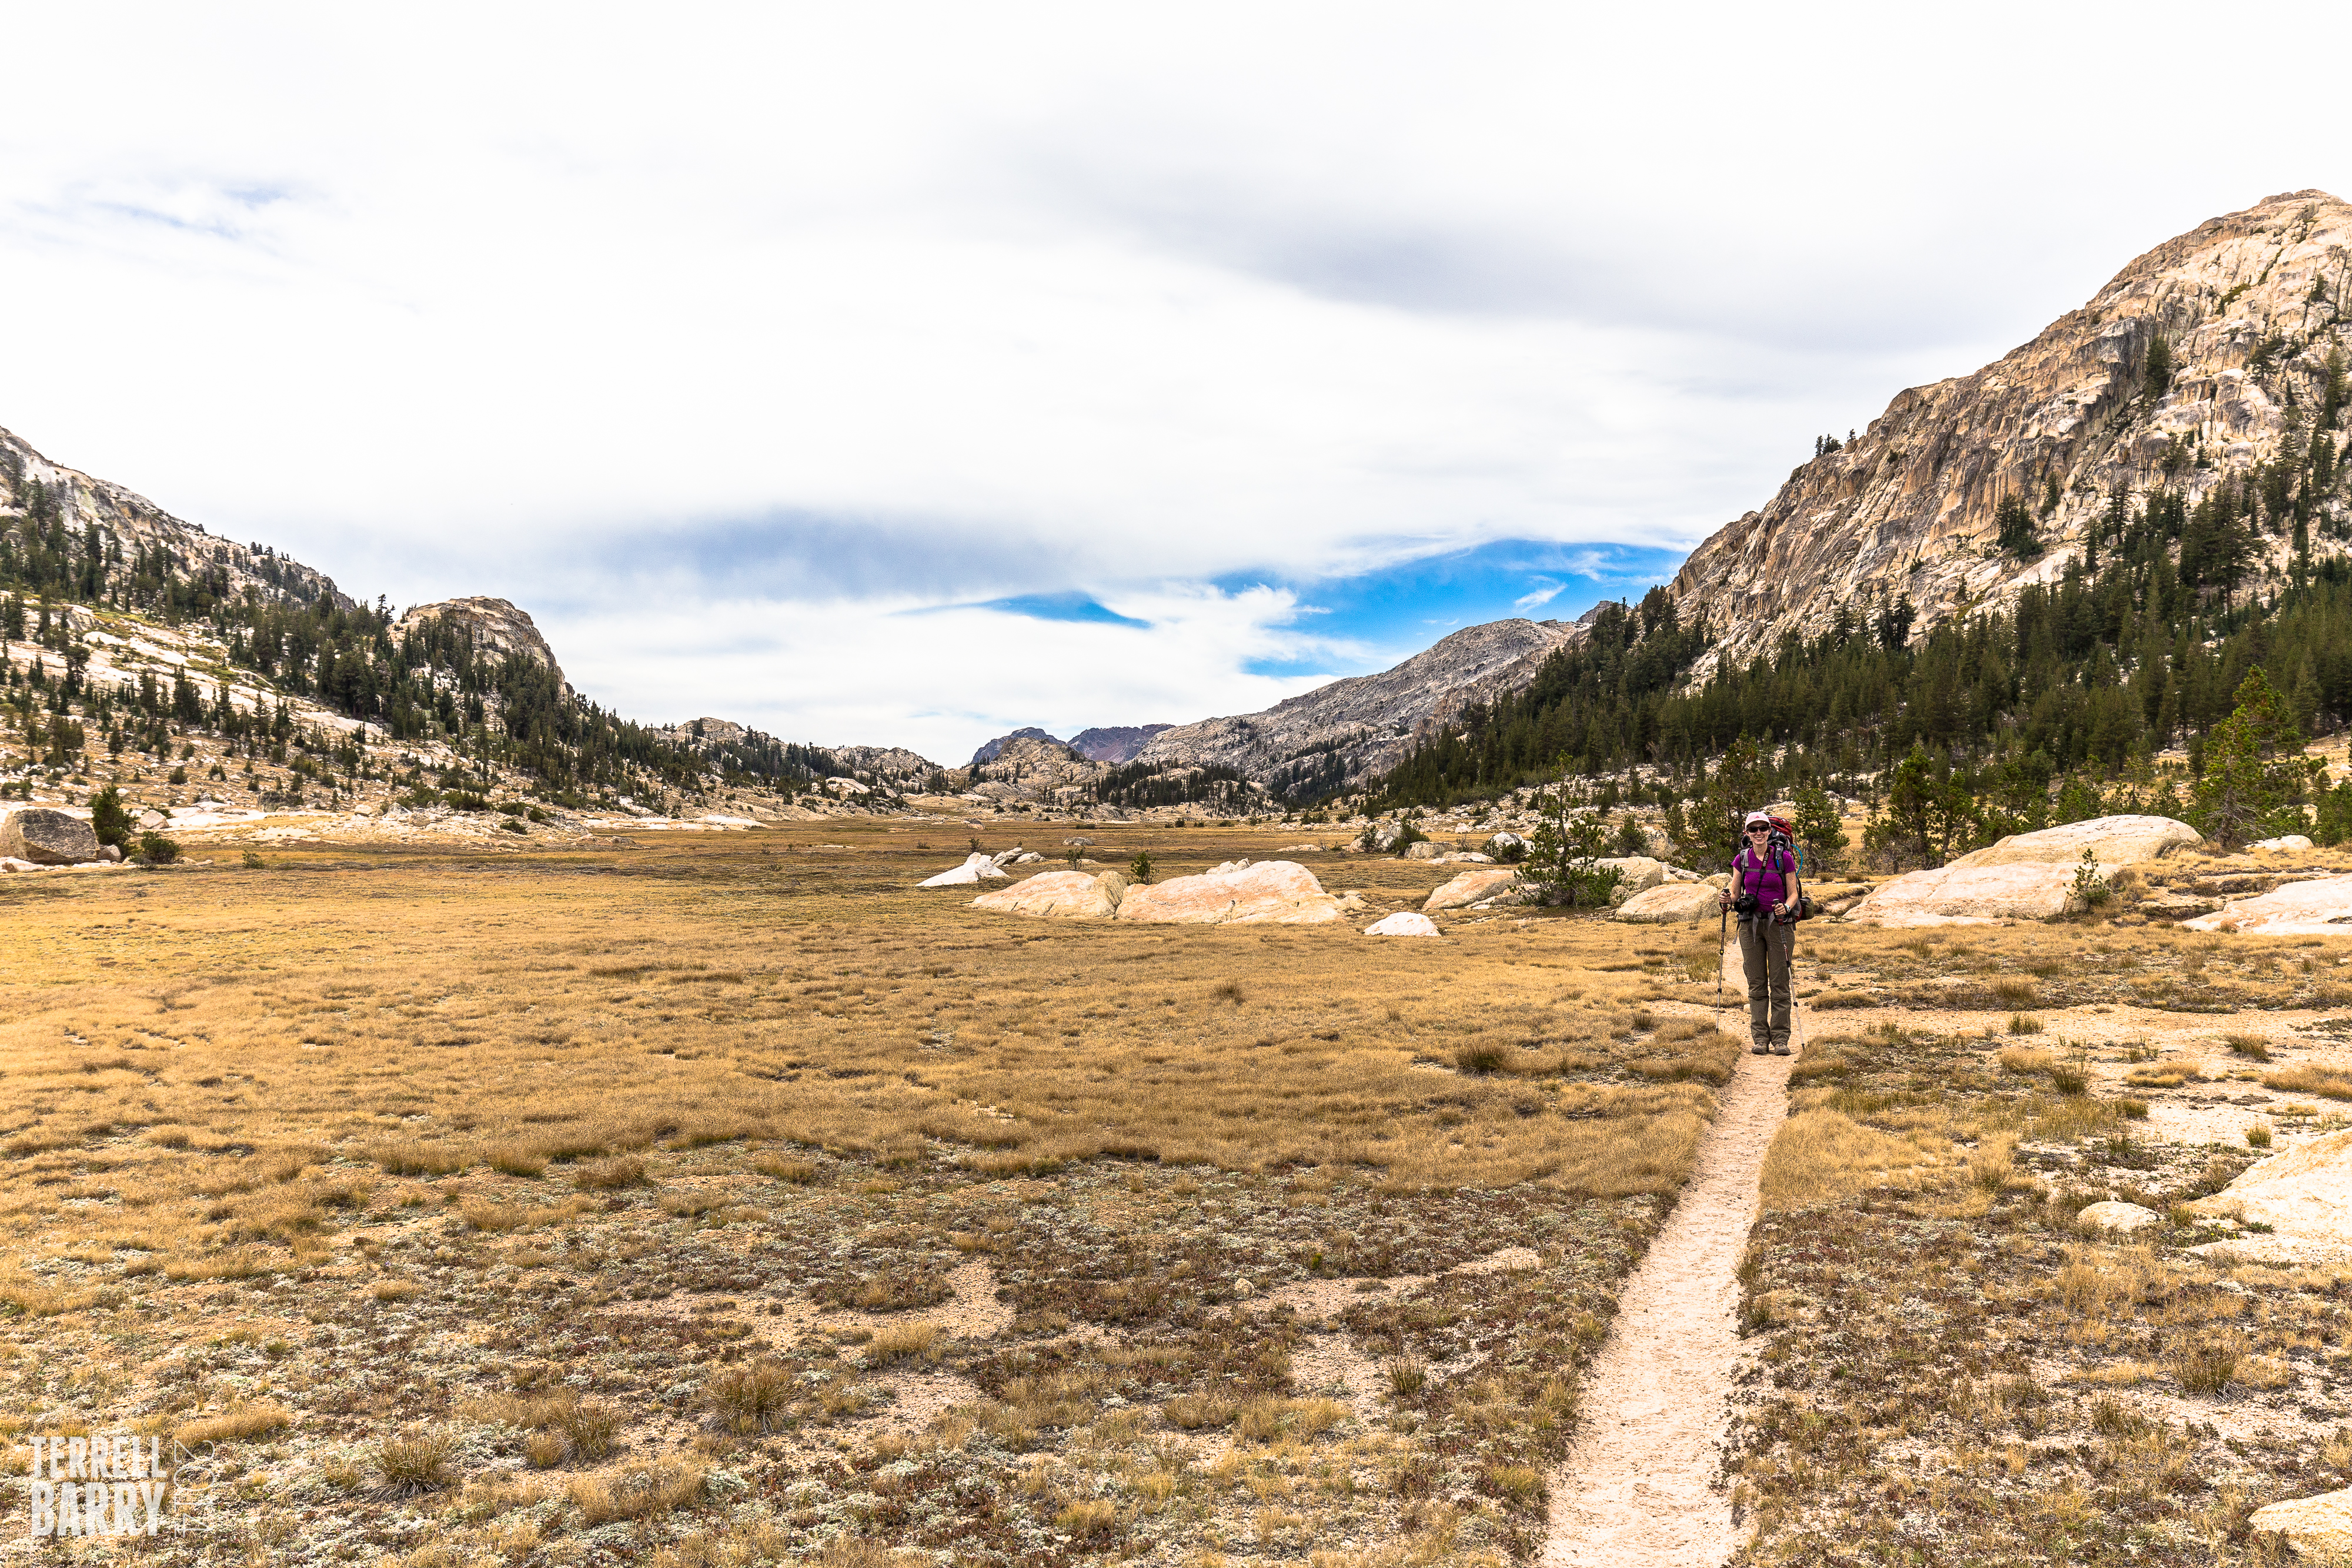
Ashley enjoying the hike through Kerrick Meadow.
When we finally arrived we were surprised and happy to find that we had the lake completely to ourselves. Ashley wanted to camp on the beach, which we did. It was nice and soft but I worried about getting sand in everything. But, we managed and it was a really nice view from our spot. Unfortunately, it was too late and chilly for the swim we had hoped to take. We also found we had to stand in the lake to collect water. Oh, well. More information for next time!
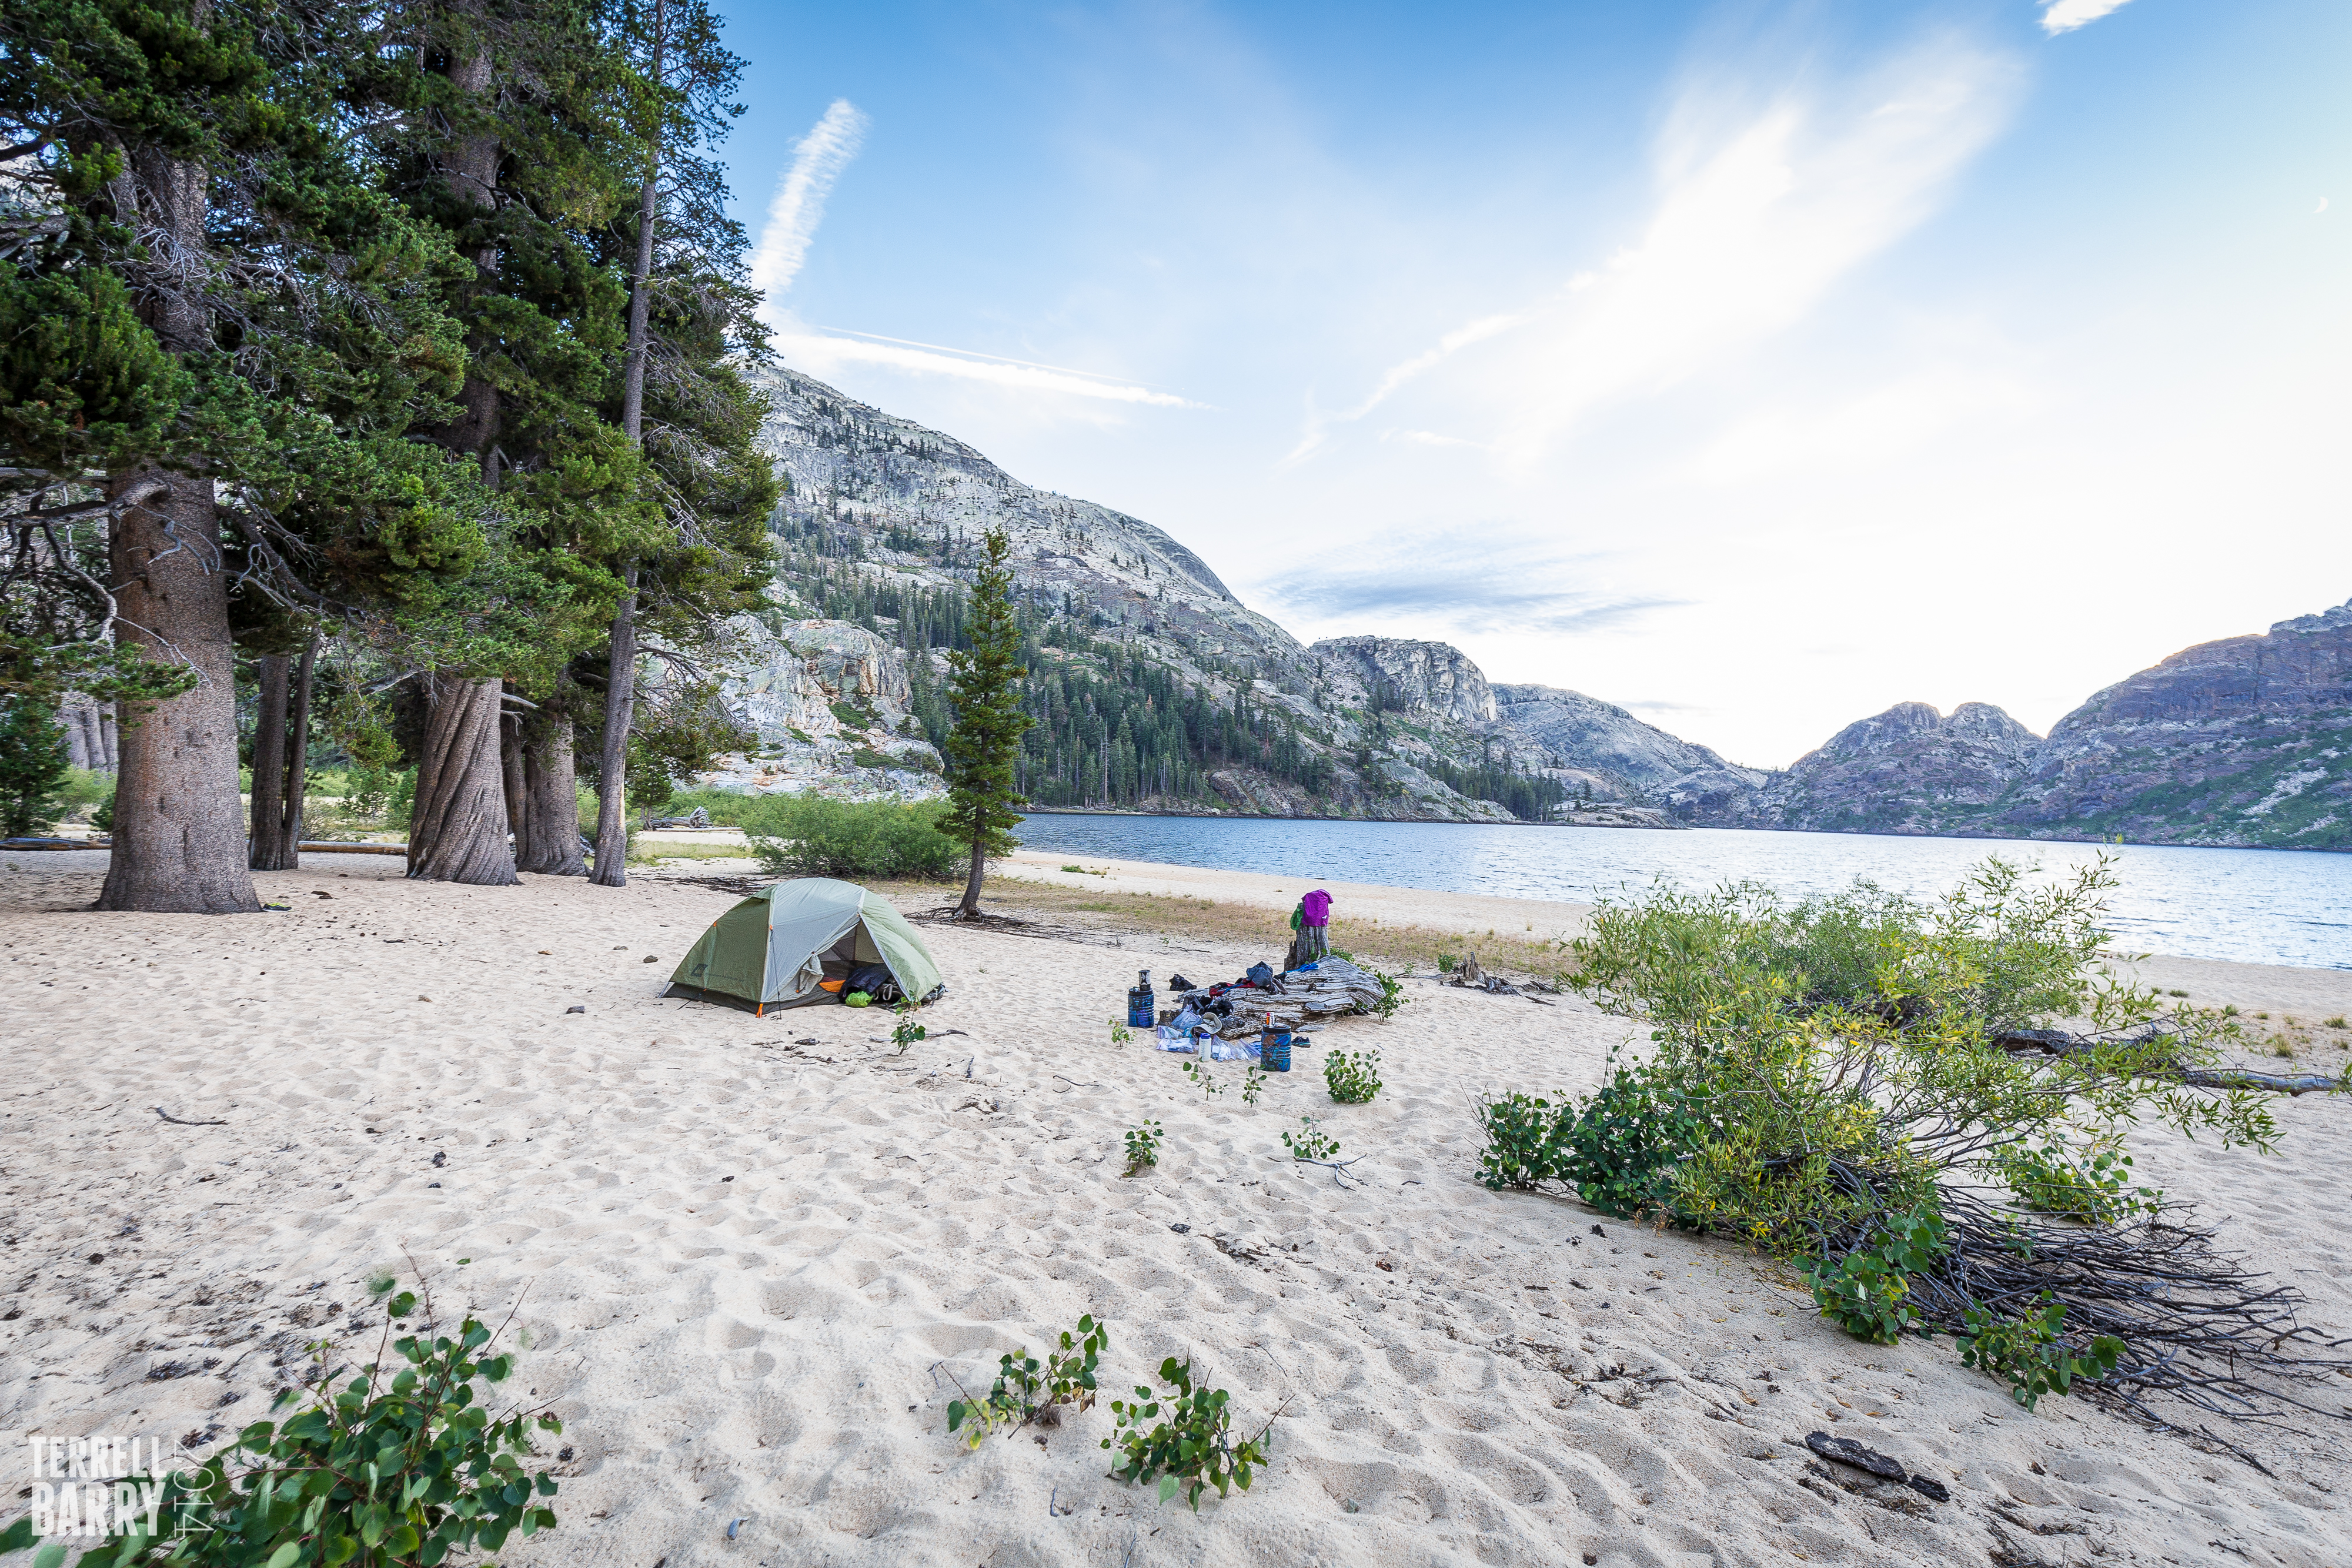
Camping on the beach at Benson Lake.
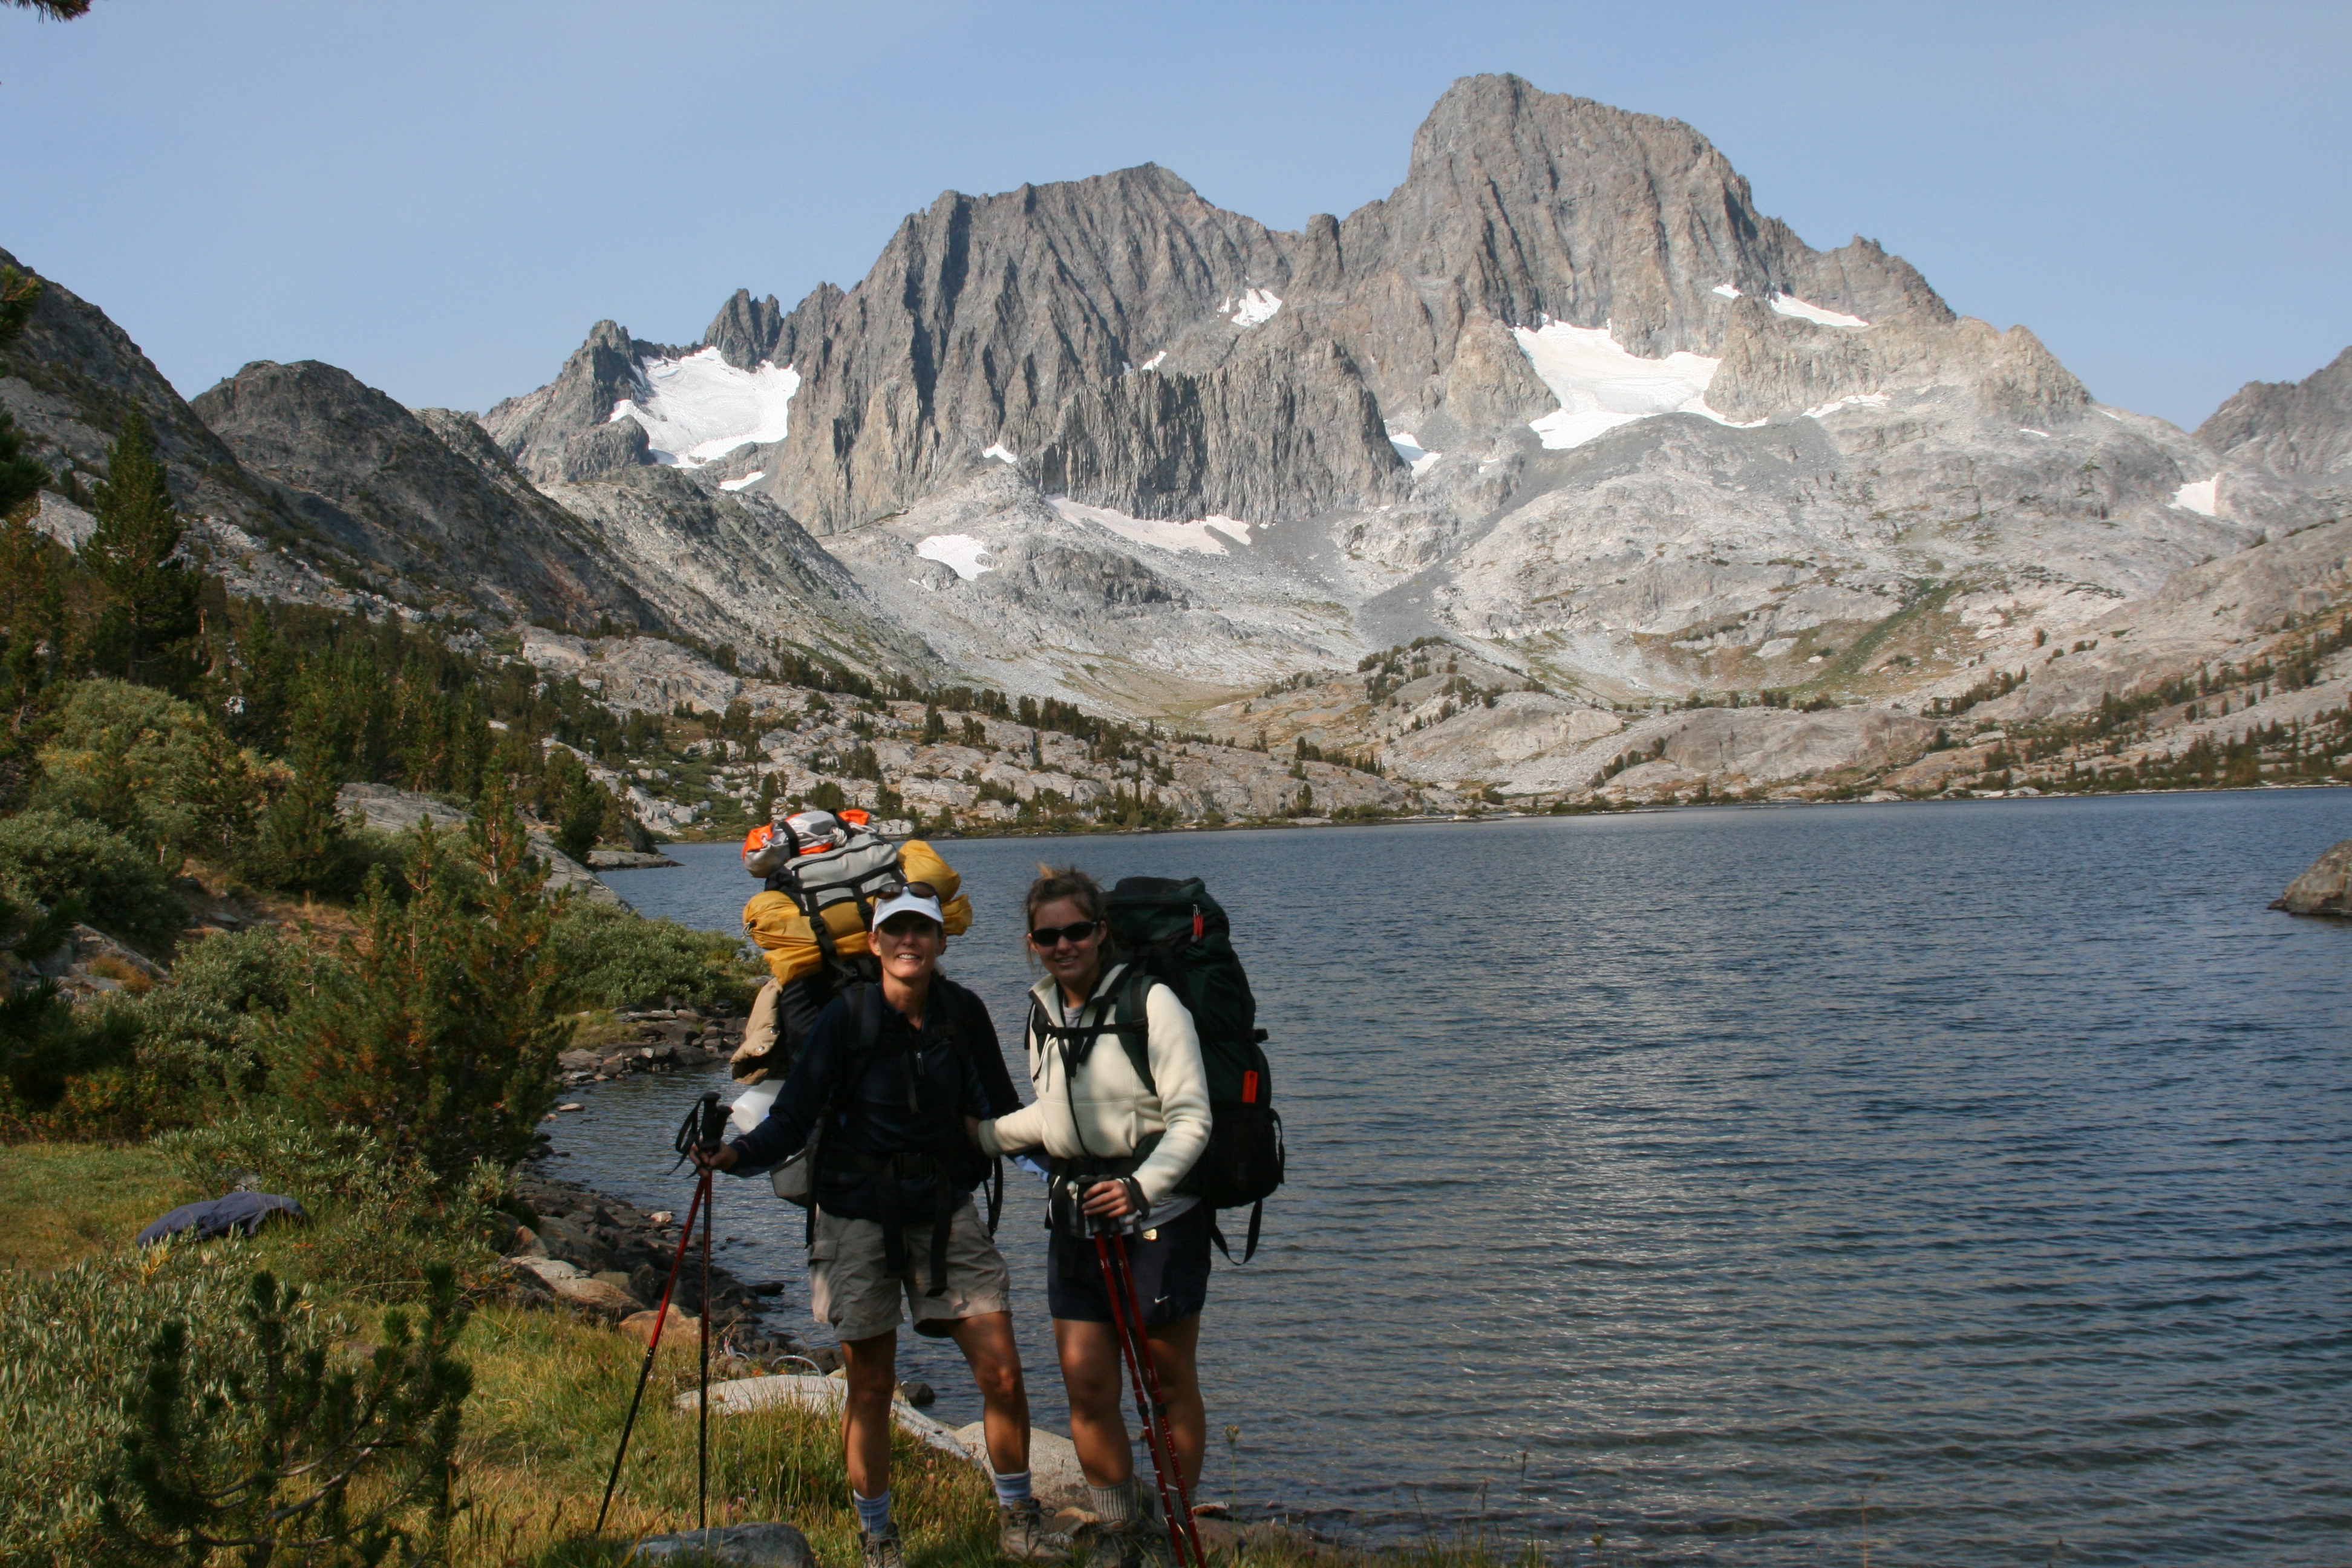
Saturday’s hike was from Benson Lake to the south end of Matterhorn Canyon. This was a big day with 11 miles that included 2500 elevation gain and 1600 ft of elevation loss. And I was not entirely clear where we would camp in Matterhorn Canyon. But the weather was beautiful and we were excited to head to Matterhorn Canyon. Our first climb of the day was from Benson Lake (7581 ft) up to Smedburg Lake (9213 ft). We arrive at Smedburg Lake around 2 pm. Smedburg Lake is one of the most remote lakes in Yosemite National Park. It is beautiful, huge, and 25 miles from anywhere. I wish we had an extra day to spend there. However, the wind had picked up. It was very windy, the white caps on the lake were impressive.
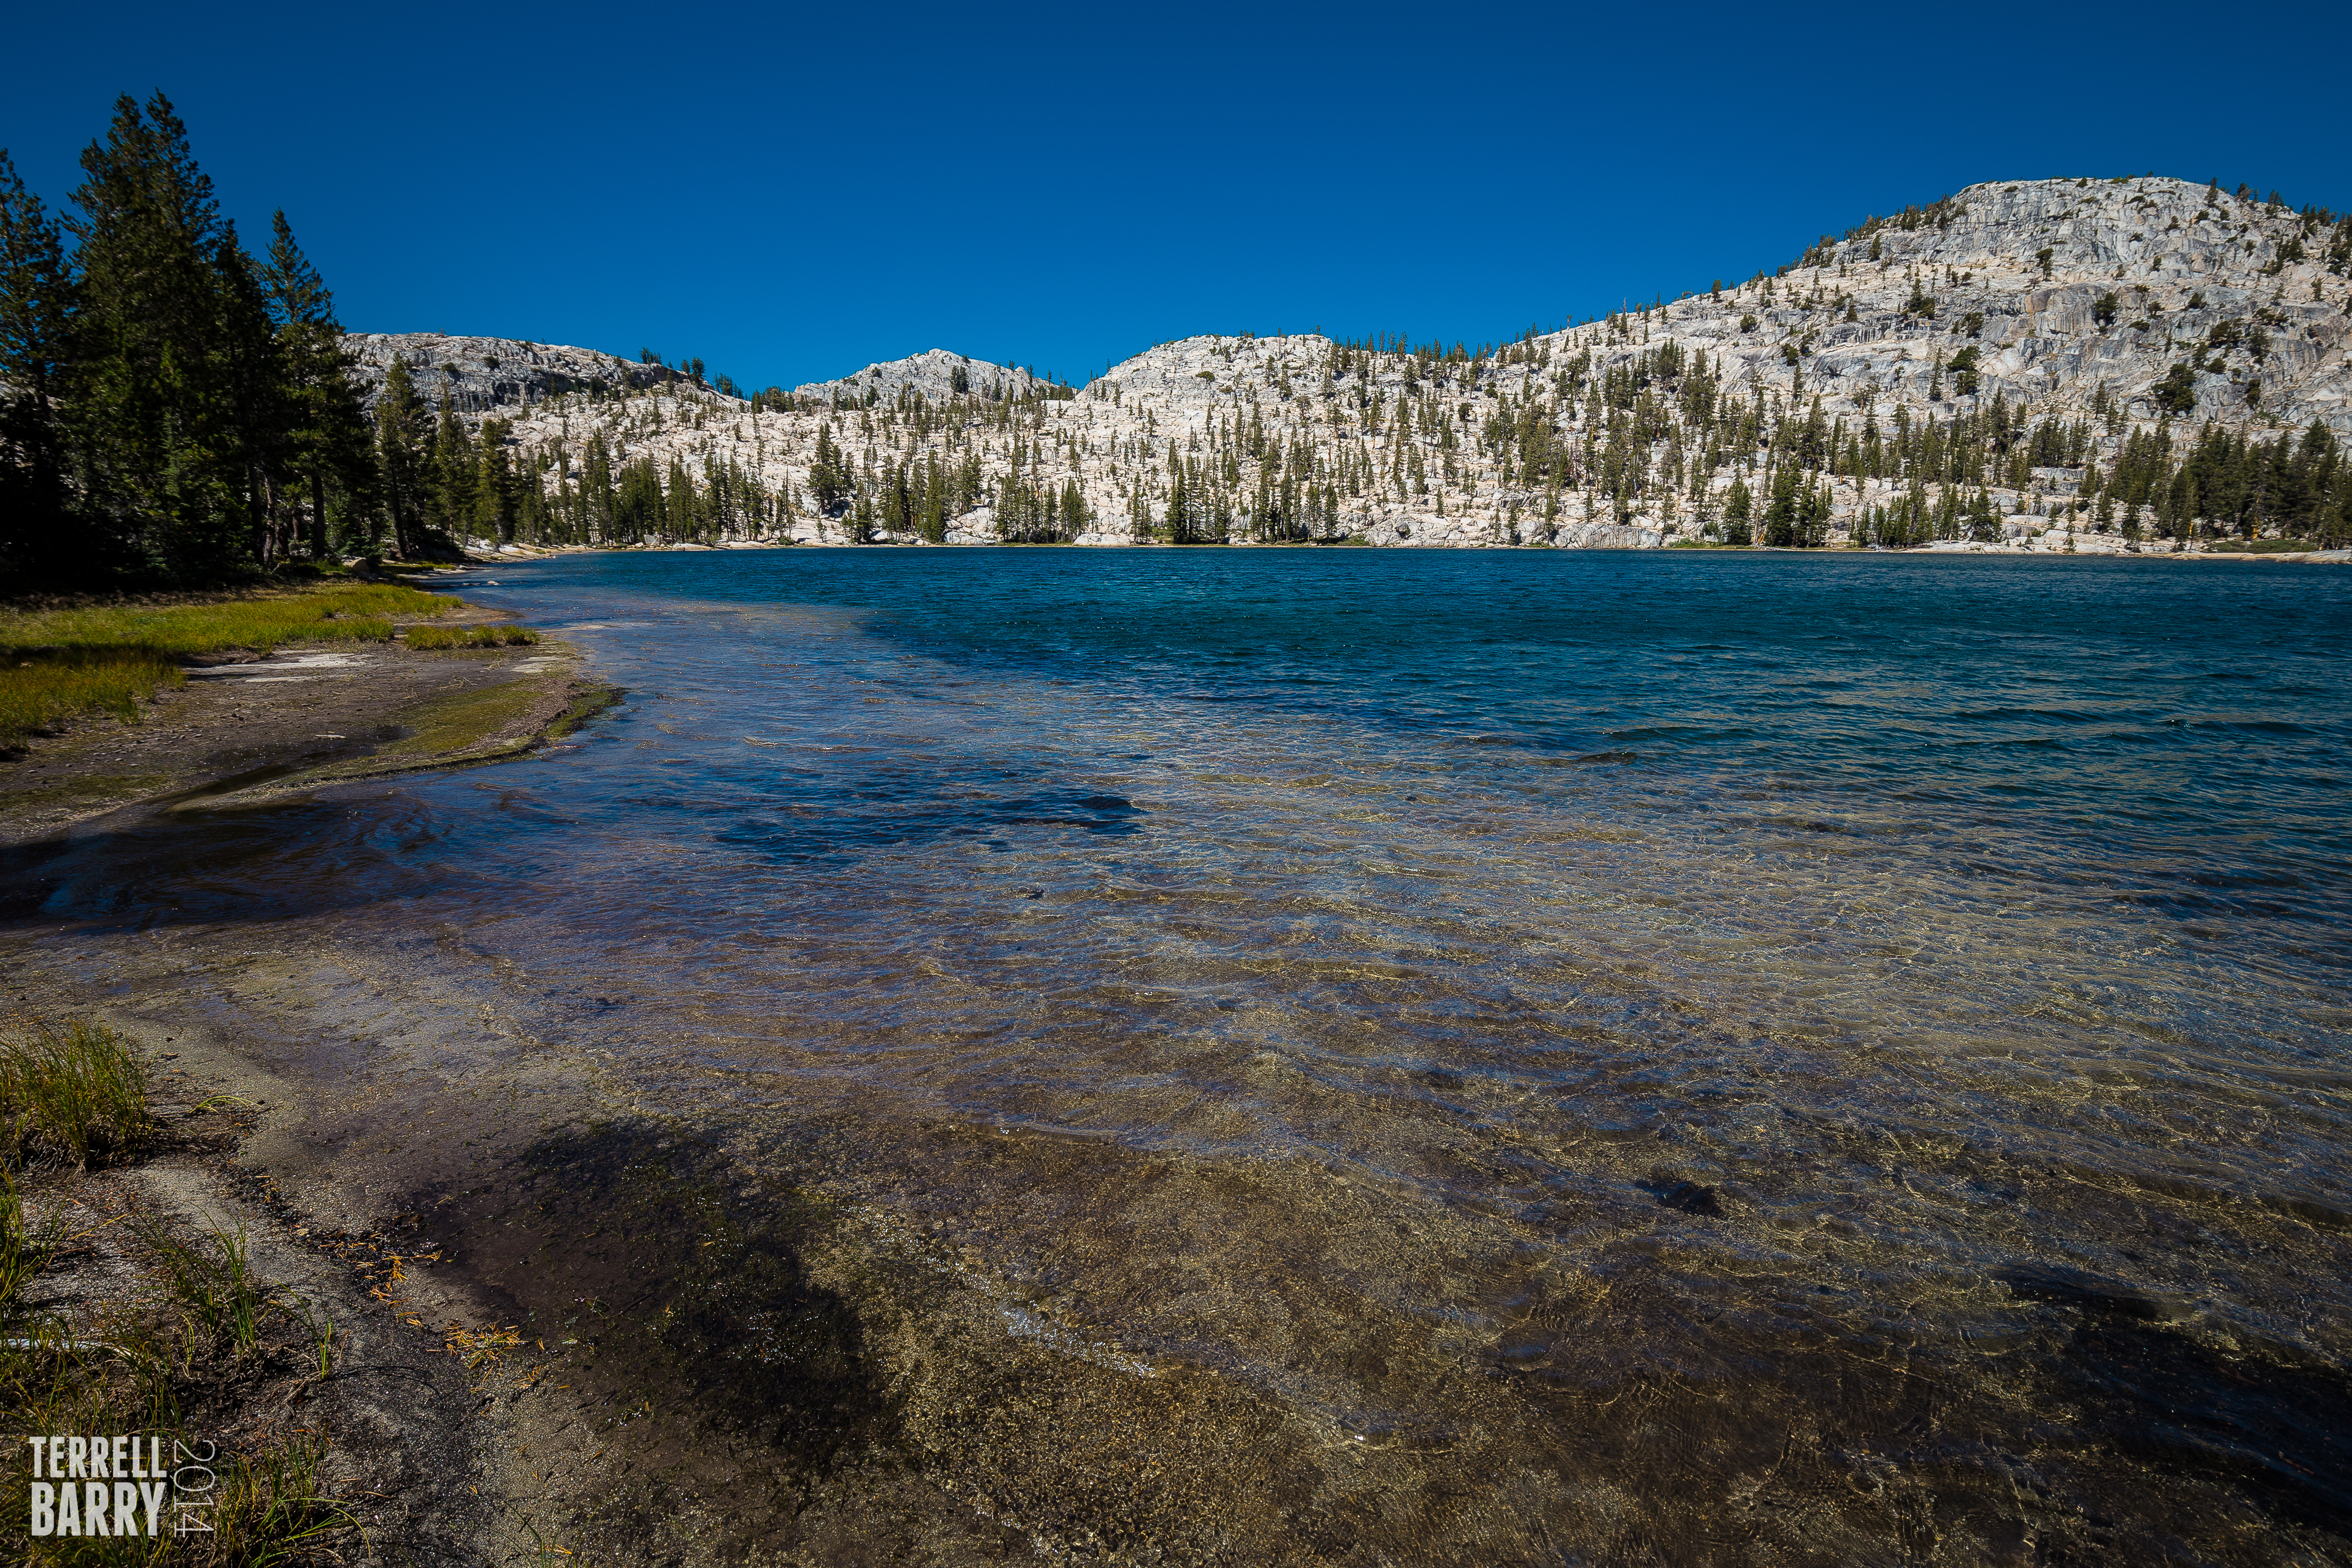
Just the southwest corner of Smedburg Lake. This lake is huge and 25 miles from anywhere.
We had lunch at Smedburg Lake and then headed out to cross Benson Pass. We thought we had crossed the pass several times but each time we were deceived! Once we reached the pass it was unmistakable. The view was amazing. We spend just a little time there because we still had 5 miles to go and it was 4:00 pm. Onward!
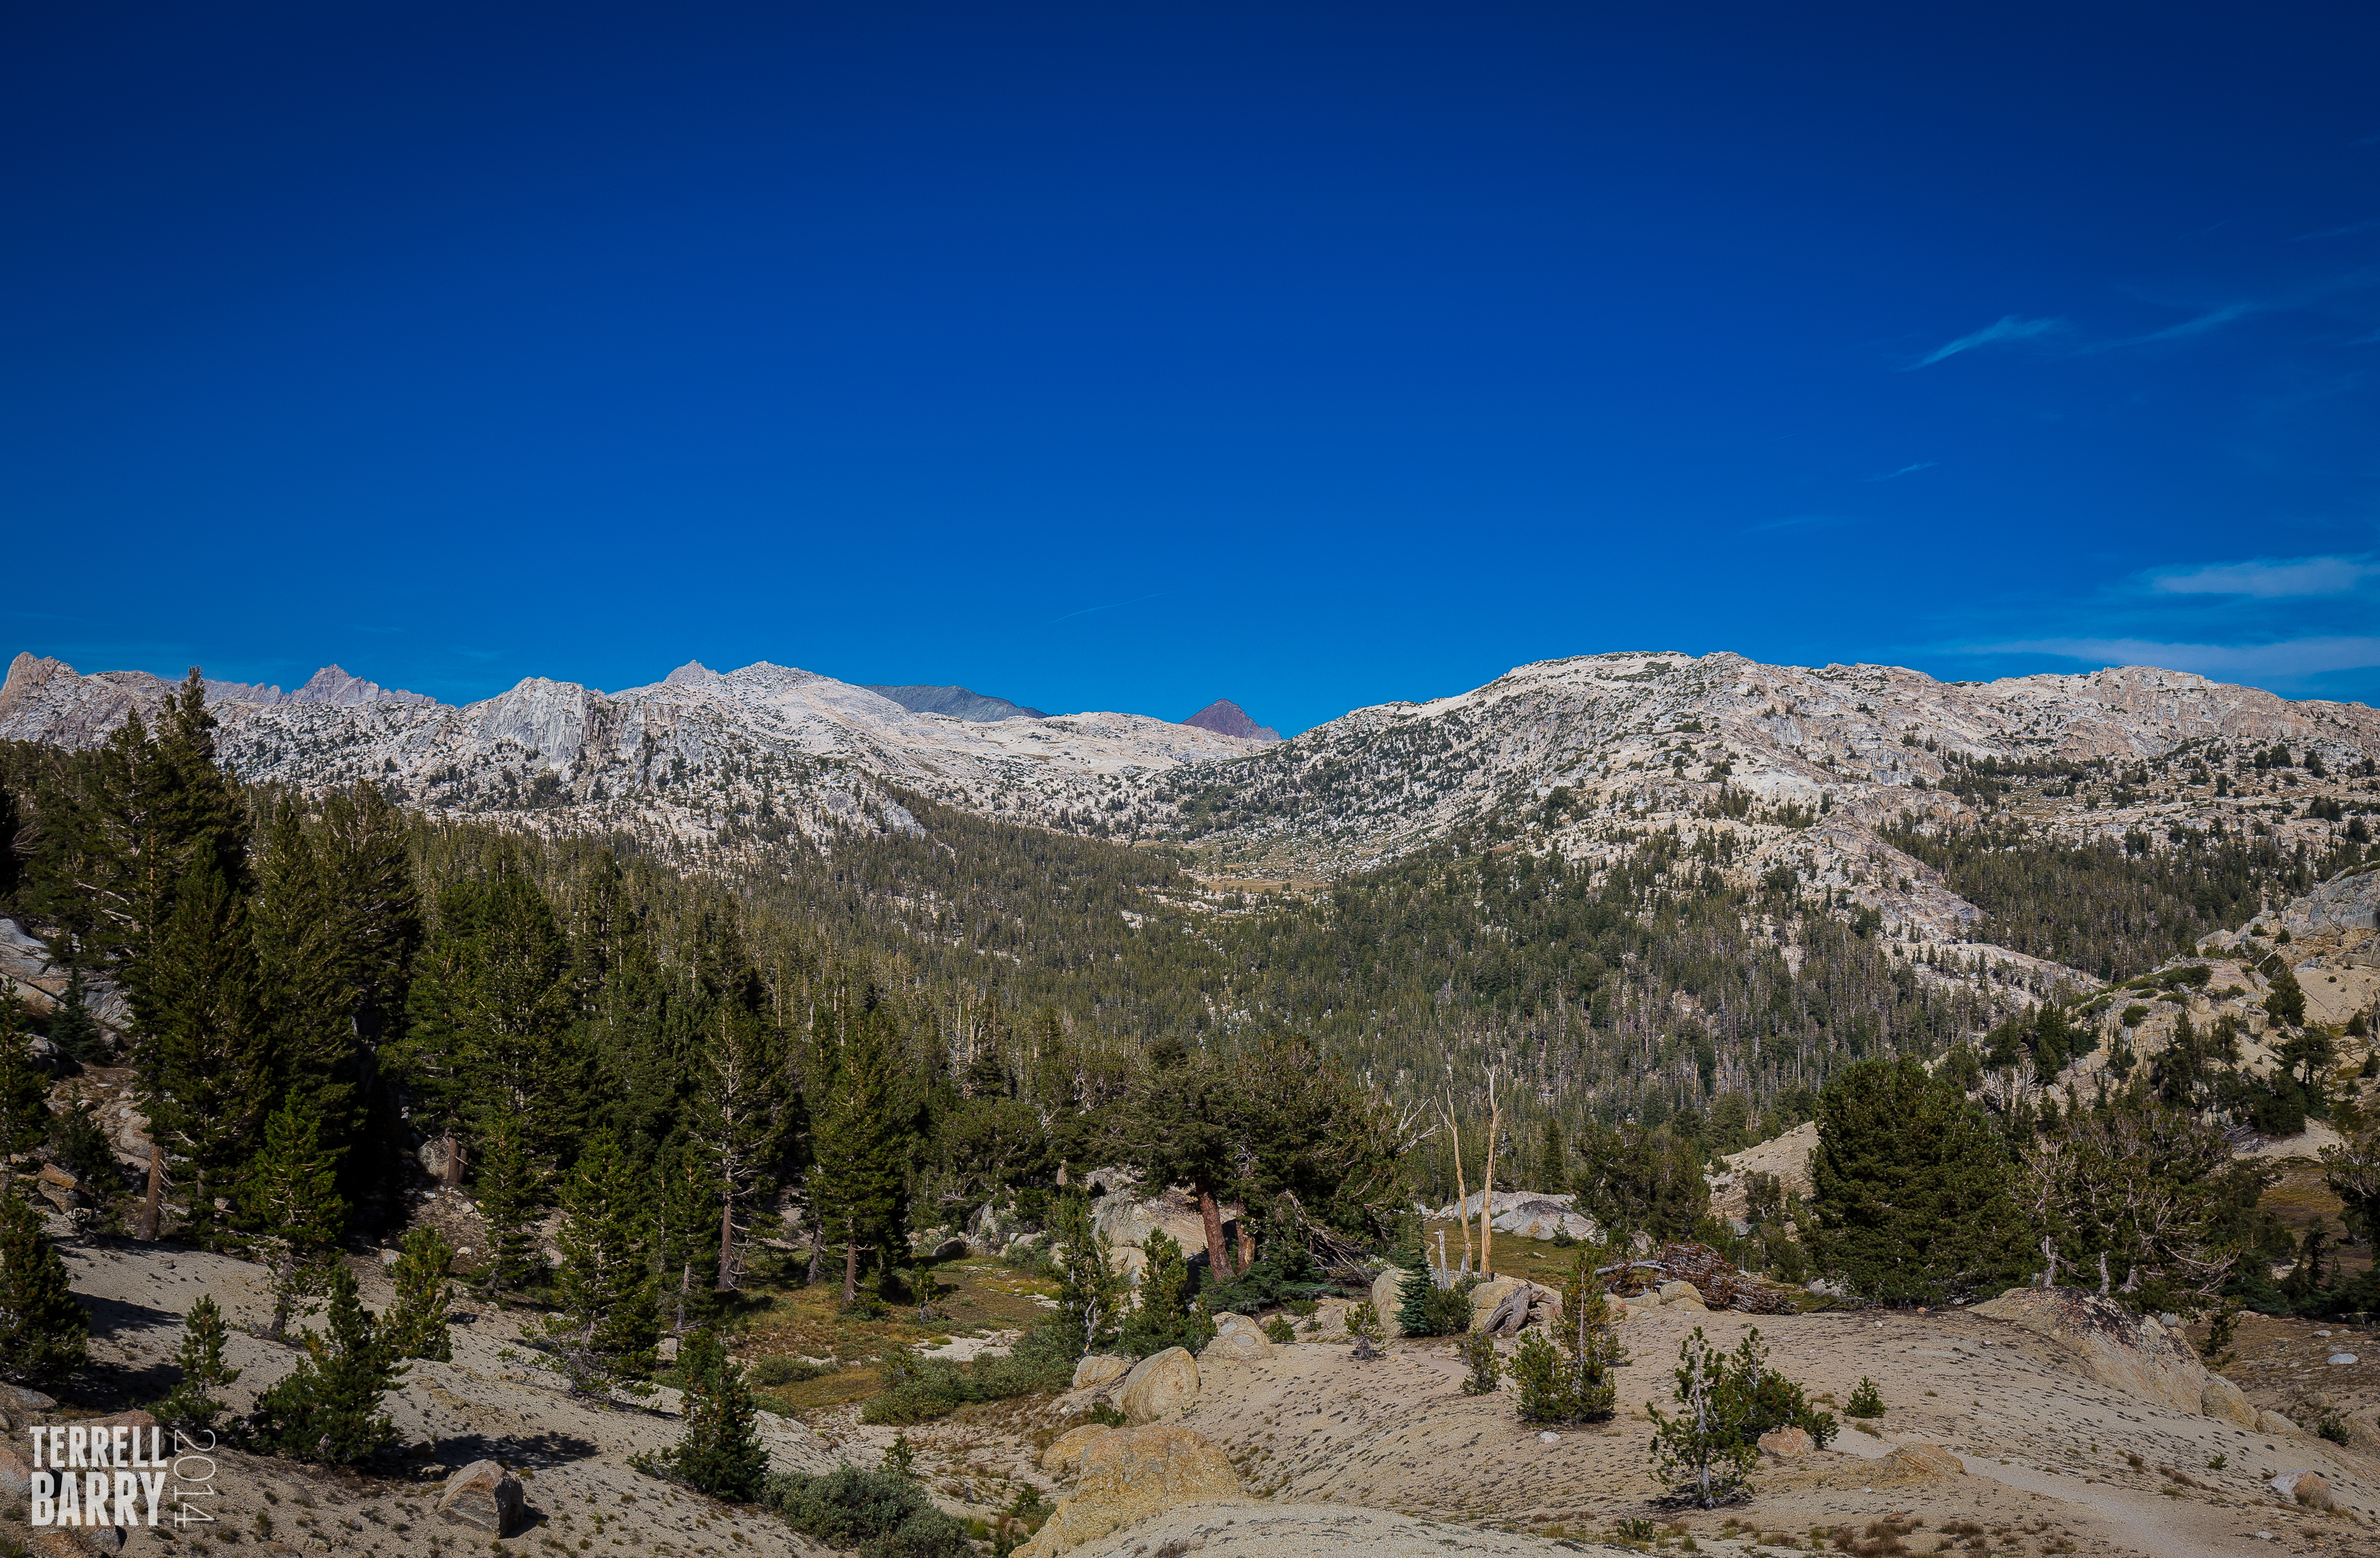
Benson Pass, facing east.
Matterhorn Canyon is to the left.
We reached the Matterhorn Canyon trail junction at 6:00 pm. I had thought we would camp close to that junction but there was no convenient water and it was not a great camping location. So, we continued up the canyon. We ended up hiking 2 more miles, the last of it in the dark, to arrive where the trail crossed Matterhorn Creek. That made for easy water collection. Finding a relatively flat spot to set the tent was challenging since the canyon gets more narrow and steep-sided the higher up you travel. And we were in thick forest. We made do with a slightly sloping spot positioning our heads up hill. Dinner made in the dark with the stars above was still better than any day back in civilization!
We hiked a total of 13 miles that day. We were now a little ahead of schedule. That night we discussed the last two days of hiking. The itinerary as planned for Sunday was to have a shorter hiking day and to camp in Slide Canyon. Then Monday we would hike 13.5 miles out over Mule Pass on Monday. We decided, instead, to hike over both Burro Pass and Mule Pass on Sunday, camping just below Mule Pass. After all, Saturday was a huge day, with more elevation gain, and we handled that fine. How hard could it be? This would make Monday a shorter day.

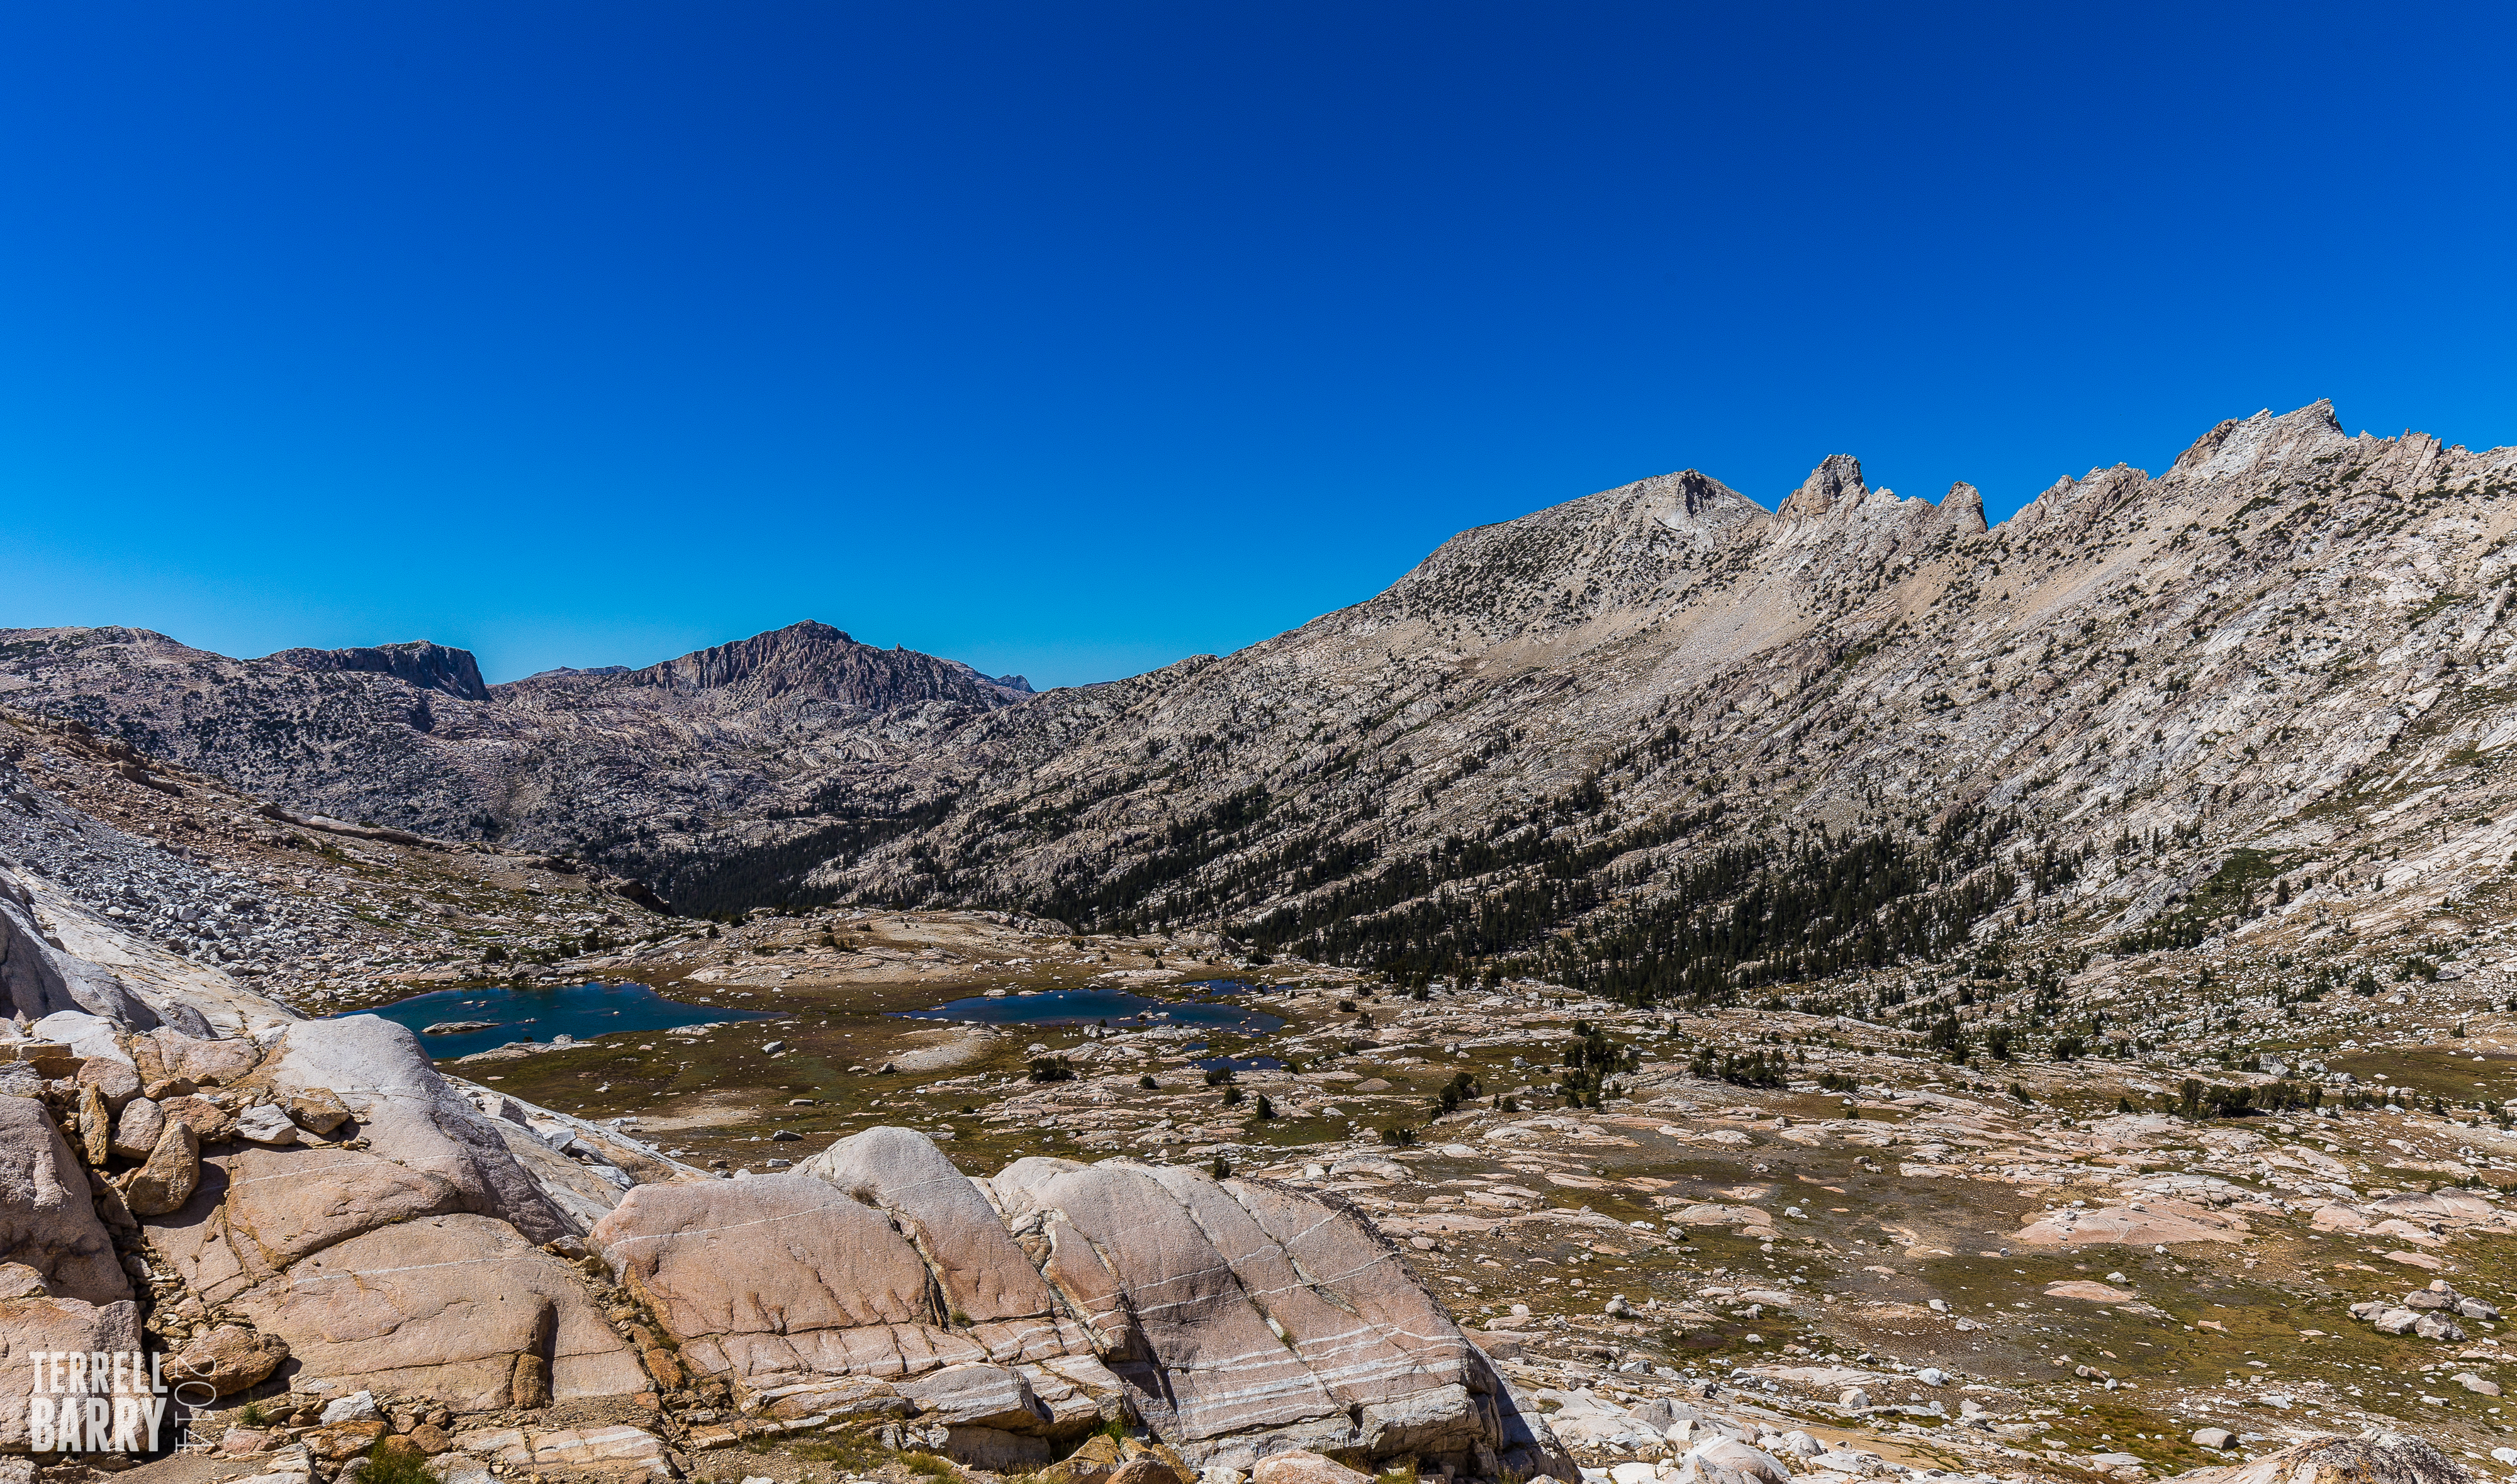
Our first view of upper Matterhorn Canyon

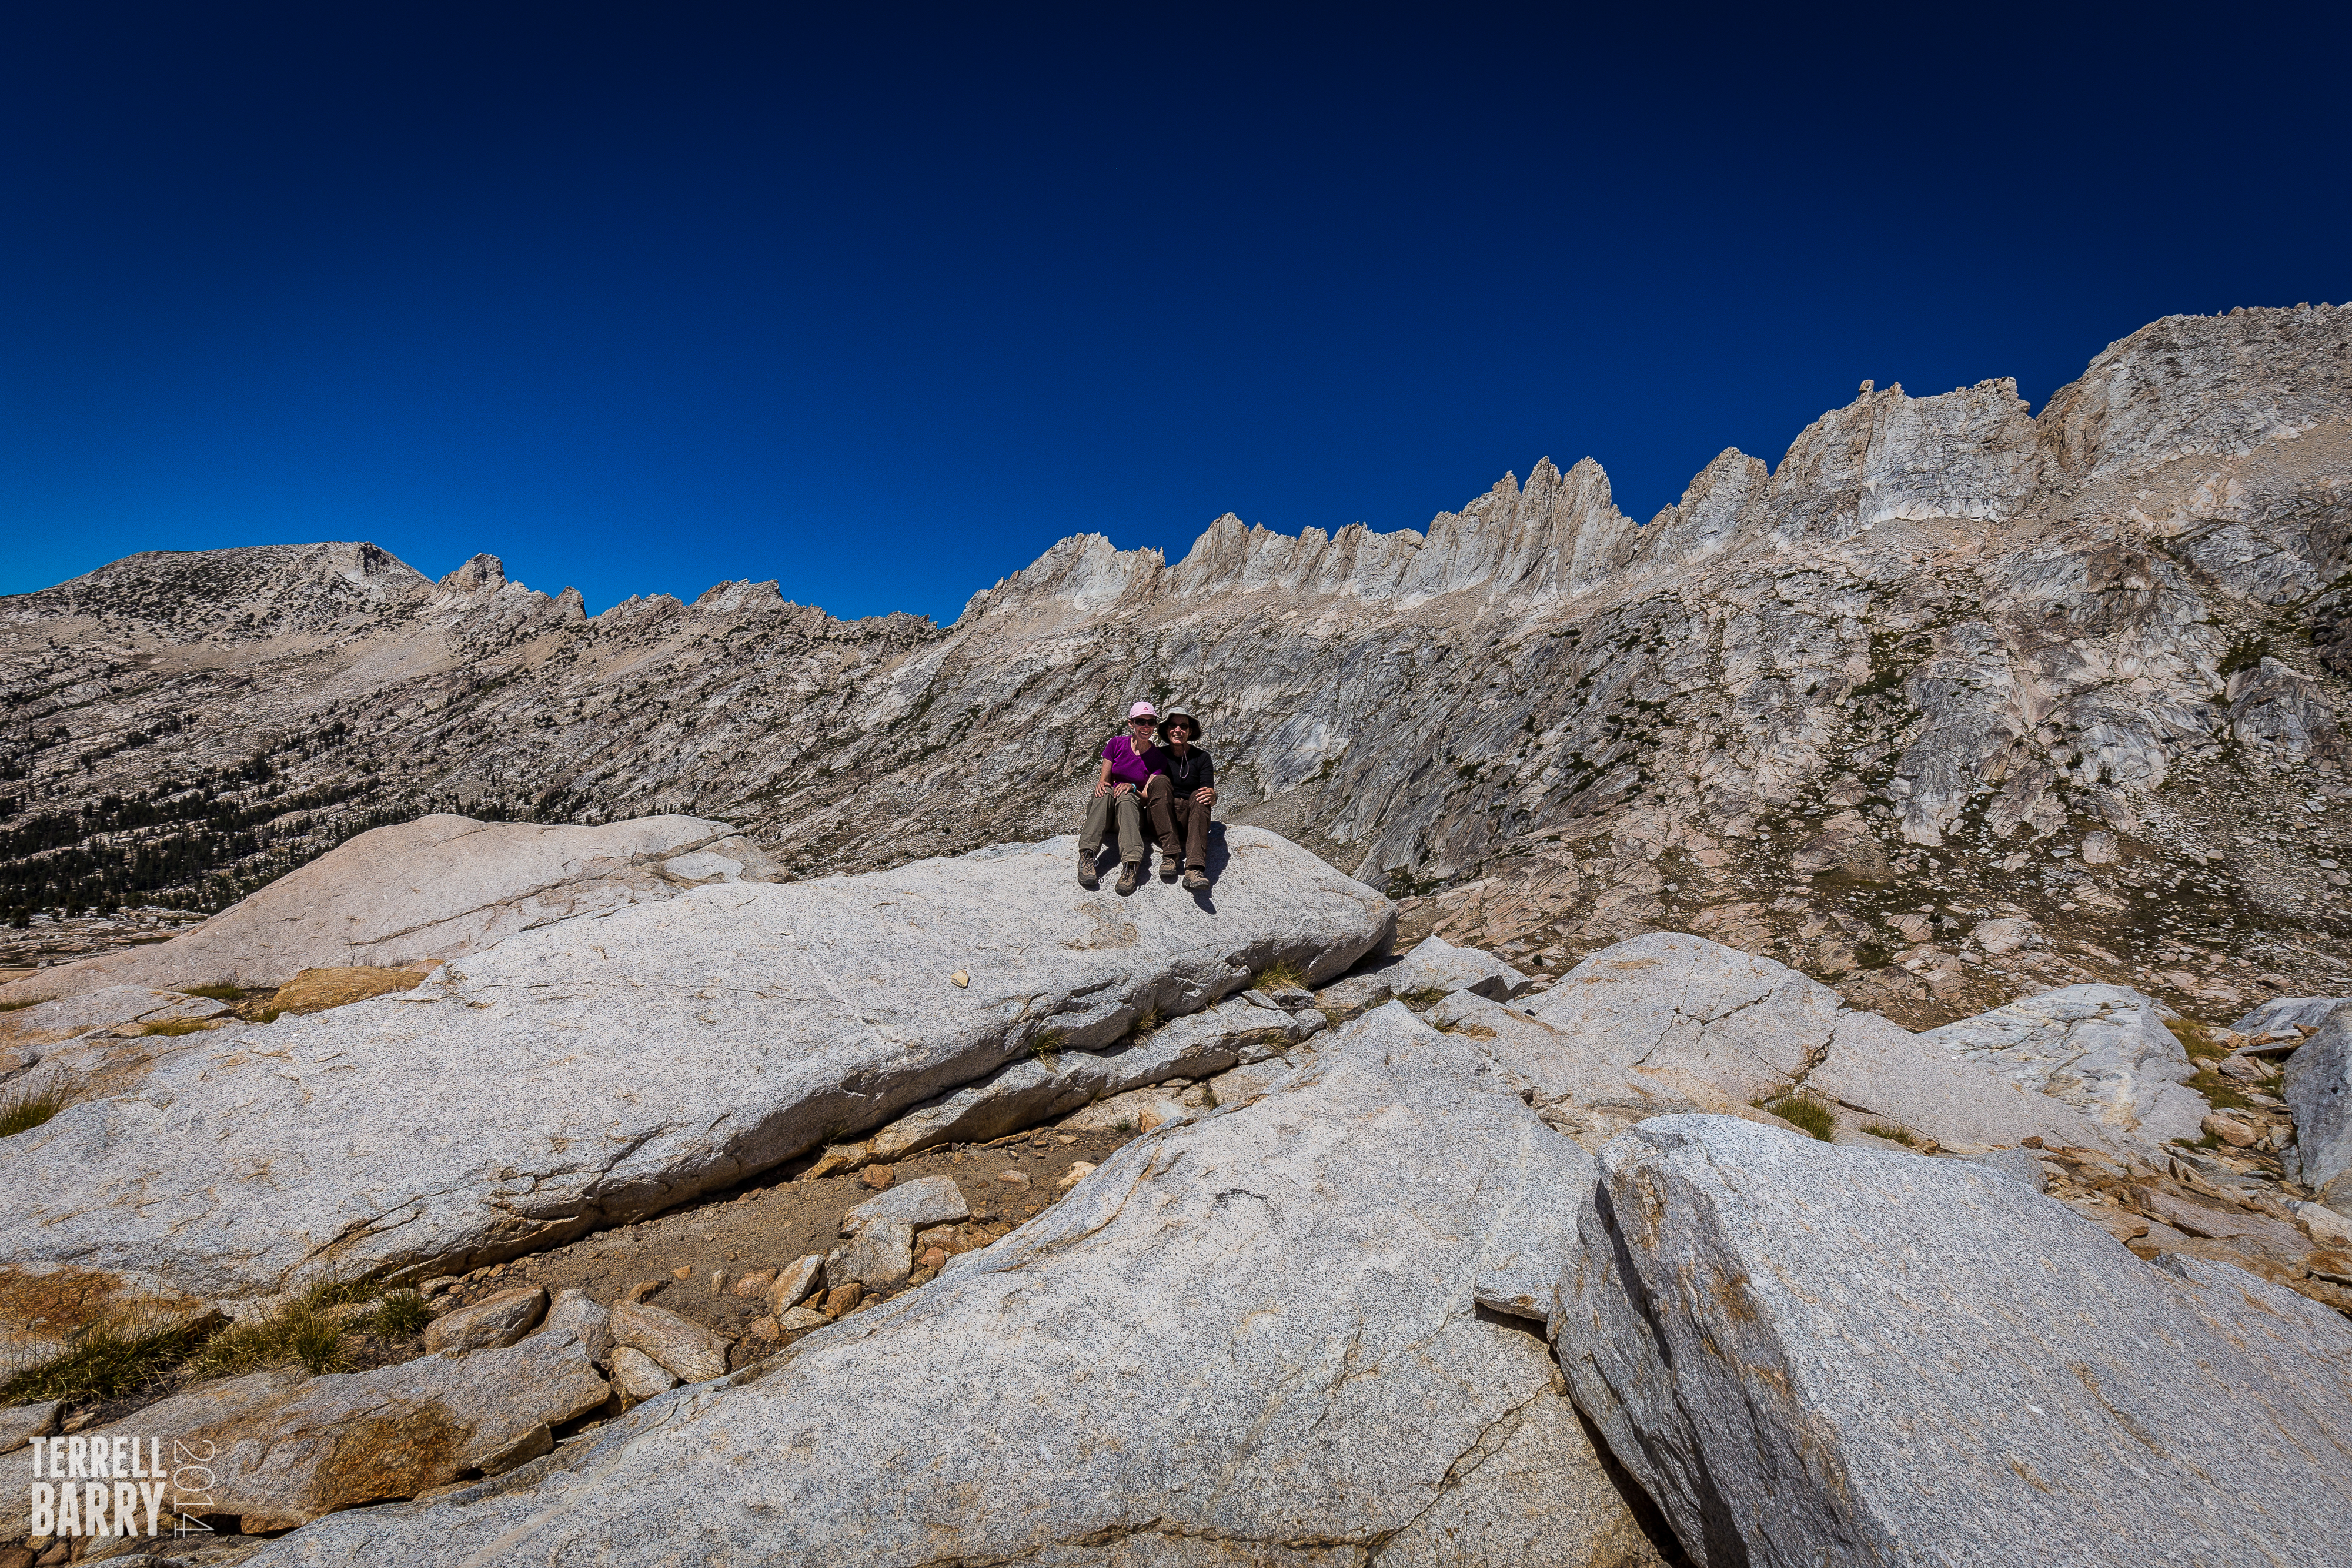
Re-enactment of 1975.
Photo credit: Ashley Barry
Sunday morning we set out to cross our two passes, Burro Pass and Mule Pass. After a short time Matterhorn Peak came into view. It was just a beautiful as I remembered. Our pace was leisurely to enjoy the canyon but we were mindful of the time. We were at the top of Burro Pass at 1:00 pm. We took our lunch break there. The view in both directions were breathtaking. I had scrambled up Matterhorn Peak in 1975 but there was no time for that this trip. I looked across to Mule Pass and thought it didn’t look too bad…
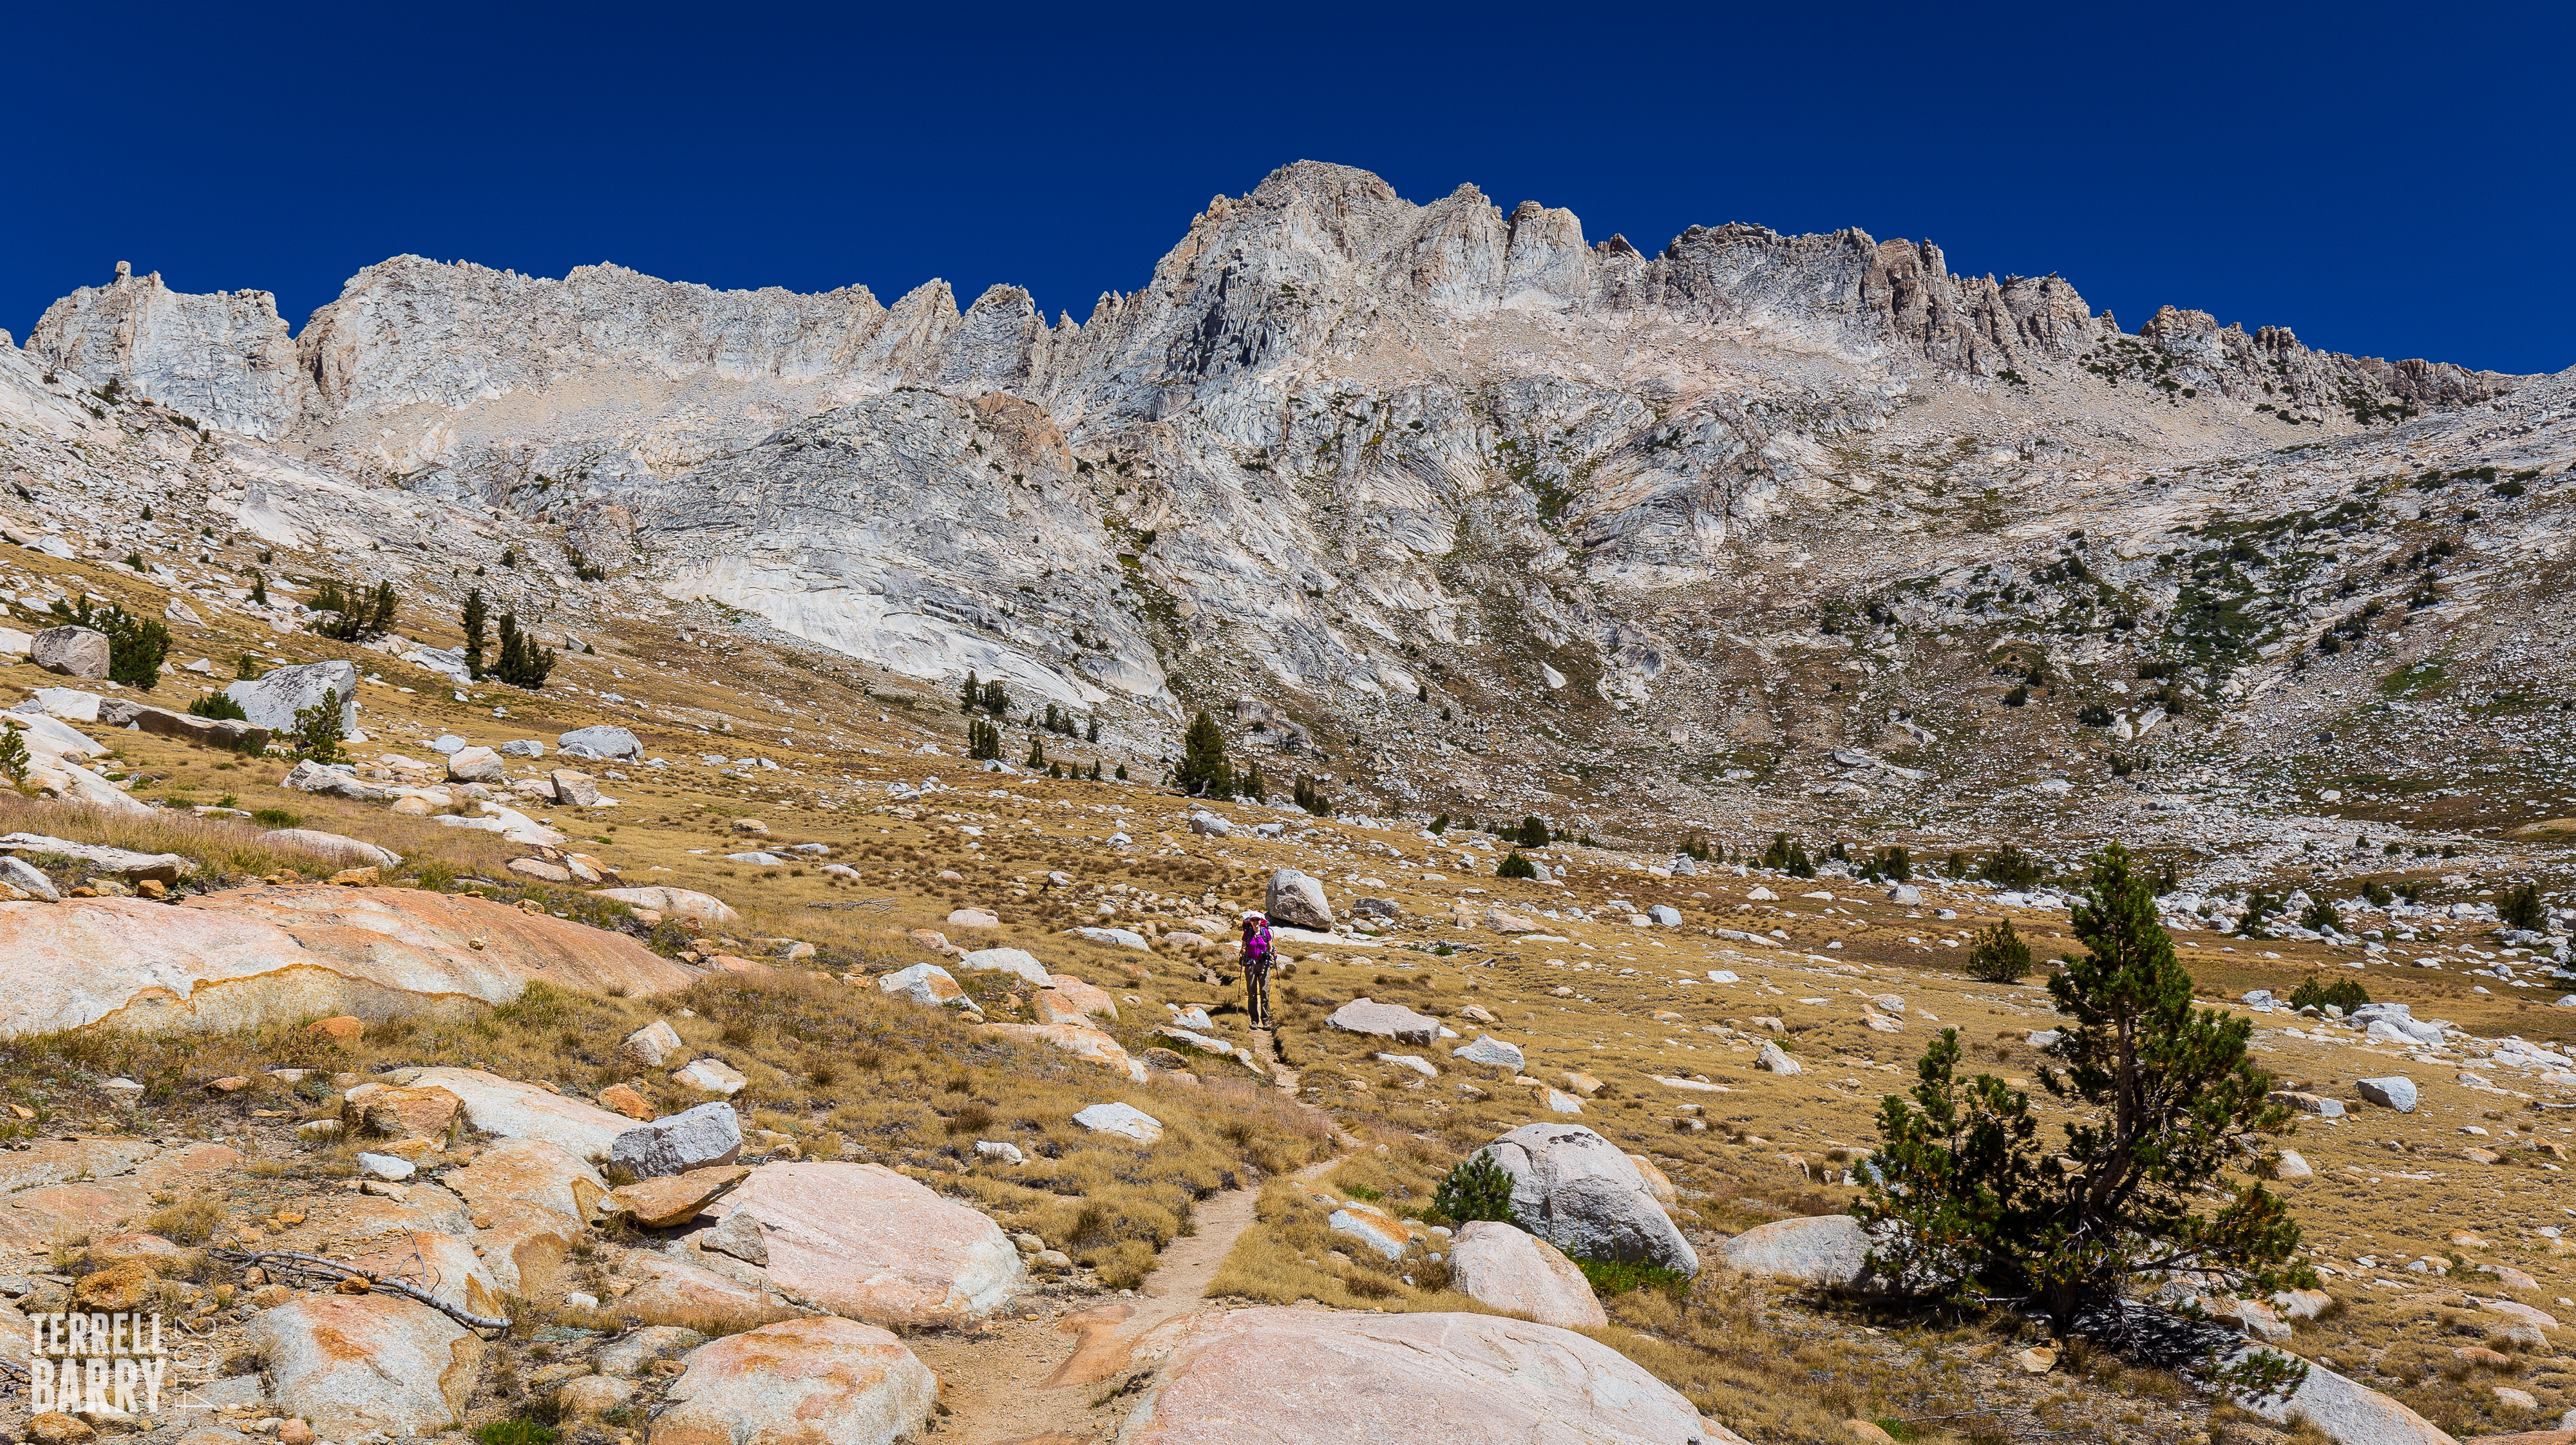
Approaching Burro Pass.
Our one and only selfie attempt. Sawtooh Ridge behind us.
Slide Canyon and Mule Pass directly across from us on the right.
After lunch we quickly descended into Slide Canyon. This is such a beautiful area that I plan to return next season directly from Twin Lakes. The hike directly from Twin Lakes into Slide Canyon in the clockwise direction is about 14 miles. Ashley loved the Sawtooth Ridge, that’s my daughter! I love the Sawtooth Ridge too. In retrospect, we probably hiked through Slide Canyon at a little too leisurely a pace but we planned to camp just over Mule Pass so it didn’t seem that far. As we hiked along I started to think about the pass name. Burro Pass versus Mule Pass. Hmmm, mules are more cantankerous than burros. I hope that isn’t why the names were assigned that way. Well, Mule Pass kicked our butts. It was long and hard even though the elevation gain was only 1000 ft. That was a big surprise, nothing we hiked the entire trip felt that hard. It could have been because we were tired from the day before or the trip as a whole. But Ashley reminded me that people we talked to way back on the first day said that hikers had to be “dumb as a mule to go up Mule Pass.” The counter-clockwise loop (our direction of travel) takes hikers up Mule Pass. When we reached the top, which is the border between Yosemite Park and Hoover Wilderness, Ashley remarked that Yosemite had just chewed us up and spit us out.
The next surprise was that a party with pack lamas was camped in the only dry spot in the area below Mule Pass we had planned to stop. So we had to continue hiking. I wasn’t sure exactly where the next opportunity to camp would be but I knew it was at least a mile. We were hungry, tired, and almost out of water. I was not happy. Luckily, Ashley became the cheerleader. Then in a talus field along the trail we saw our first, and only, Pika. It was so cute and it really interacted with us. We both enjoyed the Pika visit. We also took that opportunity to also have a snack and a little water. We also put on some warmer clothes since it had gotten quite chilly. Refueled, we headed further down in elevation. We ended up finding a perfect camping spot, flat and nearby water. There was even still a little daylight as we set up camp. That night we had hot chocolate after dinner for the first time during the trip. To make things even better, even tho it was a full moon but I managed to take a few more Milky Way photos. It was perfect!
Ashley relaxing in our tent while I’m taking Milky Way photos. It was chilly!
The next morning we woke early, packed quickly, and decided to aim for lunch at the Cafe at Mono Village. We had 9 downhill miles to cover. Off we went. We passed Crown Lake on the way. It was a beautiful little lake but there were not many campsites and people were camped in all of them so we were glad we stopped where we did the previous night.
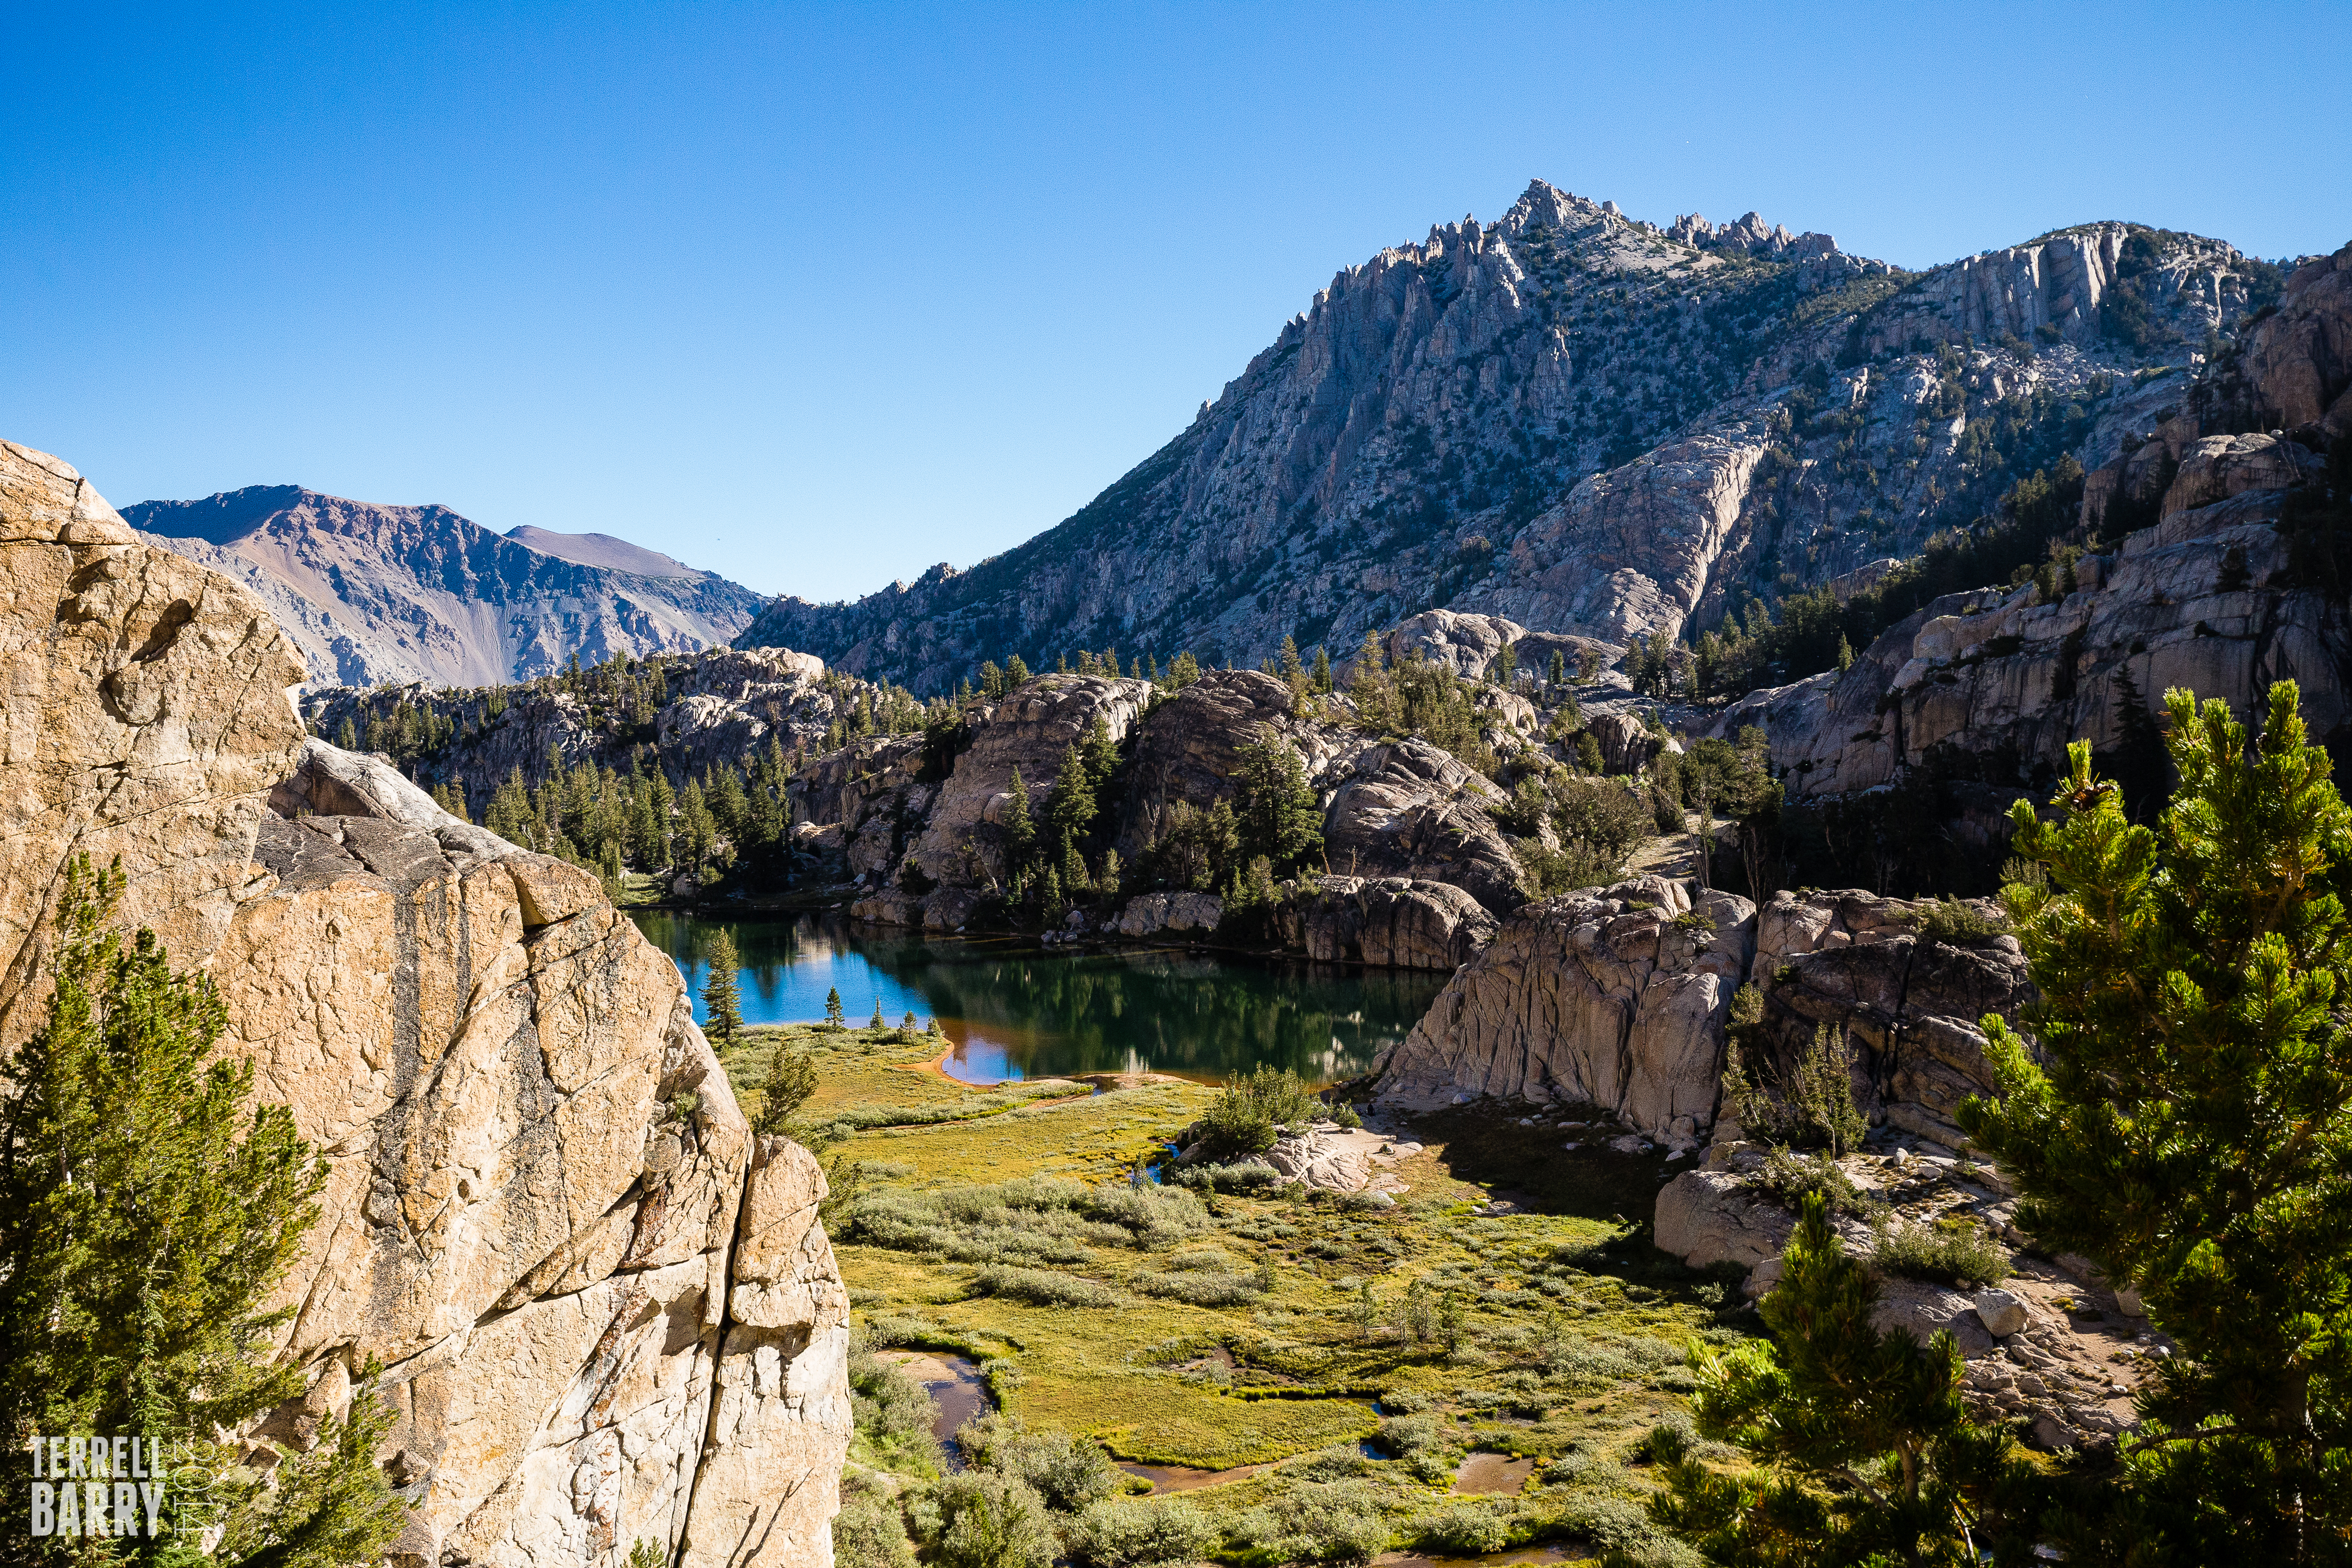
Crown Lake. The colors were gorgeous.
We quickly reached the trail junction heading back to Twin Lakes. We had 6.7 miles left that we had also covered on the way in. Ashley experienced firsthand why backpackers heading out on a route that they covered going in have that “look” in their eye and determination in their step! We covered 9 miles in a little over 4 hours, including breaks. We had a great lunch and then left for home. Since it was Labor Day, and Tahoe traffic can be expected to be heavy, we decided to go home over Sonora Pass. It was a nice drive and a nice end to a wonderful, but tough, mother/daughter backpacking trip.
My full set of photo can be found on Flickr in the Benson Lake/Matterhorn Canyon Loop – Backpacking Album.