Lassen National Park in Winter – My Return to Winter Camping

Lassen National Park has been part of my family’s life since the early 1990’s. We starting taking our daughters camping there when they were young and now our grandson. Everyone in the family has climbed Lassen Peak multiple times. We just keep going back because it is such a beautiful place and offered more opportunities for solitude than some of the other national parks near our home. We have been all over the park, hiking on many of the trails – but only during the regular season. I had always wanted to snowshoe and camp in Lassen during the winter. Finally, last year, at the age of 59 I got my chance.

1990familyonlassenpeak

Lassen Peak hike. Mid-1990’s.

I should acknowledge at the outset that winter is my favorite season. Growing up in Chicago I always looked forward to snowstorms and ice-skating. I had done some winter camping when I was in college and had done quite a bit of cross-country skiing. In addition, I am an Ice Climber and Snowboarder. So, the winter clothing routine was something I am familiar with – how to stay warm without getting too wet from sweating. I was rusty on the winter camping routine but I was heading out with a more recently experienced friend. To say I was excited is an understatement!

img_2419

Snowing on the way in to Lassen National Park. February 2016.

The timeline of the trip was delayed a day due to a snowstorm that rolled in the Friday we planned to start our trip. It was snowing hard when we arrived at the visitor center. We elected to camp at the visitor center instead, and leave Saturday morning so we wouldn’t start out the trip soaking wet from the falling snow. We spent a nice day hanging out with the rangers and visiting the displays in the visitor center. We camped in the area near the visitor center that night. There is a small fee to camp near the parking lot. The vestibule of the visitor center is open 24 hrs, providing running water and bathrooms. Quite the amenities!

img_2421

Lassen National Park. Looking out the window of the Kohm Yah-mah-nee Visitor Center. February 2016.

Saturday morning dawned clear and cold to Lassen Park covered with the cleanest, most beautiful snow imaginable. After a nice cup of coffee and warm breakfast we filled out the wilderness permit and snowshoed away from the Kohm Yah-mah-nee Visitor Center.

img_2351

My home away from home.   Christmas present from my husband. Sunrise at the Kohm Yah-mah-nee Visitor Center. Lassen National Park. February 2016.

img_2427

Kohm Yah-mah-nee Visitor Center in Lassen National Park. February 2016. Just a little bit of snow!

Our destination to camp was the Bumpass Hell Parking Lot area because it’s a nice flat area with a great view. The hike is about 5 to 6 miles one-way with approximately 2000 ft of elevation gain, depending on the route chosen. Travel during the winter into the backcountry anywhere requires avalanche hazard awareness. Lassen National Park in no exception.We all had avalanche safety gear, including beacons, shovels, and probes. I also had my InReach Explorer that tracks travel that can be followed via the internet and also allows two-way communication without cell service.

In addition to the usual winter safety awareness, Lassen is a geothermal area. When traveling in the Lassen backcountry, especially in winter when snow can cover geothermal areas, it is necessary to be aware of the location of those geothermal areas. The Lassen National Park website has a map of the avalanche and geothermal hazards in the southwest section of the park. Anyone venturing into the backcountry in winter should be well aquatinted with the information on that map. The visitor center sells laminated copies that are waterproof. We had several copies with us.

When snow is deep in Lassen travel to the Bumpass Hell area is via the Ranger Cutoff to avoid avalanche danger near Diamond Peak. The Ranger Cutoff shortens the hike in miles but it is more difficult than taking the road due to the steep elevation gain around the back side of Diamond Peak.

img_2428

Snowshoeing along SR89 Lassen National Park. Steam from the Sulfur Works is visible dead center of this photo. February 2016.

The day was absolutely gorgeous. The Sulfur Works area was in full steamy and bubbly swing as we headed up the first significant elevation gain approaching the Ranger Cutoff. This part of the hike follows SR89 until it rounds the corner at Windy Point. Then the route heads up the shoulder of Diamond Peak. I don’t have any photos of the actual Ranger’s Cutoff because I was too busy working my butt off in the soft, knee-deep powder to get to the ridge top! The slope of the climb on the Ranger Cutoff varies between 15% – 30%, at times we were literally using steps in the snow. It was very hard work. However, the view as we passed the backside of Diamond Peak was absolutely amazing.

img_2436

Lassen Peak visible from the backside of Diamond Peak. February 2016.

We descended the Practice Hill area where we met some backcountry skiers. We saw a lot of skiers and several snowshoers during the day. The backcountry of Lassen is a popular destination. We continued to slog through the knee-deep powder in a winter wonderland. As we descended the backside of Diamond Peak we found SR 89 again and followed until the switchbacks in the road heading up to the Emerald Sidehill area. We took a shortcut evident in the snow left by skiers that skipped some of the road and ended up at the entrance to the Emerald Sidehill area. I am familiar with this area of Lassen and wondered what it would look like covered in snow. It was impressive. The road was not visible at all anymore, being covered by deep snow. The slope of the snow over the road in this area is steep. We sized up the snow condition and the track left by skiers earlier in the day. We then spread out, crossing one at a time, staying away from the edge as we traveled across the area. I was a little nervous but the snow was stable and we all got across without incident.

img_2437

Snowshoeing across the Emerald Sidehill area of SR89. Lassen National Park. February 2016.

The rest of the hike was easy. Relatively flat and open. We quickly located the Bumpass Hell parking lot and found the flattest area for our tents. Next it was time to dig the tent platform and entry step. Then the tents were all set up. Ready for dinner! But first, the ever-present necessity of melting snow. I brought my Sumo Jetboil pot so the snow melting went pretty quickly and we had enough water for both drinking and to make dinner. I also made a hot water bottle in an extra wool sock for my sleeping bag, something I learned from my climbing buddy when climbing Mt Whitney.

The sunset was amazing. Then, of course, the temperature dropped and we got into sleeping bags since the number one mission during winter camping seems to be staying warm. The temperature overnight dropped into the upper teens. However, I was surprisingly cozy even with my 15 deg sleeping bag but I did use a silk liner. And I had an inflatable pillow – a must for winter camping!

img_2352-2

Sunset at Bumpass Hell parking lot. Looking southwest. Lassen National Park. February 2016.

img_2454

Lassen Peak bathed in golden sunset light. February 2016.

img_2451

Amazing lighting looking towards Bumpass Hell. Lassen National Park. February 2016.


Sunday morning was glorious. The view of Lassen Peak from the Bumpass Hell parking lot area is amazing. We had hoped to summit Lassen Peak but losing Friday to the storm meant that we needed to pack up and head back to the visitor center. We lounged around the area for the morning – in our shirtsleeves by noon. Then we packed up camp and headed back.


img_2461

Campsite with a view of Lassen Peak. Bumpass Hell parking lot. Lassen National Park. February 2016

img_2490

Lassen National Park. Emerald Sidehill on SR89, looking back east on our way back. Such a lovey day! February 2016.


The hike back felt leisurely since it was mostly downhill and the weather was so pleasant. We arrived back at the cars late in the afternoon and headed home. My first winter backcounty camping trip since college as a success!

We repeated the trip one more time in May 2016 hoping to summit Lassen Peak. Unfortunately, we were hit with an unseasonable snowstorm. We were able to follow the road in May making the hike quick and navigation not really necessary. However, to say the weather was inclement is an under statement.  Once again I was denied a summit of Lassen Peak in the snow. The photos below show that on the return trip we got our practice dealing with winter storm conditions! I am looking forward to returning to Lassen this winter fo more winter camping adventures and maybe a winter summit of Lassen Peak.


img_2739

Bumpass Hell parking lot. Not such great weather conditions! May 2016.

The Benson Lake/Matterhorn Canyon Loop Backpacking Trip

It started with a somewhat random text from my daughter, Ashley. She wanted to know if she could take my dog, Sport, on a solo backpacking trip. After a little back and forth texting, I invited myself instead. Playing the part of Sport is Terri. After a little bit more discussion about destinations, I suggested we do the 54 mile Benson Lake/Matterhorn Canyon Loop. I have wanted to do this trip for at least 15 years. And, I have wanted to return to Matterhorn Canyon ever since an amazing backpacking trip I took from Tuolumne Meadows to Twin Lakes in 1975. I was excited to share the canyon with Ashley. I did warn her that it would be strenuous. We are both marathon runners but backpacking has been an only an occasional thing for both of us. However, she was definitely game. Especially because this route had the varied scenery she wanted during the trip. It passes through thick forest, travels along beautiful alpine lakes, traverses the wide and long Kerrick Meadow, crosses over several high elevation passes and threads up two rocky canyons, Matterhorn Canyon and Slide Canyon, before descending into thick forest again.

Me in Matterhorn Canyon in the summer of 1975. Photo Credit: Ivan Lee

Me in Matterhorn Canyon in the summer of 1975. Photo Credit: Ivan Lee

Among family and friends, I am known as the trip planner. All it takes is a vague suggestion for a trip and in 10 minutes flat I’ve got the itinerary, lodging, and menu planned. This trip was no different with the exception of the menu, which I will get to in detail a little later. Ashley and I settled on a 5 day trip over the Labor Day weekend. We would camp near Twin Lakes Wednesday, enter Hoover Wilderness from Twin Lakes on Thursday, and exit on Monday. We decided to do the loop counterclockwise because I wanted to walk up Matterhorn Canyon from the south. The camp spots were chosen with each day’s mileage charted out.

With only 5 days we would need to stick to the schedule (or better) or we would not make it out by Monday! I typically have a pretty relaxed approach to backpacking planning. I don’t mind carrying a heavy-ish pack for the kind of trips I usually take. But this time the goal was much bigger. In fact, I had not done a trip this big since 1975! So, I did a lot of research on hiking speed, calories burned, and meal planning. We needed to keep things light since we needed to average 11 miles per day. I found the website https://caseyfiedler.wordpress.com by an ultra-light hiker that covers everything you need to know about the calorie to weight ratio approach. I used that approach to plan our meals and snacks. We are not ultra-light hikers, neither of us have the latest and lightest equipment. But the food information was excellent. I developed an EXCEL spreadsheet to calculate the weight of the food and the calories for each day. It totally changed which freeze dried meals and what kind of snacks I chose for the trip. I will never look at backpacking food the same again! By the time I was finished we each had 3000 calories per day with an average calorie density of 150 calories per ounce and our total food weight was 5 lbs apiece. We were never hungry. We ate all the food except for a couple of snack bars and some of the gorp.I also estimated the time each day’s hike would take (It turned out we tended to be faster uphill than estimated but we were a little slower downhill). At the start of the trip our packs each weighed under 30 lbs without water. I added 4 lbs of photography equipment because that was important to me.

Entering Hoover Wilderness

Entering Hoover Wilderness

Our first night was at Peeler Lake. This was the shortest day at 8 miles. We found a beautiful campsite on the southwest side of the lake. We had gotten a later start than we wanted so we arrived late. We were setting up camp and getting water in near darkness. Ashley did remark that night that everything about backpacking was harder than she remembered. But she is a tough cookie and took it all in stride.

Peeler Lake at sunset

Peeler Lake at sunset

Once we were finished with dinner and the sun had set, I prepared to take my first Milky Way photos ever. I set up the tripod and camera and realized right away that I had not played with my new manual lens enough at home. I couldn’t get the remote to interact with the camera (that turned out to be operator error!) so I had to use the delayed shutter instead. Oh, well, I still got some shots I really like. In between one of the shots we saw a meteor so big it actually lit up the sky like firework. I wish I would have been lucky enough to get it in one of my photos. But just seeing it was amazing.

My first serious Milky Way photo!

My first serious Milky Way photo!

The next day, Friday, we headed to Benson Lake. This is an alpine lake with a huge sand beach. The hike to Benson Lake was lovely. The route travels through Kerrick Meadows and over Seavey Pass. I will say this day was tougher than either of us expected. The elevation gain on the route was not huge and it was net downhill. But once we were over Seavey Pass it seemed like it took forever to reach the lake, even though it was only 3 miles.

Ashley enjoying  the hike through Kerrick Meadow

Ashley enjoying the hike through Kerrick Meadow.

When we finally arrived we were surprised and happy to find that we had the lake completely to ourselves. Ashley wanted to camp on the beach, which we did. It was nice and soft but I worried about getting sand in everything. But, we managed and it was a really nice view from our spot. Unfortunately, it was too late and chilly for the swim we had hoped to take. We also found we had to stand in the lake to collect water. Oh, well. More information for next time!

Camping on the beach at Benson Lake.

Camping on the beach at Benson Lake.

Saturday’s hike was from Benson Lake to the south end of Matterhorn Canyon. This was a big day with 11 miles that included 2500 elevation gain and 1600 ft of elevation loss. And I was not entirely clear where we would camp in Matterhorn Canyon. But the weather was beautiful and we were excited to head to Matterhorn Canyon. Our first climb of the day was from Benson Lake (7581 ft) up to Smedburg Lake (9213 ft). We arrive at Smedburg Lake around 2 pm. Smedburg Lake is one of the most remote lakes in Yosemite National Park. It is beautiful, huge, and 25 miles from anywhere. I wish we had an extra day to spend there. However, the wind had picked up. It was very windy, the white caps on the lake were impressive.

Just the southwest corner of Smedburg Lake. This lake is huge and 25 miles from anywhere.

Just the southwest corner of Smedburg Lake. This lake is huge and 25 miles from anywhere.

We had lunch at Smedburg Lake and then headed out to cross Benson Pass. We thought we had crossed the pass several times but each time we were deceived! Once we reached the pass it was unmistakable. The view was amazing. We spend just a little time there because we still had 5 miles to go and it was 4:00 pm. Onward!

Benson Pass, facing east.  Matterhorn Canyon is to the left.

Benson Pass, facing east.
Matterhorn Canyon is to the left.

We reached the Matterhorn Canyon trail junction at 6:00 pm. I had thought we would camp close to that junction but there was no convenient water and it was not a great camping location. So, we continued up the canyon. We ended up hiking 2 more miles, the last of it in the dark, to arrive where the trail crossed Matterhorn Creek. That made for easy water collection. Finding a relatively flat spot to set the tent was challenging since the canyon gets more narrow and steep-sided the higher up you travel. And we were in thick forest. We made do with a slightly sloping spot positioning our heads up hill. Dinner made in the dark with the stars above was still better than any day back in civilization!

We hiked a total of 13 miles that day. We were now a little ahead of schedule. That night we discussed the last two days of hiking. The itinerary as planned for Sunday was to have a shorter hiking day and to camp in Slide Canyon. Then Monday we would hike 13.5 miles out over Mule Pass on Monday. We decided, instead, to hike over both Burro Pass and Mule Pass on Sunday, camping just below Mule Pass. After all, Saturday was a huge day, with more elevation gain, and we handled that fine. How hard could it be? This would make Monday a shorter day.

Our first view of the head of Matterhorn Canyon

Our first view of upper Matterhorn Canyon


Re-enactment of 1975. Photo credit: Ashley Barry

Re-enactment of 1975.
Photo credit: Ashley Barry

Sunday morning we set out to cross our two passes, Burro Pass and Mule Pass. After a short time Matterhorn Peak came into view. It was just a beautiful as I remembered. Our pace was leisurely to enjoy the canyon but we were mindful of the time. We were at the top of Burro Pass at 1:00 pm. We took our lunch break there. The view in both directions were breathtaking. I had scrambled up Matterhorn Peak in 1975 but there was no time for that this trip. I looked across to Mule Pass and thought it didn’t look too bad…

Approaching Burro Pass.

Approaching Burro Pass.

Our one and only selfie attempt. Sawtooh Ridge behind us.

Our one and only selfie attempt. Sawtooh Ridge behind us.

Slide Canyon and Mule Pass directly across from us on the right.

Slide Canyon and Mule Pass directly across from us on the right.

After lunch we quickly descended into Slide Canyon. This is such a beautiful area that I plan to return next season directly from Twin Lakes. The hike directly from Twin Lakes into Slide Canyon in the clockwise direction is about 14 miles. Ashley loved the Sawtooth Ridge, that’s my daughter! I love the Sawtooth Ridge too. In retrospect, we probably hiked through Slide Canyon at a little too leisurely a pace but we planned to camp just over Mule Pass so it didn’t seem that far. As we hiked along I started to think about the pass name. Burro Pass versus Mule Pass. Hmmm, mules are more cantankerous than burros. I hope that isn’t why the names were assigned that way. Well, Mule Pass kicked our butts. It was long and hard even though the elevation gain was only 1000 ft. That was a big surprise, nothing we hiked the entire trip felt that hard. It could have been because we were tired from the day before or the trip as a whole. But Ashley reminded me that people  we talked to way back on the first day said that hikers had to be “dumb as a mule to go up Mule Pass.” The counter-clockwise loop (our direction of travel) takes hikers up Mule Pass. When we reached the top, which is the border between Yosemite Park and Hoover Wilderness, Ashley remarked that Yosemite had just chewed us up and spit us out.

The next surprise was that a party with pack lamas was camped in the only dry spot in the area below Mule Pass we had planned to stop. So we had to continue hiking. I wasn’t sure exactly where the next opportunity to camp would be but I knew it was at least a mile. We were hungry, tired, and almost out of water. I was not happy. Luckily, Ashley became the cheerleader. Then in a talus field along the trail we saw our first, and only, Pika. It was so cute and it really interacted with us. We both enjoyed the Pika visit. We also took that opportunity to also have a snack and a little water. We also put on some warmer clothes since it had gotten quite chilly. Refueled, we headed further down in elevation. We ended up finding a perfect camping spot, flat and nearby water. There was even still a little daylight as we set up camp. That night we had hot chocolate after dinner for the first time during the trip. To make things even better, even tho it was a full moon but I managed to take a few more Milky Way photos. It was perfect!

Ashley relaxing in our tent while I'm taking Milky Way photos. It was chilly!

Ashley relaxing in our tent while I’m taking Milky Way photos. It was chilly!

The next morning we woke early, packed quickly, and decided to aim for lunch at the Cafe at Mono Village. We had 9 downhill miles to cover. Off we went. We passed Crown Lake on the way. It was a beautiful little lake but there were not many campsites and people were camped in all of them so we were glad we stopped where we did the previous night.

Crown Lake. The colors were gorgeous.

Crown Lake. The colors were gorgeous.

We quickly reached the trail junction heading back to Twin Lakes. We had 6.7 miles left that we had also covered on the way in. Ashley experienced firsthand why backpackers heading out on a route that they covered going in have that “look” in their eye and determination in their step! We covered 9 miles in a little over 4 hours, including breaks. We had a great lunch and then left for home. Since it was Labor Day, and Tahoe traffic can be expected to be heavy, we decided to go home over Sonora Pass. It was a nice drive and a nice end to a wonderful, but tough, mother/daughter backpacking trip.

My full set of photo can be found on Flickr in the Benson Lake/Matterhorn Canyon Loop – Backpacking Album.

Ouray! Ice Climbing!

IMGP4162

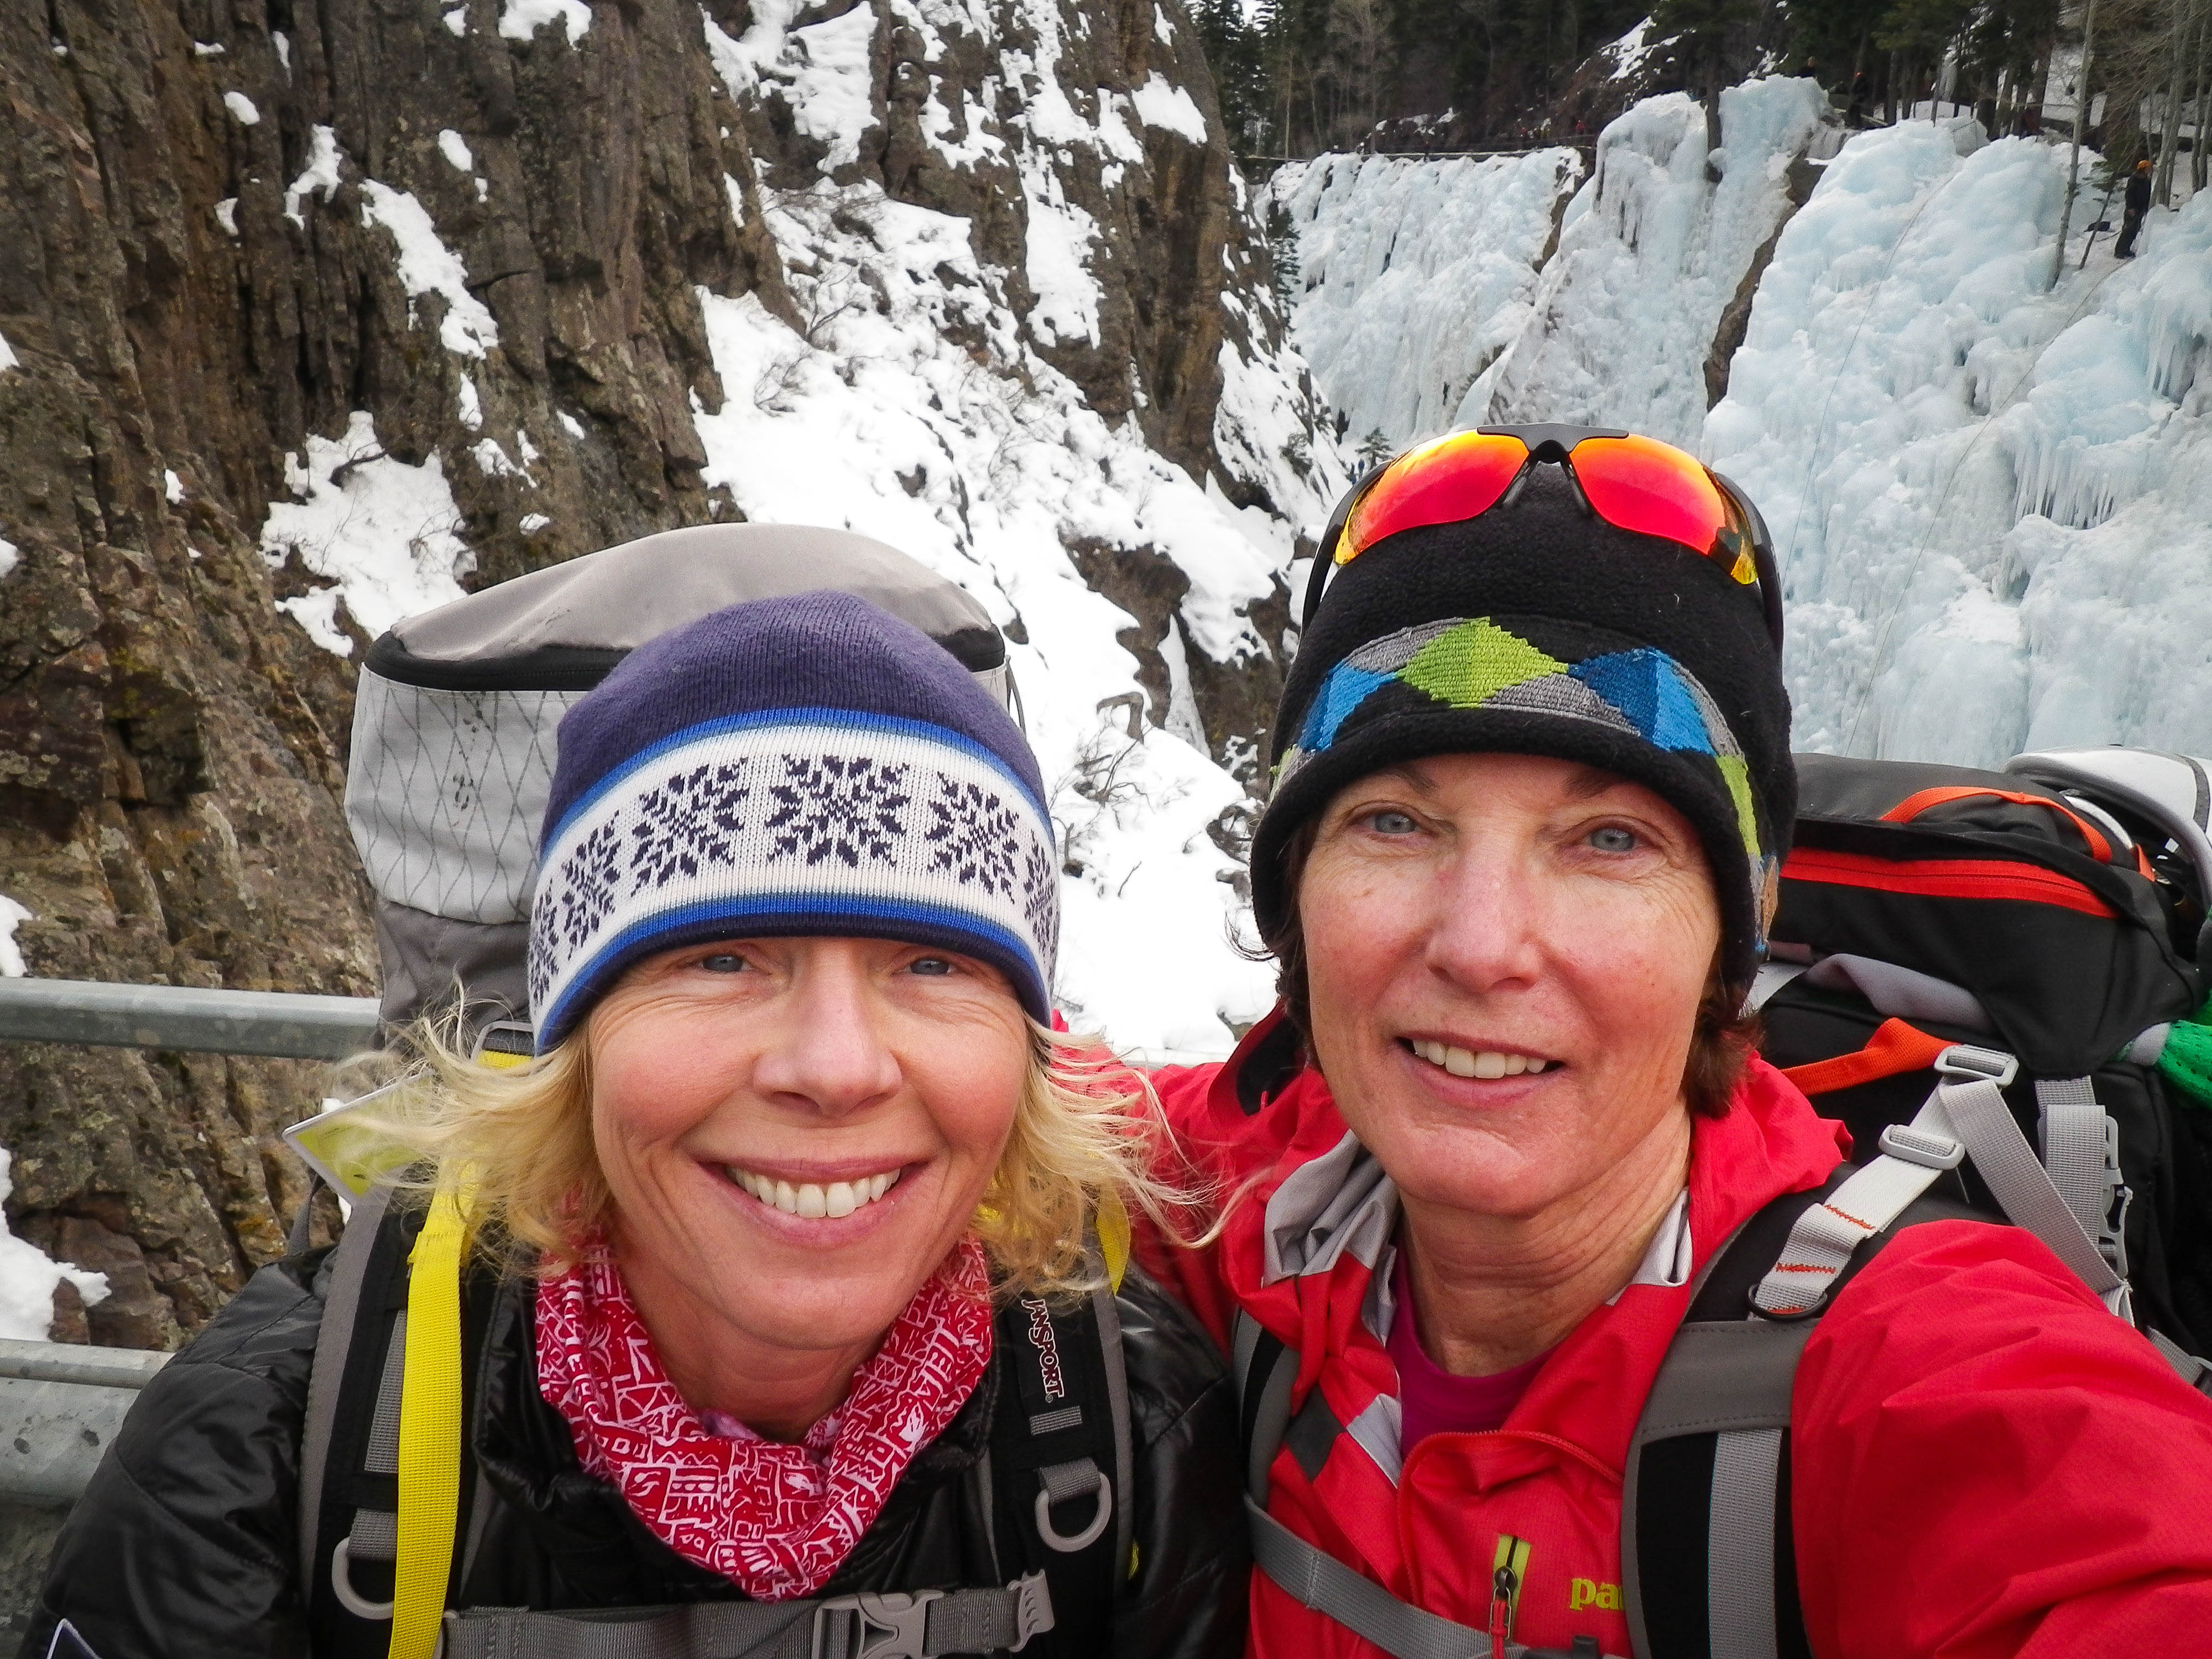
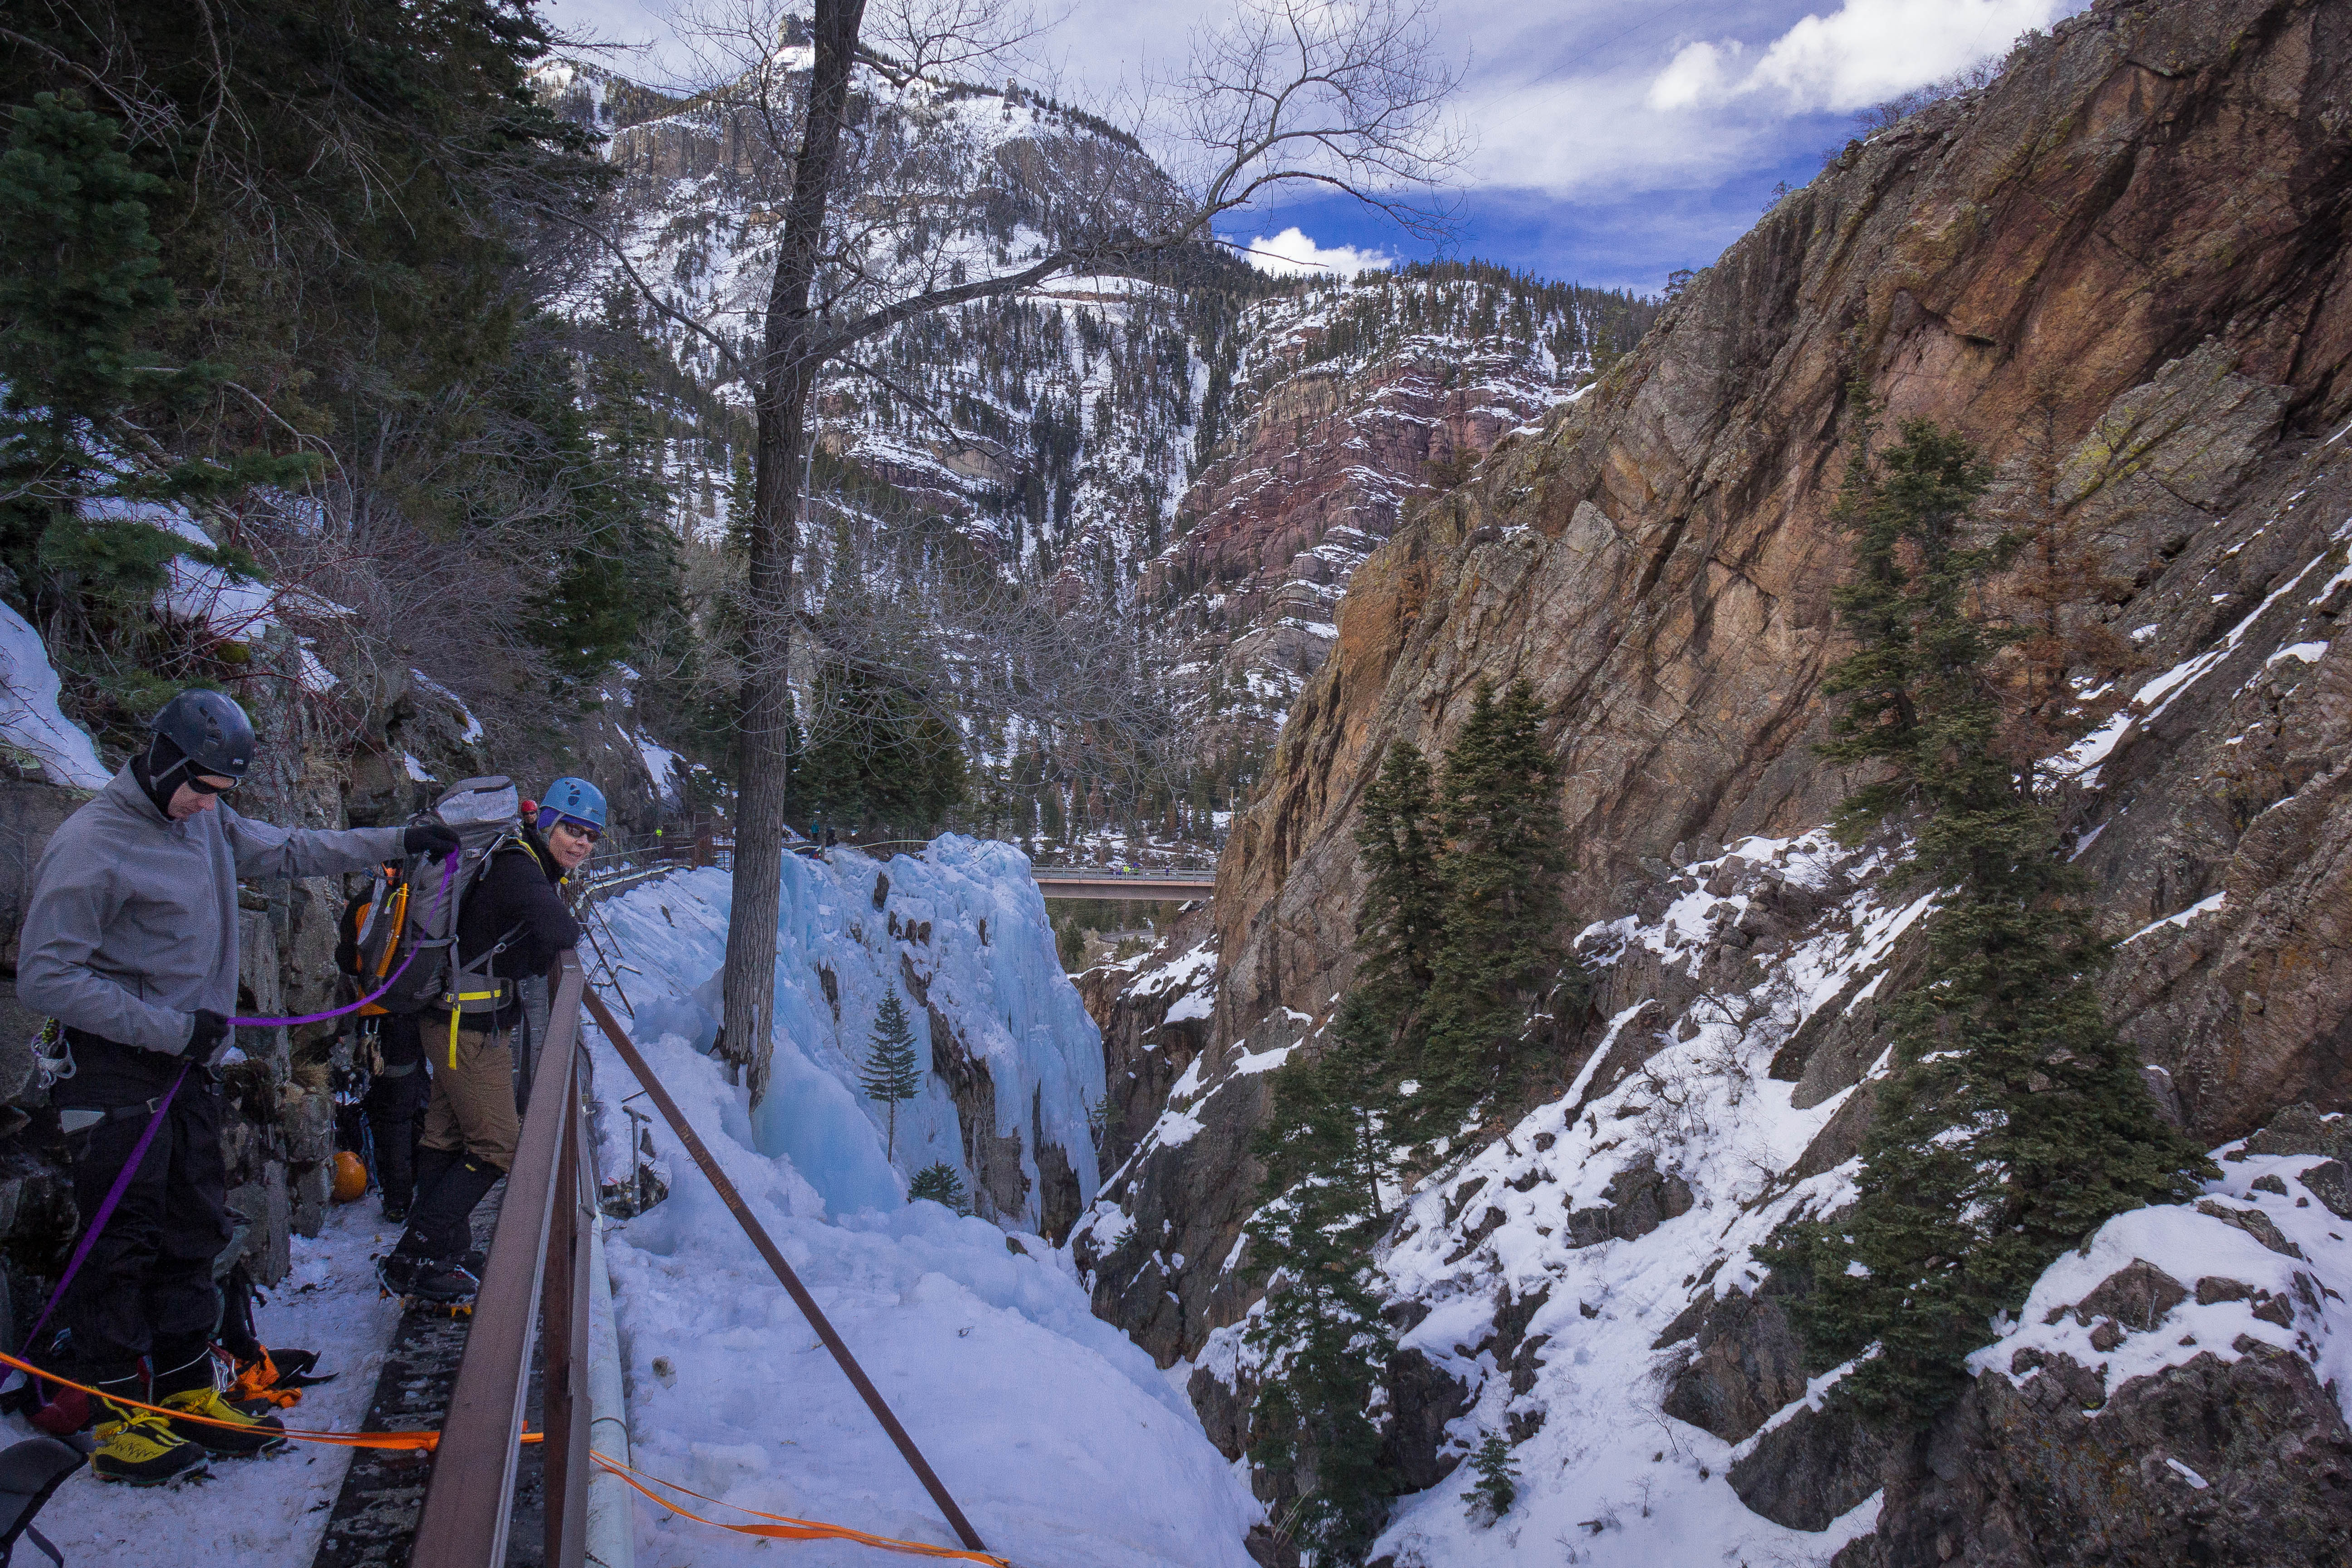
Me and my climbing bud, Karen on the bridge above the Ouray Ice Park.
Photo credit: Terri Barry

Every since I took my ice climbing class in January 2011 I have wanted to go to the Ouray Ice Park. On January 2, 2014 I shared to my Facebook page an article about ice climbing at the Ouray Ice Park on a blog I follow.  My comment on the post was “Must. Go. To. Ouray.” Early the morning of January 3 my friend Karen responded with “Let’s Go!” And my twitter/fb friend Diane responded “Come on down! We live just 45 minutes away, and it’ll be an opportunity to finally meet in person.”  Karen suggested we drive. That removed my final reservation about airfare and rental car costs. By January 6 the trip was a go.  We would to be in Ouray February 12-17. Wow, I didn’t see that coming at the New Year!

Karen had been to Ouray several years ago when she took a Chicks with Picks ice climbing class. Base on her familiarity we made a list of what equipment we would need. We planned to top rope, neither of us lead on ice. This would be a bit of a landmark trip for both of us. Karen was excited to return to Ouray on her own. I was the more experienced outdoor and ice climber of the two of us and would be the “lead” in terms of setting up anchors. In the past I had always been one of several experienced climbers, this time it was just me! We also had decided to hire a guide for one day. We agreed that Saturday would be perfect, giving us two days on our own beforehand. Also, the guide would be handy on Saturday since it was the holiday weekend. A guide could help us climb in areas that were logistically more difficult. Karen booked a guide through San Juan Mountain Guides.

Our milage total in 14 hours - Truckee, CA to Ouray, CO. Didn't even seem to take that long! Photo credit - Terri Barry

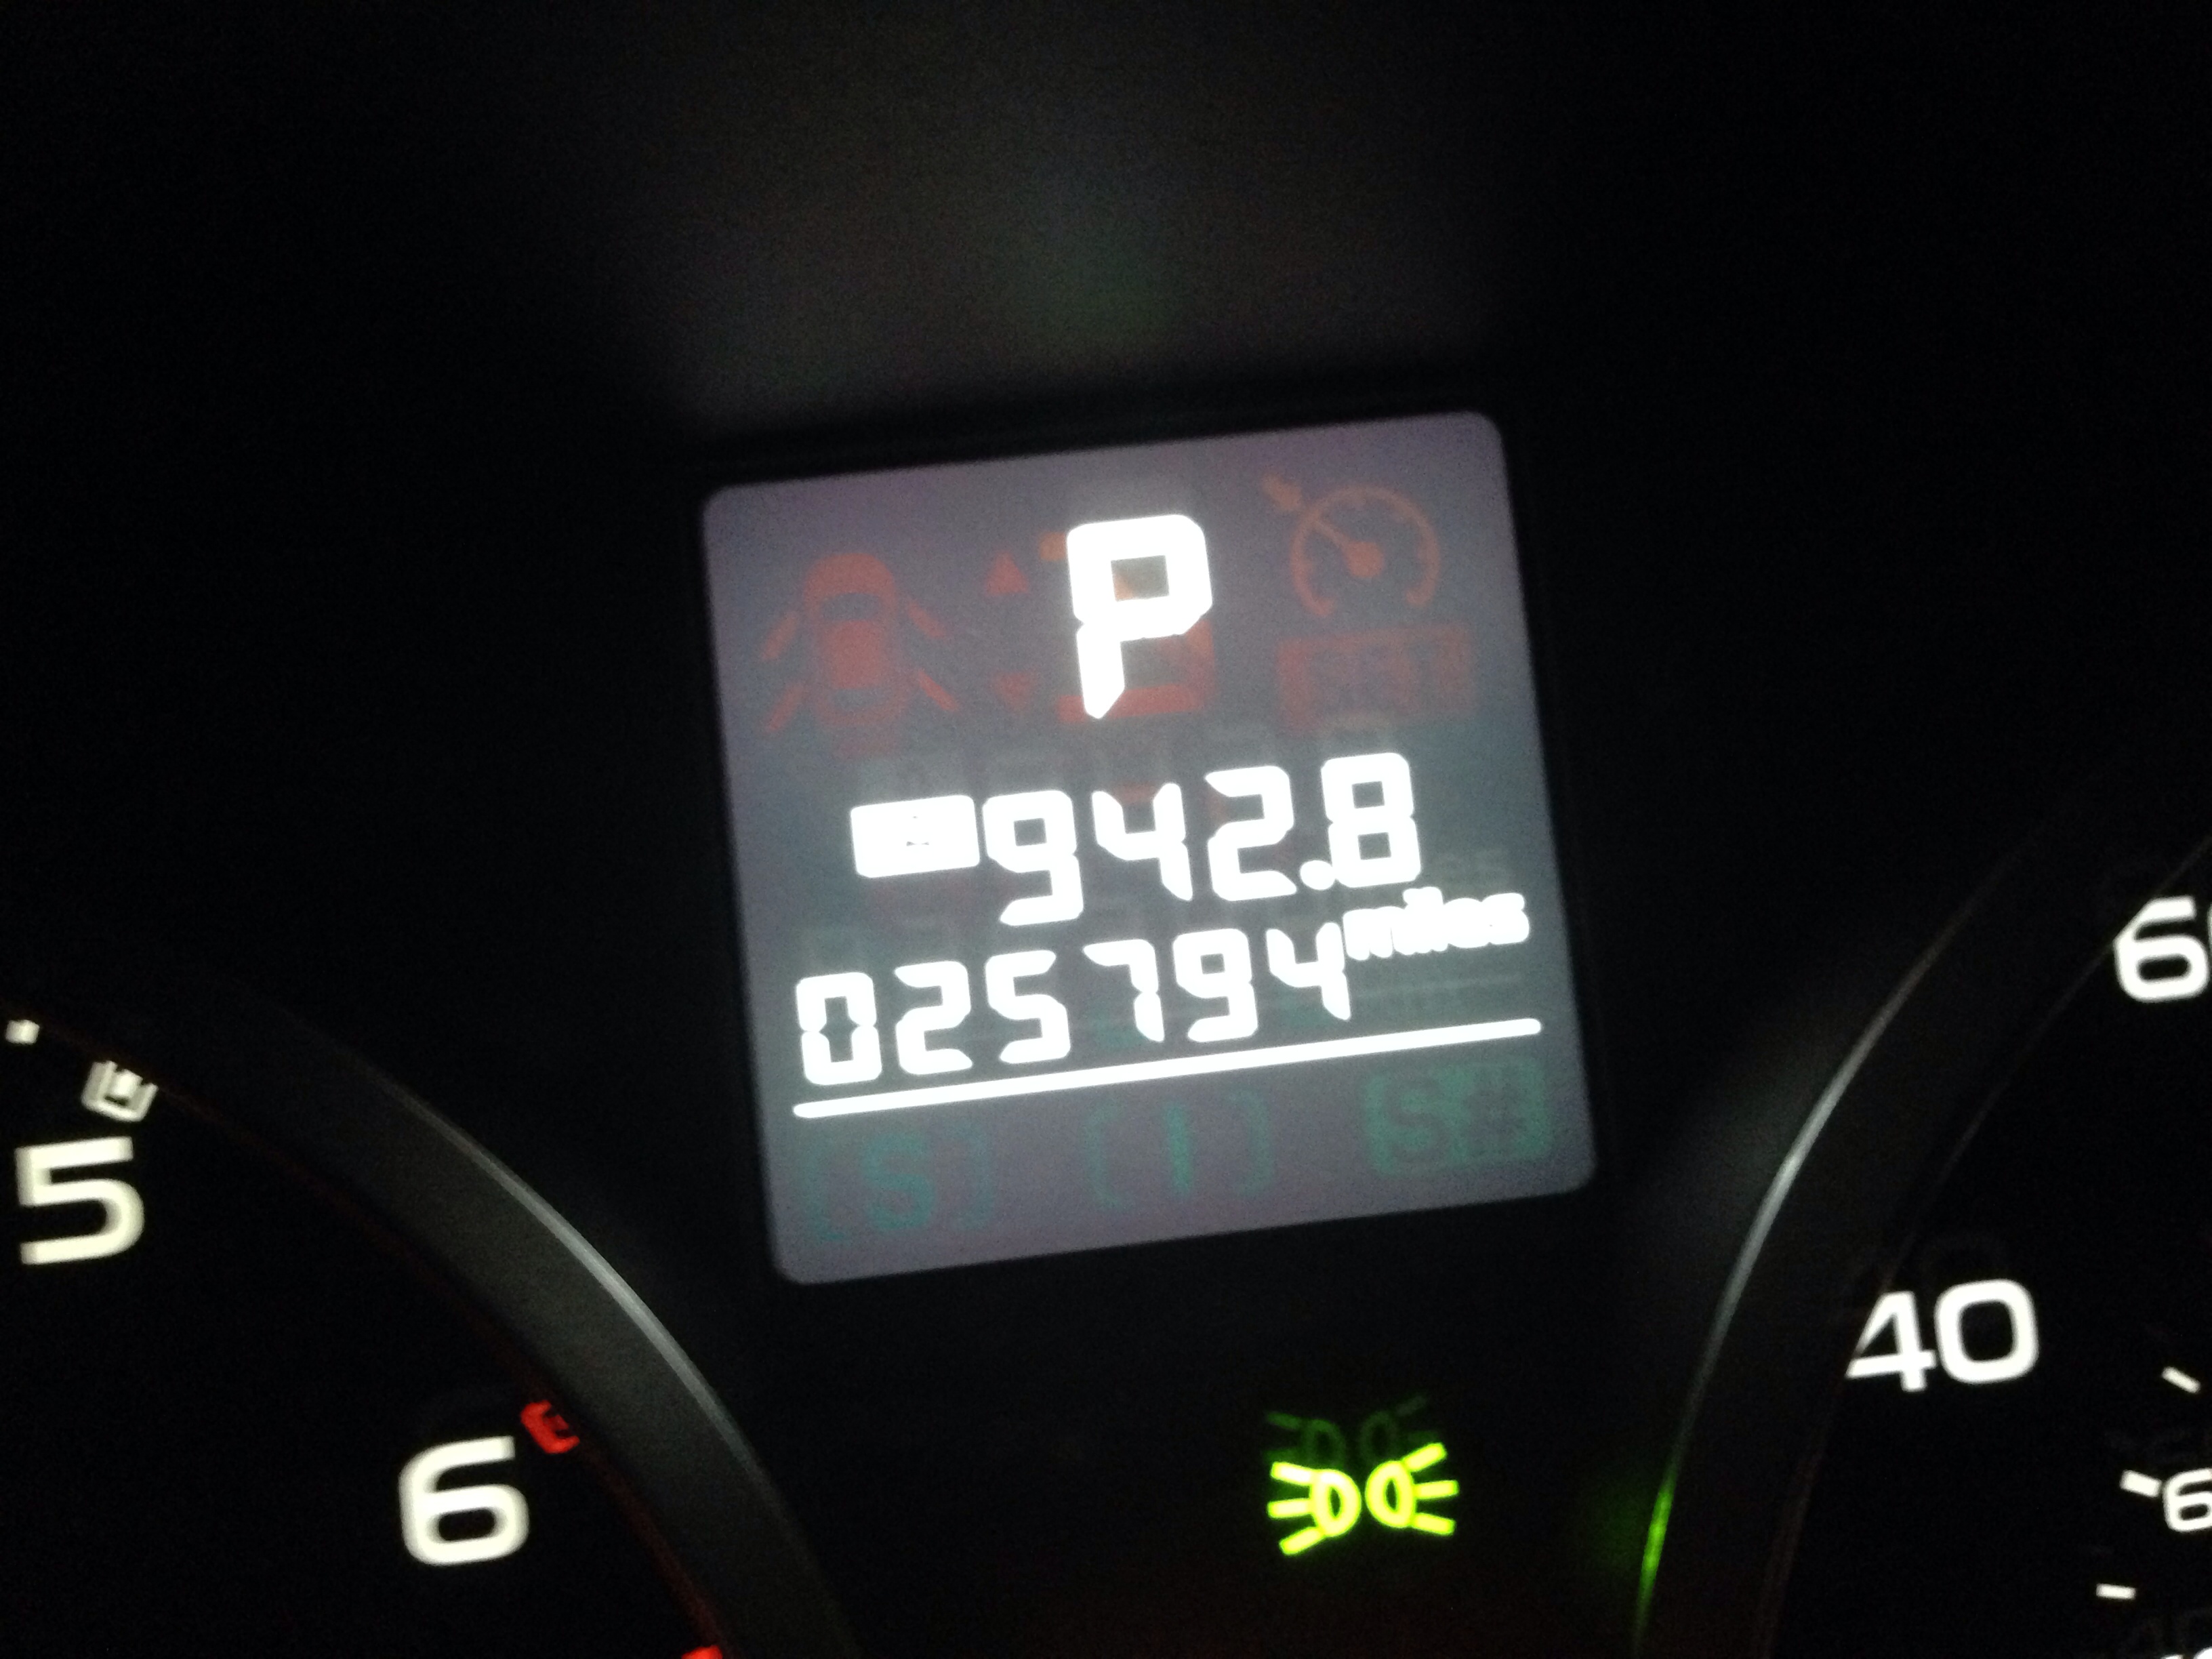
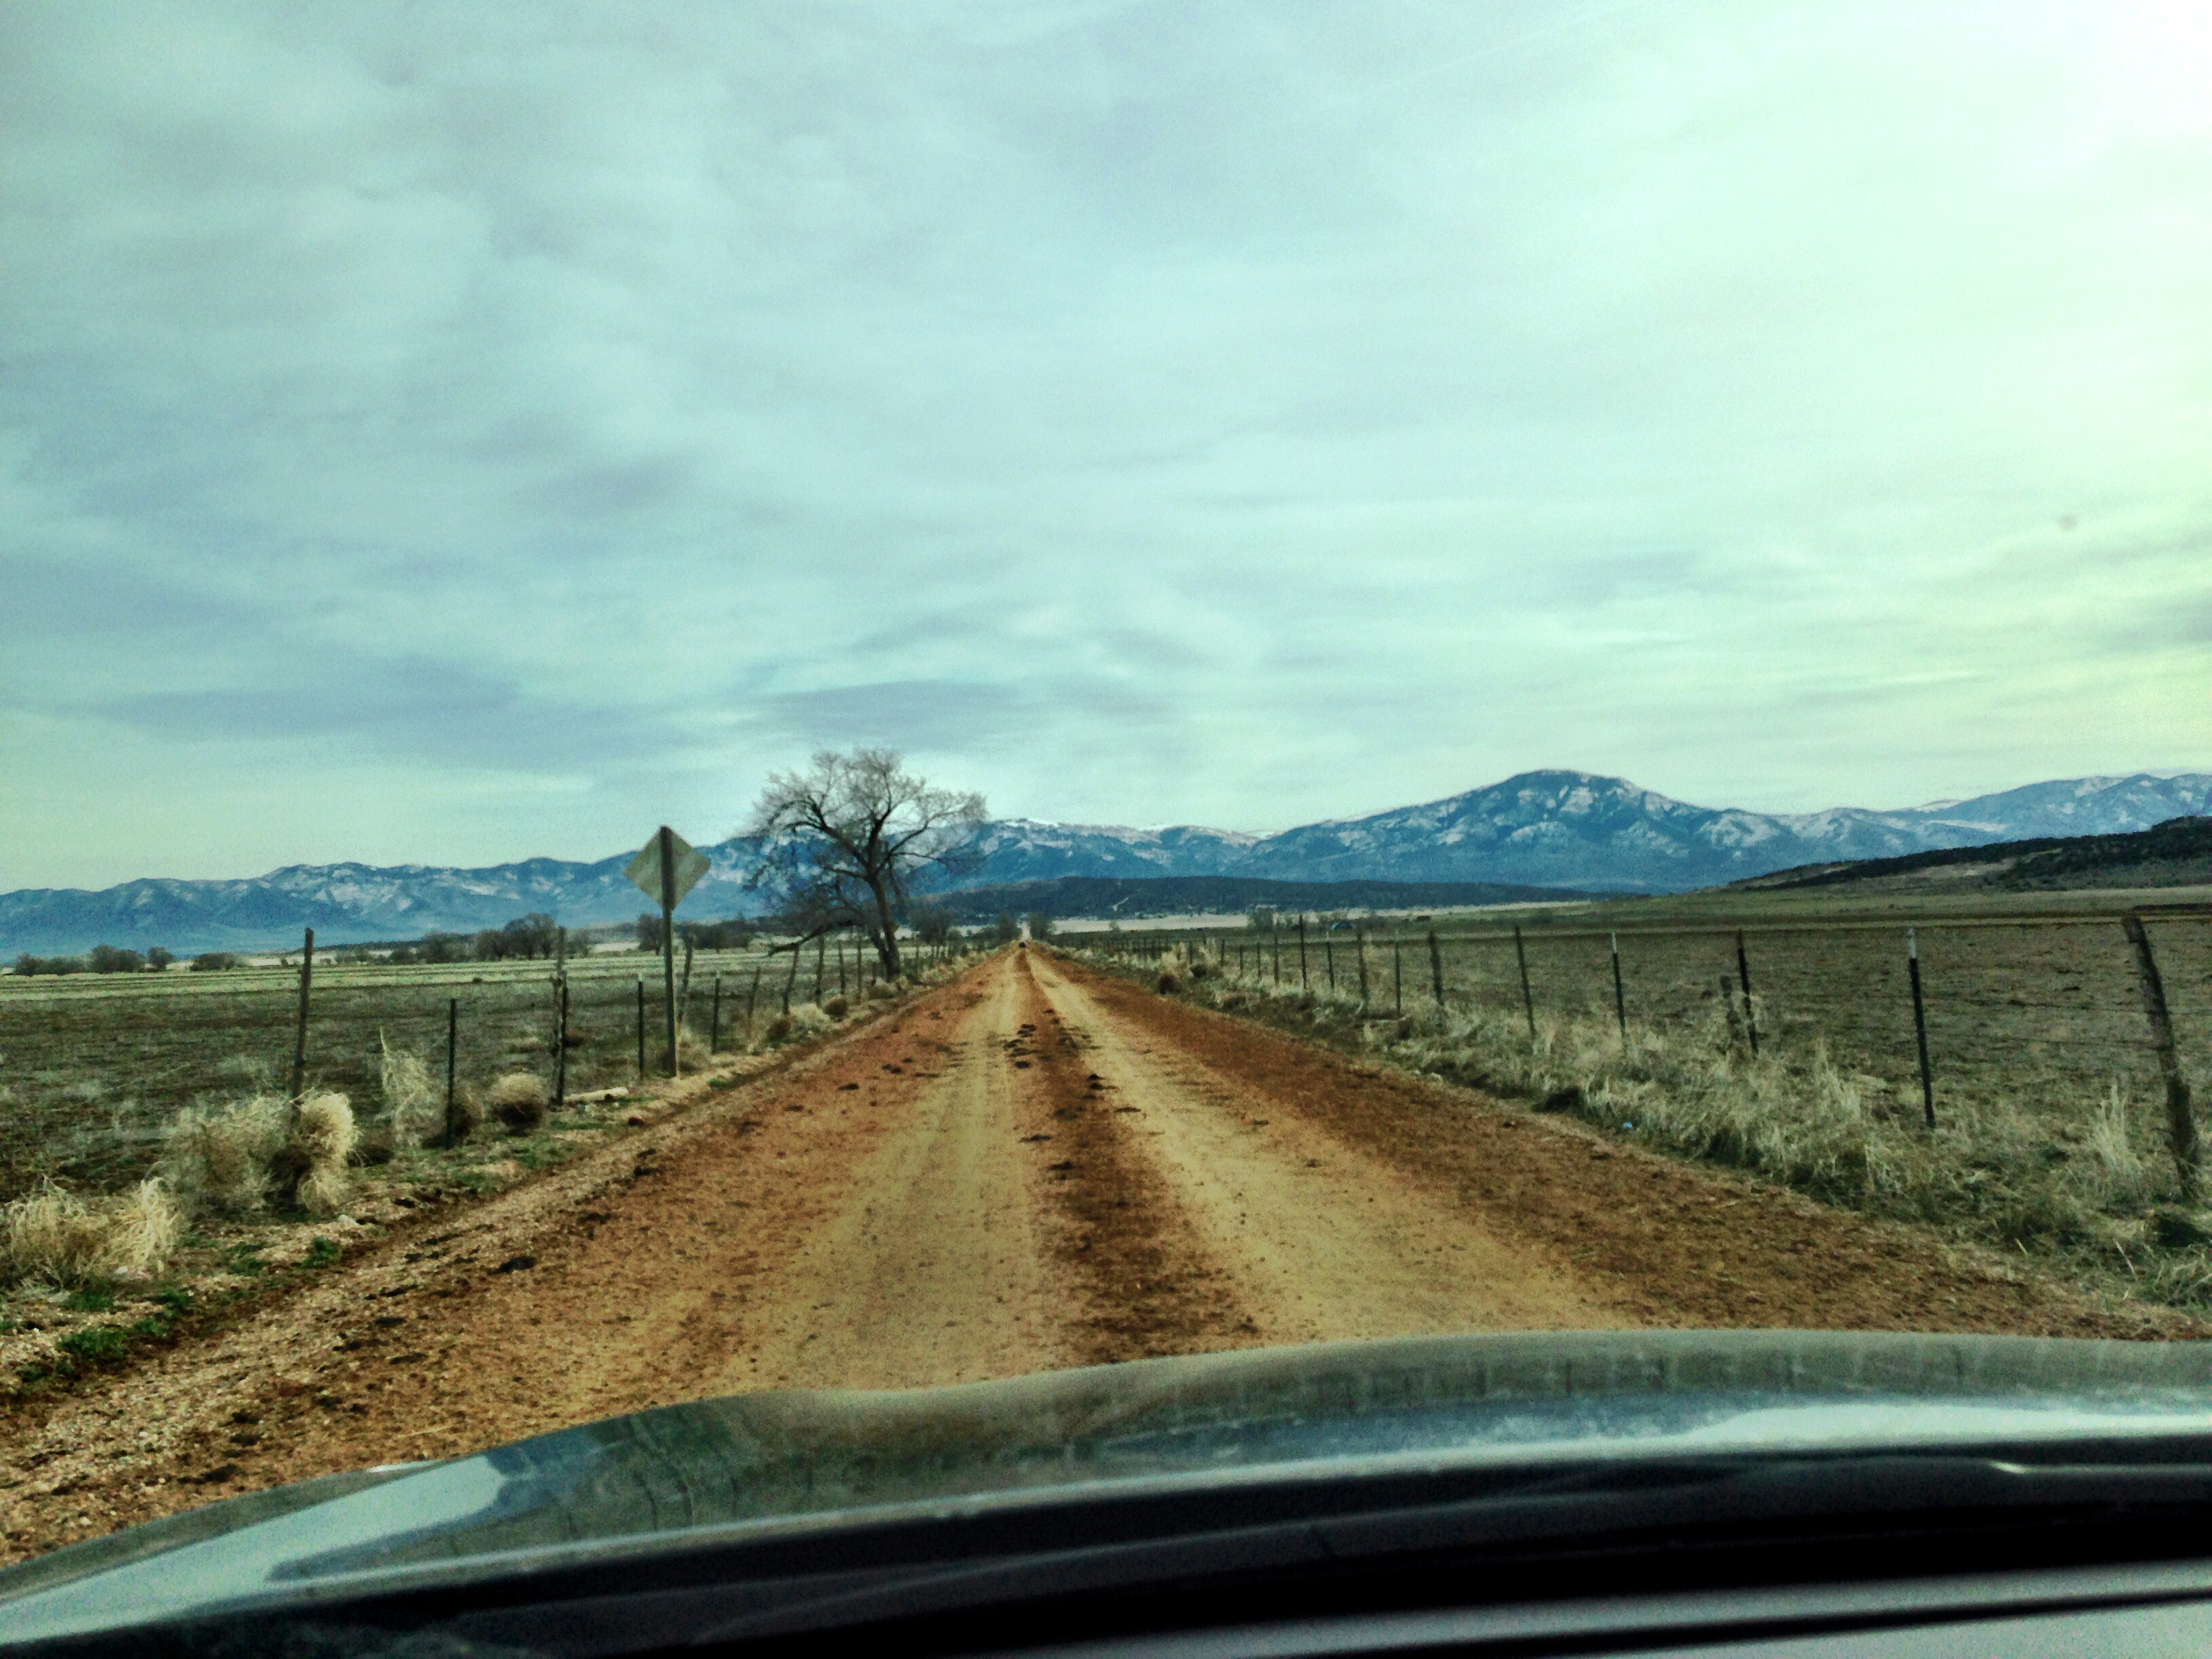
Our milage total in 14 hours – Truckee, CA to Ouray, CO. Didn’t even seem to take that long!
Photo credit – Terri Barry

IMG_8023-2

Downtown Ouray. Pretty scenic!
Photo credit: Terri Barry

We left from Truckee, California at 5 am on Wednesday morning. We only stopped for gas so we were in Ouray 14 hours later. Not bad! That night we organized our gear and set the alarm for 6 am. We stayed at the Comfort Inn, which was a great choice. The owners and staff are so friendly, it’s very affordable, and the breakfast is awesome. On Thursday morning we discovered a selection of waffles, eggs, sausage, yogurt, biscuits and gravy, fruit, cereal, oatmeal, coffee, milk, and juice. I listed everything because it was such an impressive spread! We were very well fed and ready for our first day of ice climbing.

IMG_7986

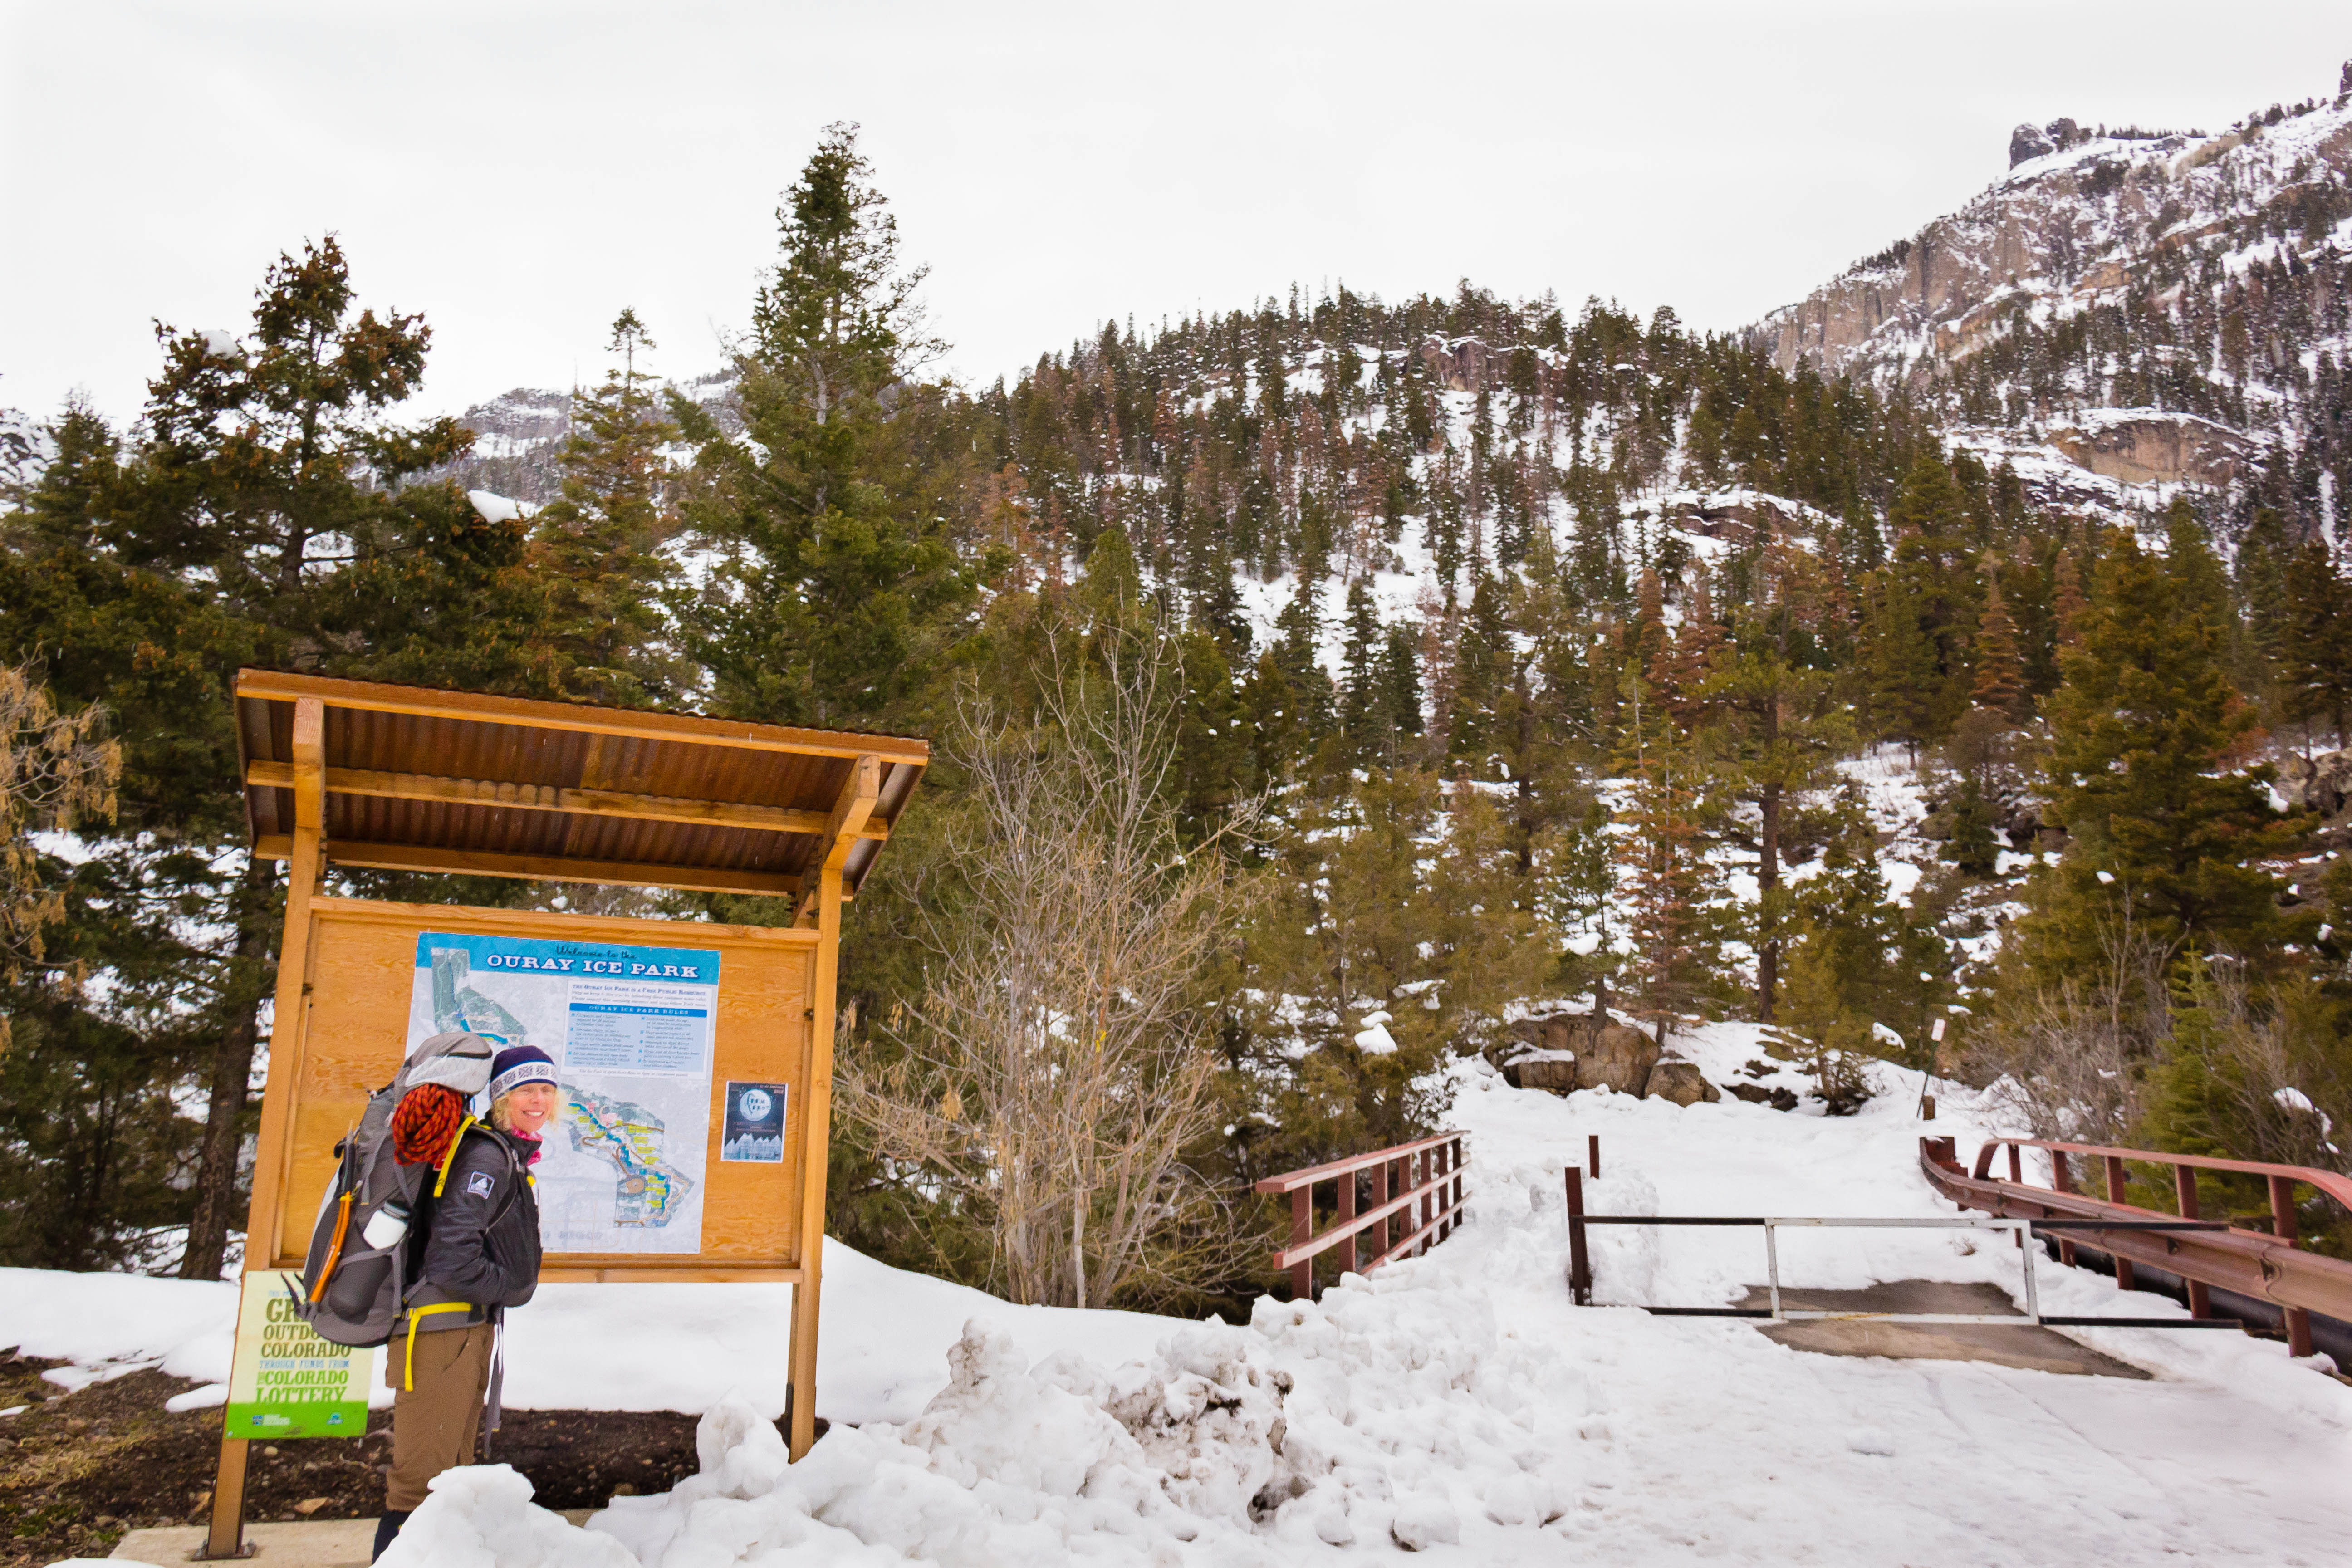
Karen at the entrance to the Ouray Ice Park.
Photo Credit – Terri Barry

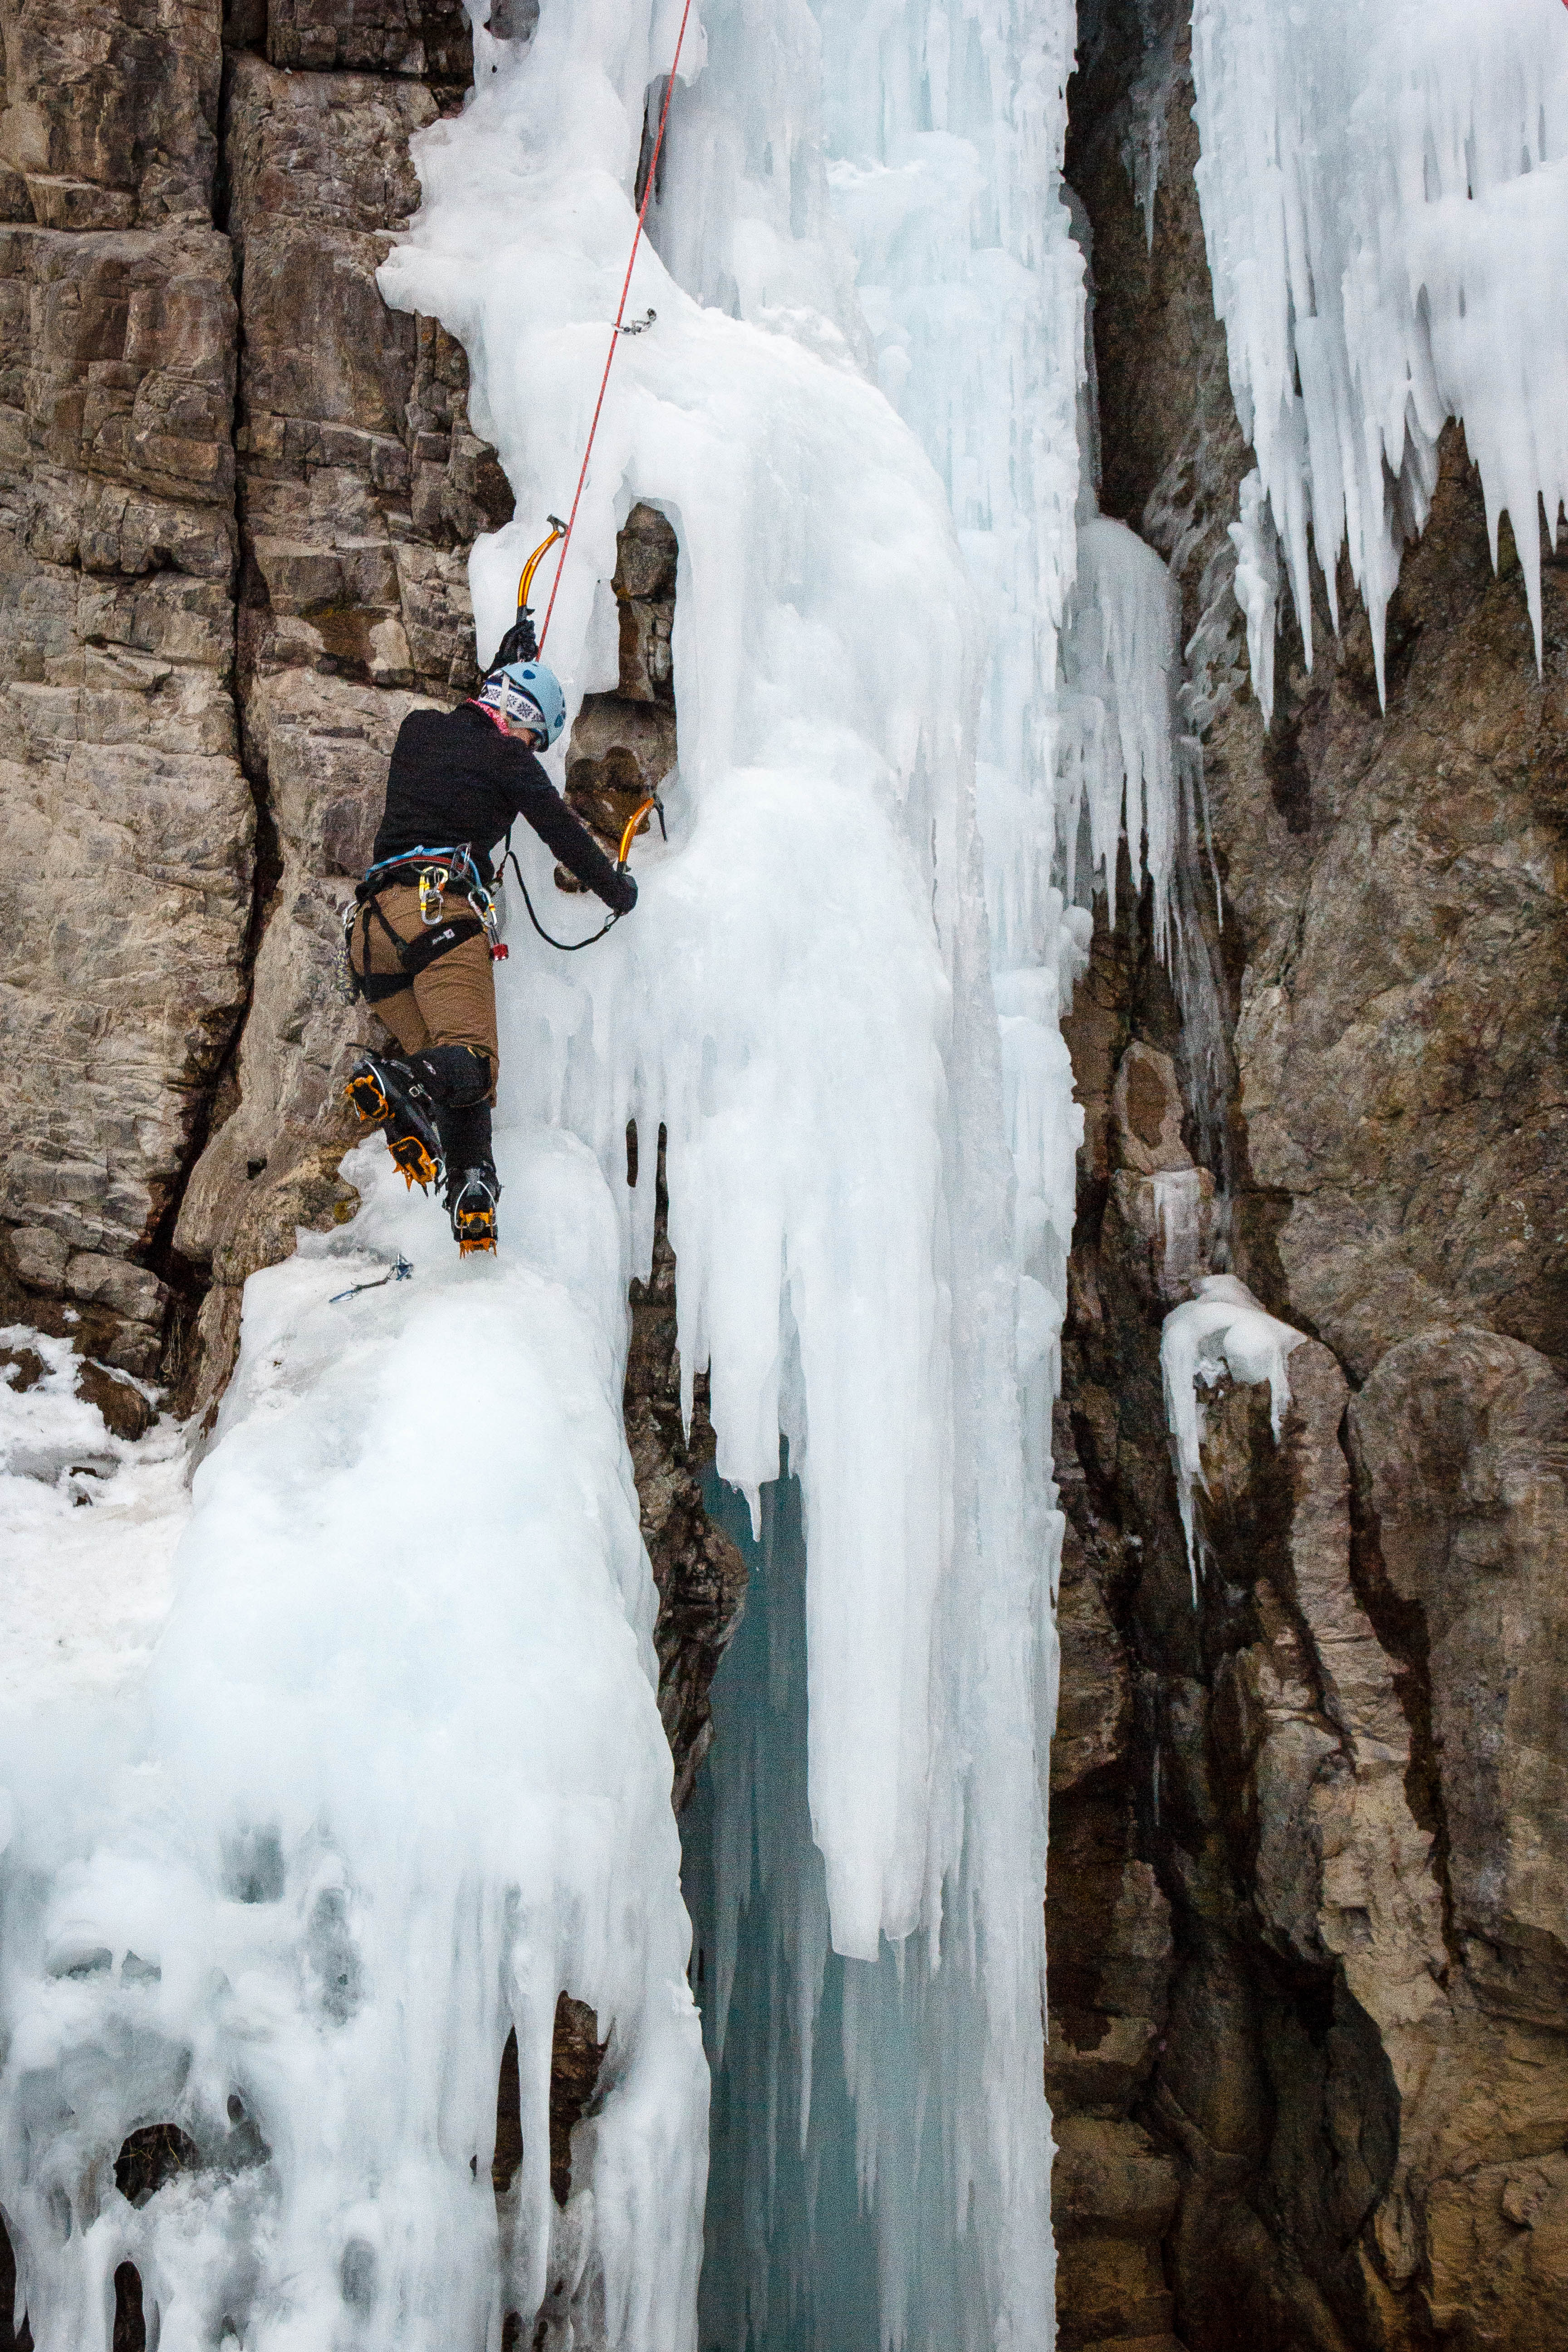
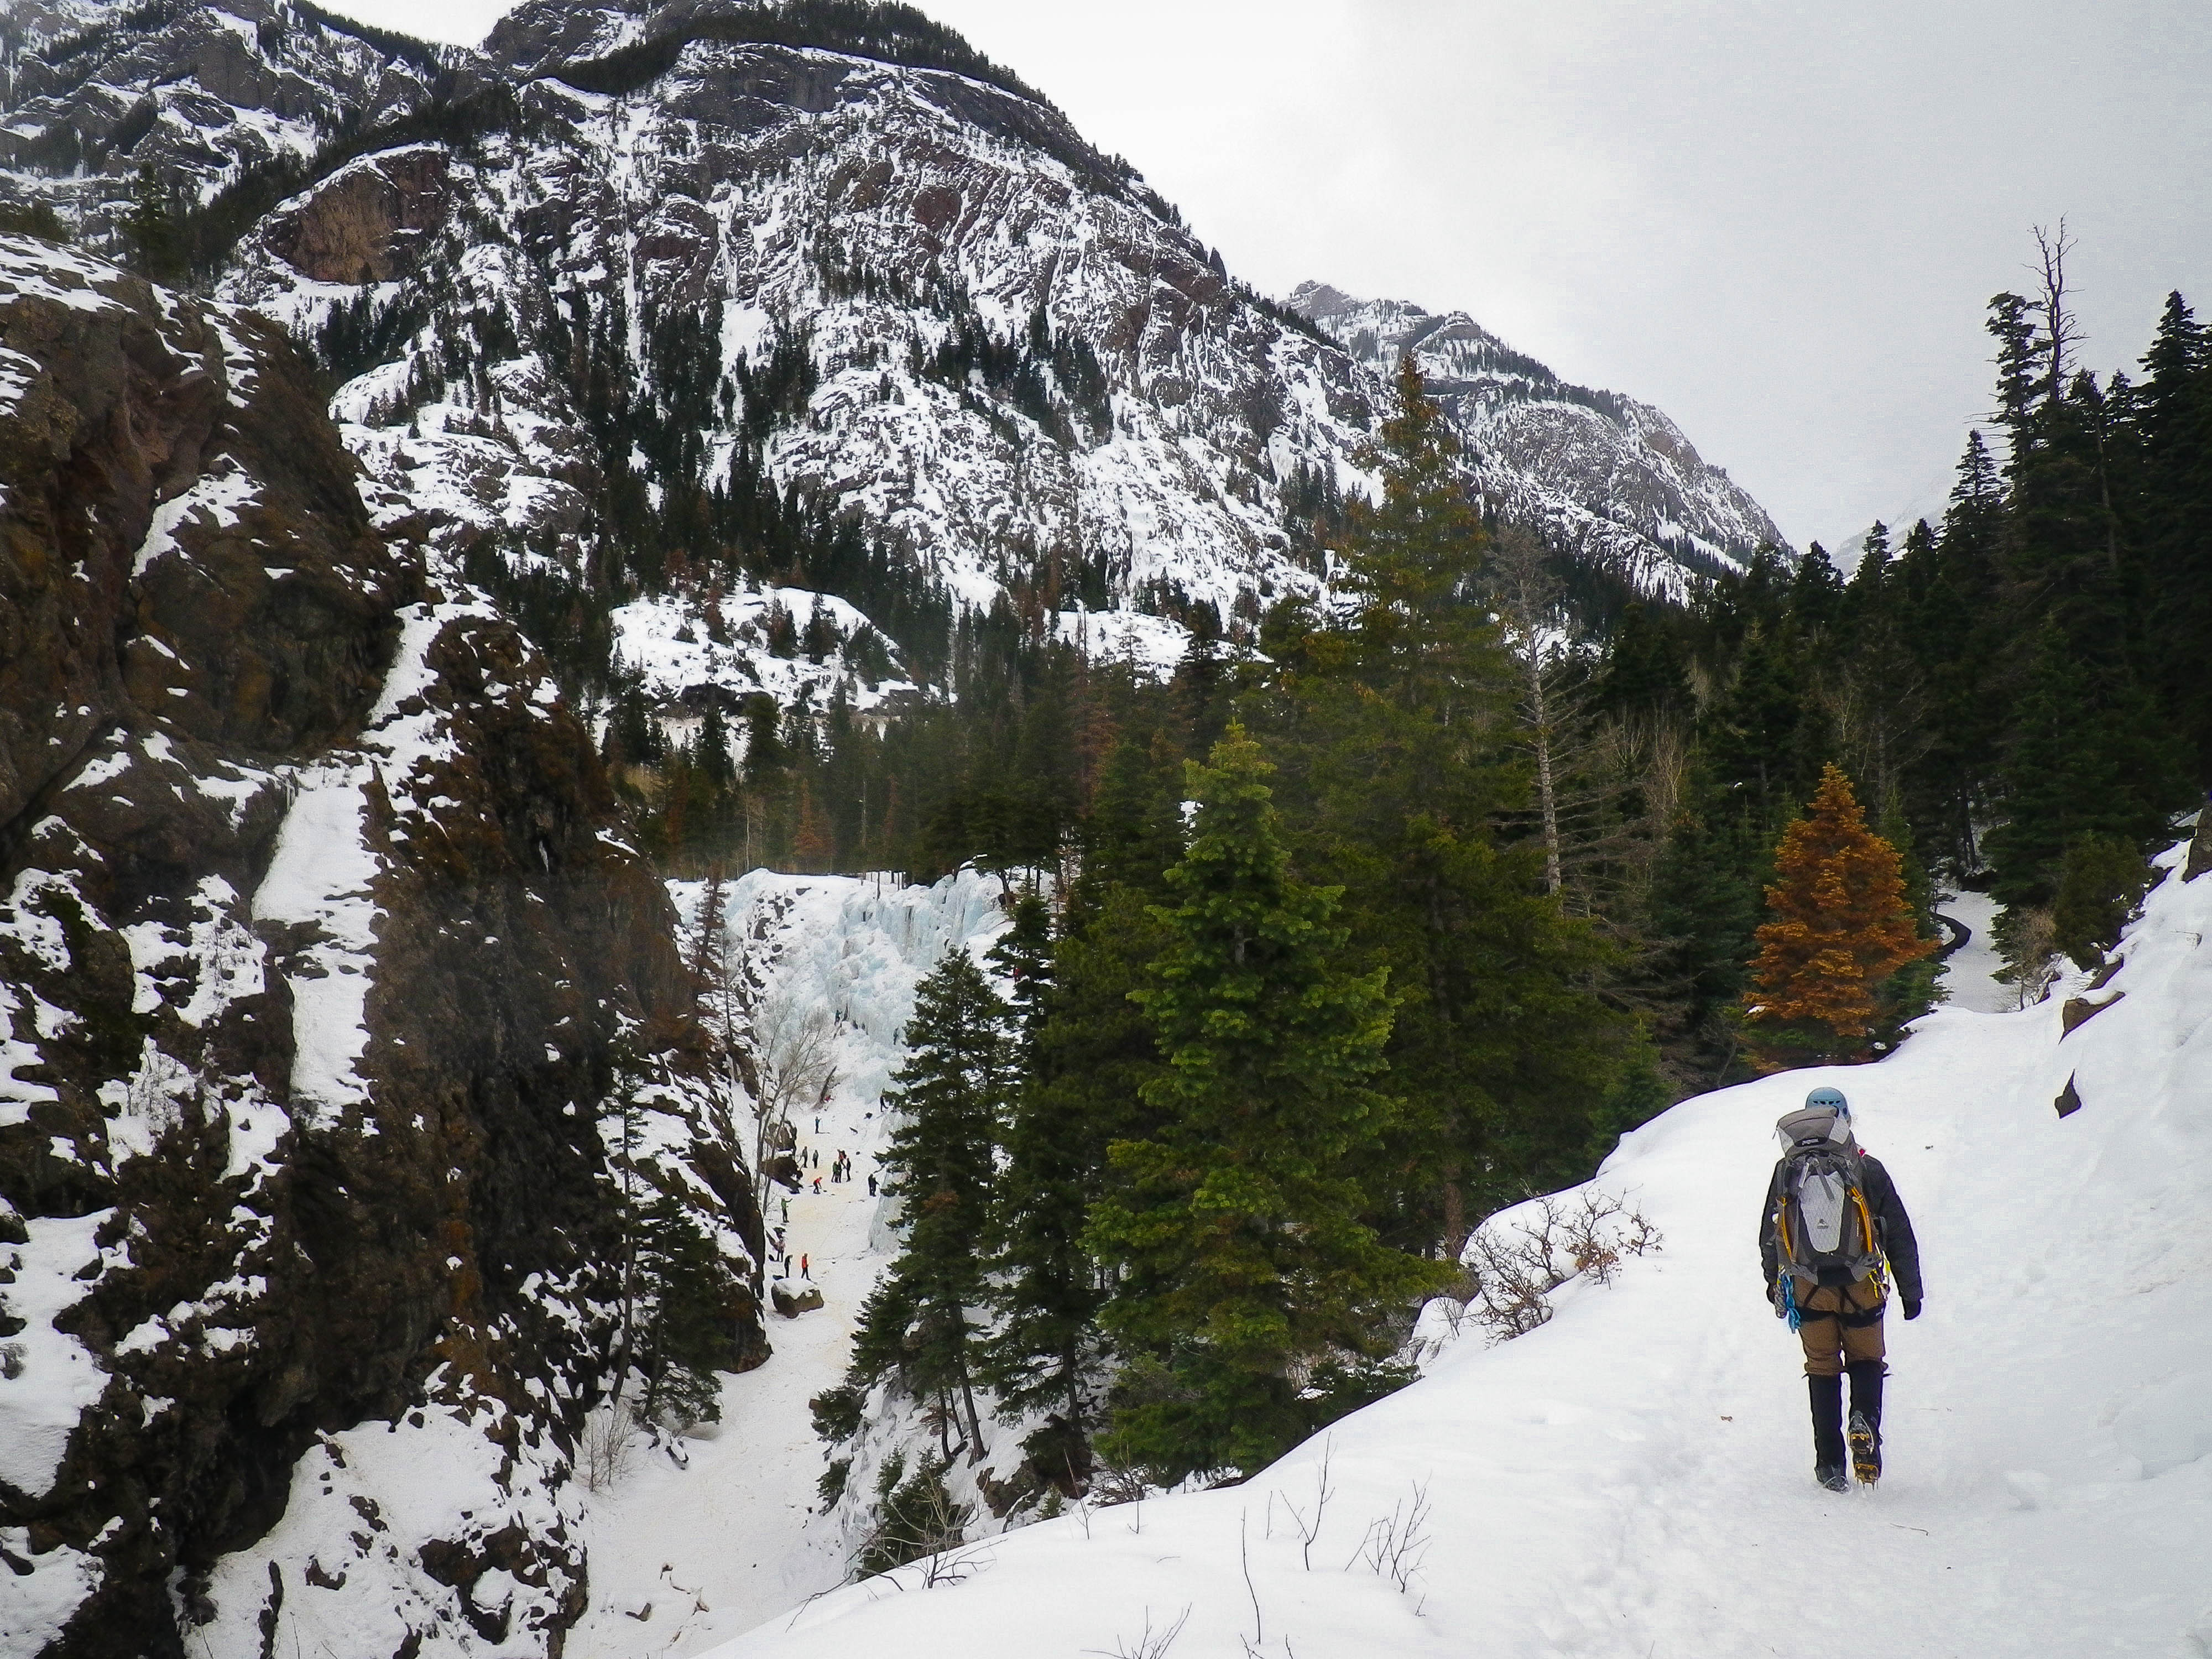
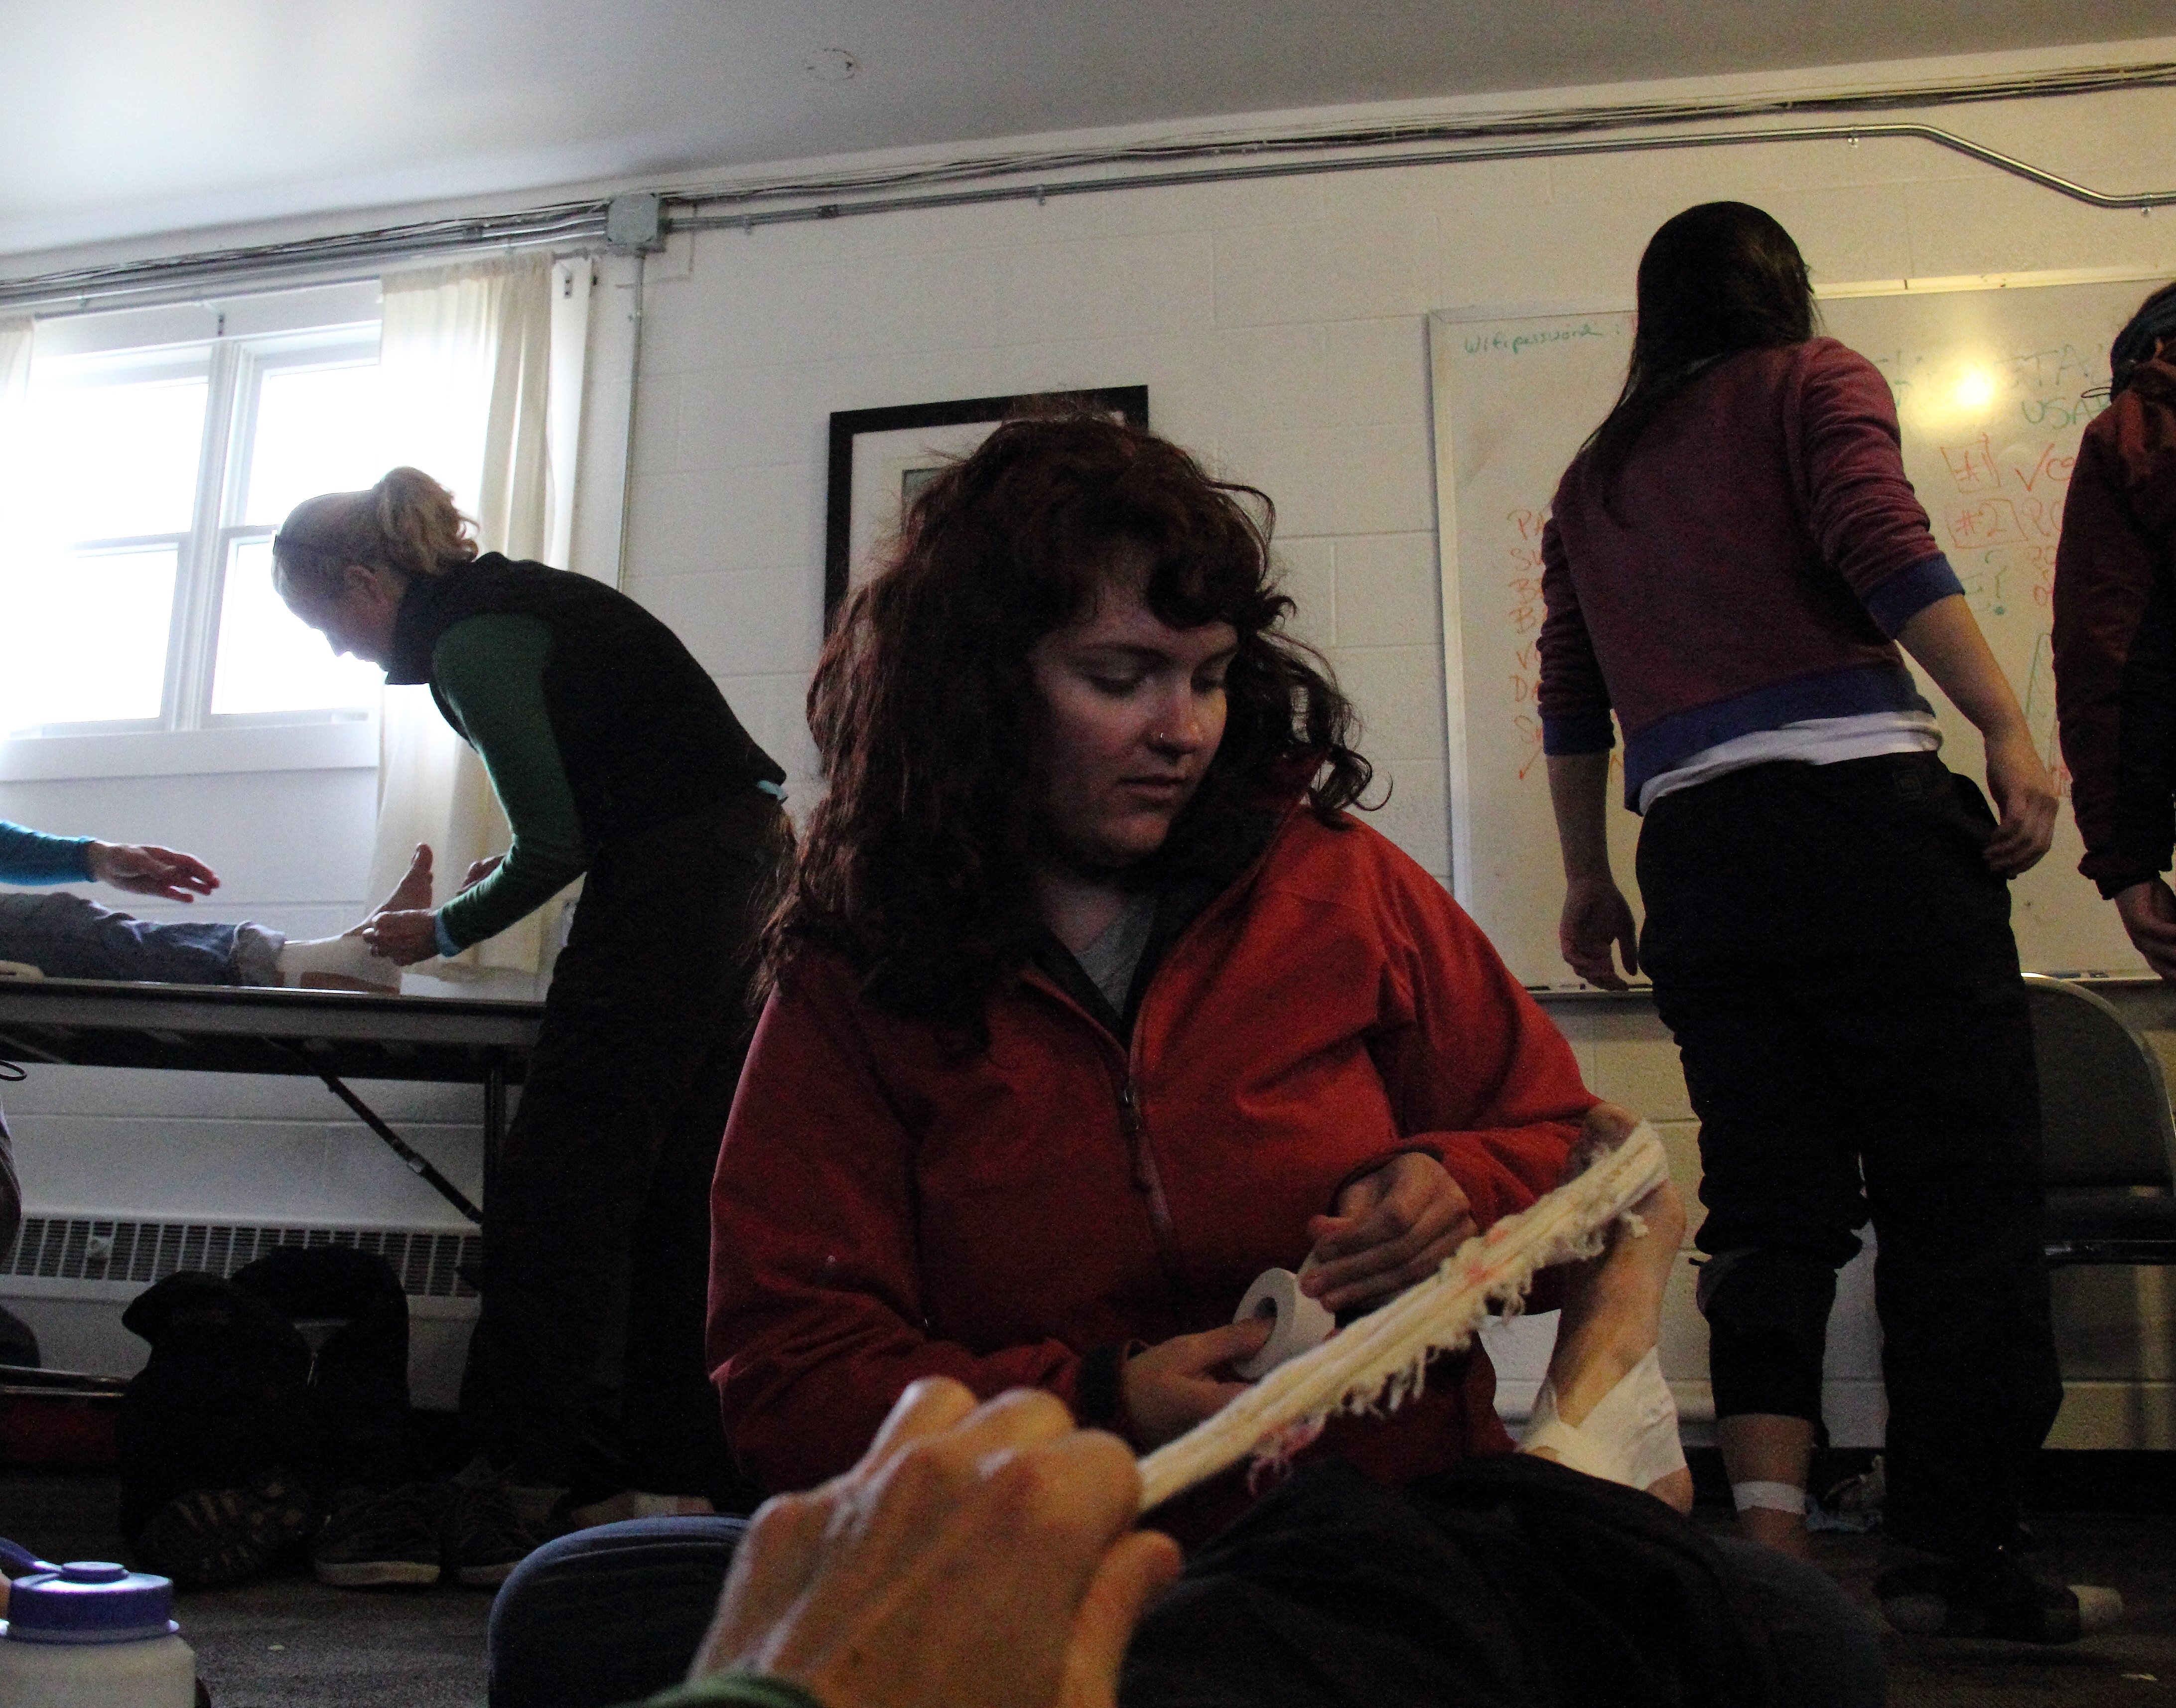
Day 1- We started out the day walking to the ice park. Karen suggested we walk and I’m really glad she did. As we walked we consulted the guidebook to get the lay of the park. We donned our harnesses, crampons, and helmets at the gate of the park (that’s the rule!). We decide that “Schoolroom” would be the best place to start. The anchors are all located along a catwalk above the climbing area. The anchors are numbered and bolted and there are several WI2 and WI3 climbs to warm up on. We chose our bolts – #10 – and set to constructing our anchor. The anchors at Schoolroom need to be extended, so long static line, cordelette, or webbing is required. I had brought along a 30’ static line. I used several figure-8’s on bights to set up a redundant anchor with two opposite and opposed lockers on the master point. Karen examined the anchor and confirmed for herself that it was redundant. Turns out we work very well together. And, yeah, she was ready to set up her own anchor!

Now, it was time to walk down to the base of the climb. We encountered an icy and steep trail down to the bottom of the canyon. There is a rope hand line to use but with a heavy pack it was a little unnerving. With caution we made it. At the bottom of the canyon I would find my potential waterloo – a ladder bridge over the creek. I’m not known for my log crossing ability so seeing the ladder bridge definitely gave me a pause. I held my breath and took short, careful steps. I managed to not fall in! Small victories.

IMG_8017

The ladder bridge… I did not like it!
Photo credit – Terri Barry

The climb we set up on anchor #10 is number 60 “Teacher’s Pet” WI3. There were two lines off of the anchor so we got two climbs for one. It was a nice mellow start to the trip. Pretty easy climbing and a good warm-up. We both climbed both lines. Next we headed back up to the catwalk, which involved crossing that ladder bridge again. Good practice for me! We moved our rope to anchor number #9 and the climb is number 61 and is called “Report Card” WI3. We were able to move our anchor as it was constructed since the set-up was the right length for this climb too, that saved some time. That allowed us to easily get two more lines climbed. Four routes of WI3, all 32m, for the first day was ok with us! I felt like I was getting into my climbing groove and Karen was feeling pretty confident too. It was 3:30 and the park closes at 4pm. So, we hiked up to the catwalk and gathered up our rope and anchor materials and headed back to the Comfort Inn. The temperatures the first day were in the 40’s so we weren’t cold at all. I hardly used my down jacket or down mittens when belaying.  That was nice but we were wishing it was a little colder. The forecast was not hopeful though, each day was forecasted to be warmer than the last during our trip.

IMG_7991

Our first anchor and climb in the Ouray Ice Park!!! Yay!!!
Photo credit: Terri Barry

Day 2 – Once again, after a full breakfast, we walked to the ice park. This was a really nice way to warm up in the morning. And you don’t have to fight for one of the few parking places near the park. I highly recommend walking! We headed back to Schoolroom mulling over whether we would start on a WI4 route. This worked out well because, although we left earlier than the day before, when we got to the Schoolroom there were already lines set up on all the WI2 and WI3 climbs. Get there early, early if you want easier climbs! So, while we debated how quickly to up the difficulty, today it seemed, we would have no choice. We grabbed the WI4 bolts we were standing at, #8. This climb is number 62 “Recess” WI4 in the guide-book. We continued to use the anchor setup from the day before, it worked just as well on this anchor as the previous two. We debated rappelling this time but we both felt a little unsure about climbing over the railing along the catwalk. Maybe next trip. Instead, we walked down the same trail from the day before, the rope hand line was beginning to feel routine and the ladder bridge not so threatening. The climbing lines on this anchor were definitely steeper than those the day before. I started first and really enjoyed getting on some steeper ice. The temperatures were barely freezing over night so the ice was definitely “hero ice” meaning the tools place very easily. The lines on this anchor were really fun! But I was also eyeing the lines to the right, thinking we would move to those bolts (#7) when we were finished. Then, someone yelled “Rope!” and down came a rope on those lines. Happily for us, the group on that anchor was interested to share ropes with us. This turns out to be common at the park. Of course, not everyone wants to share. And, of course, you should check out the anchor before you share. Karen and I were very happy when Thomas (the owner of anchor #7) said our anchor was bomber! We knew that but it was nice to have someone else say it too.

I’ve had the opportunity to ice climb several times each season since my 2010 class. So, I usually feel pretty confident in my climbing. But for Karen, this was the first time she had ice climbed in 2 years. So, understandably, the first day she was a little tentative. But, each day we climbed, she visibly improved. It very so was fun to see her make leaps in technique and confidence each day as she got her ice climbing mojo back. Day 2 plus steeper ice was just what she needed! We both ended the day on 5 lines. Having gotten some great climbing under our belt, we were ready for our Day 3 with San Juan Mountain Guides.

IMG_8019

Schoolroom is always busy, even during the week. Get there early!
Photo Credit: Terri Barry

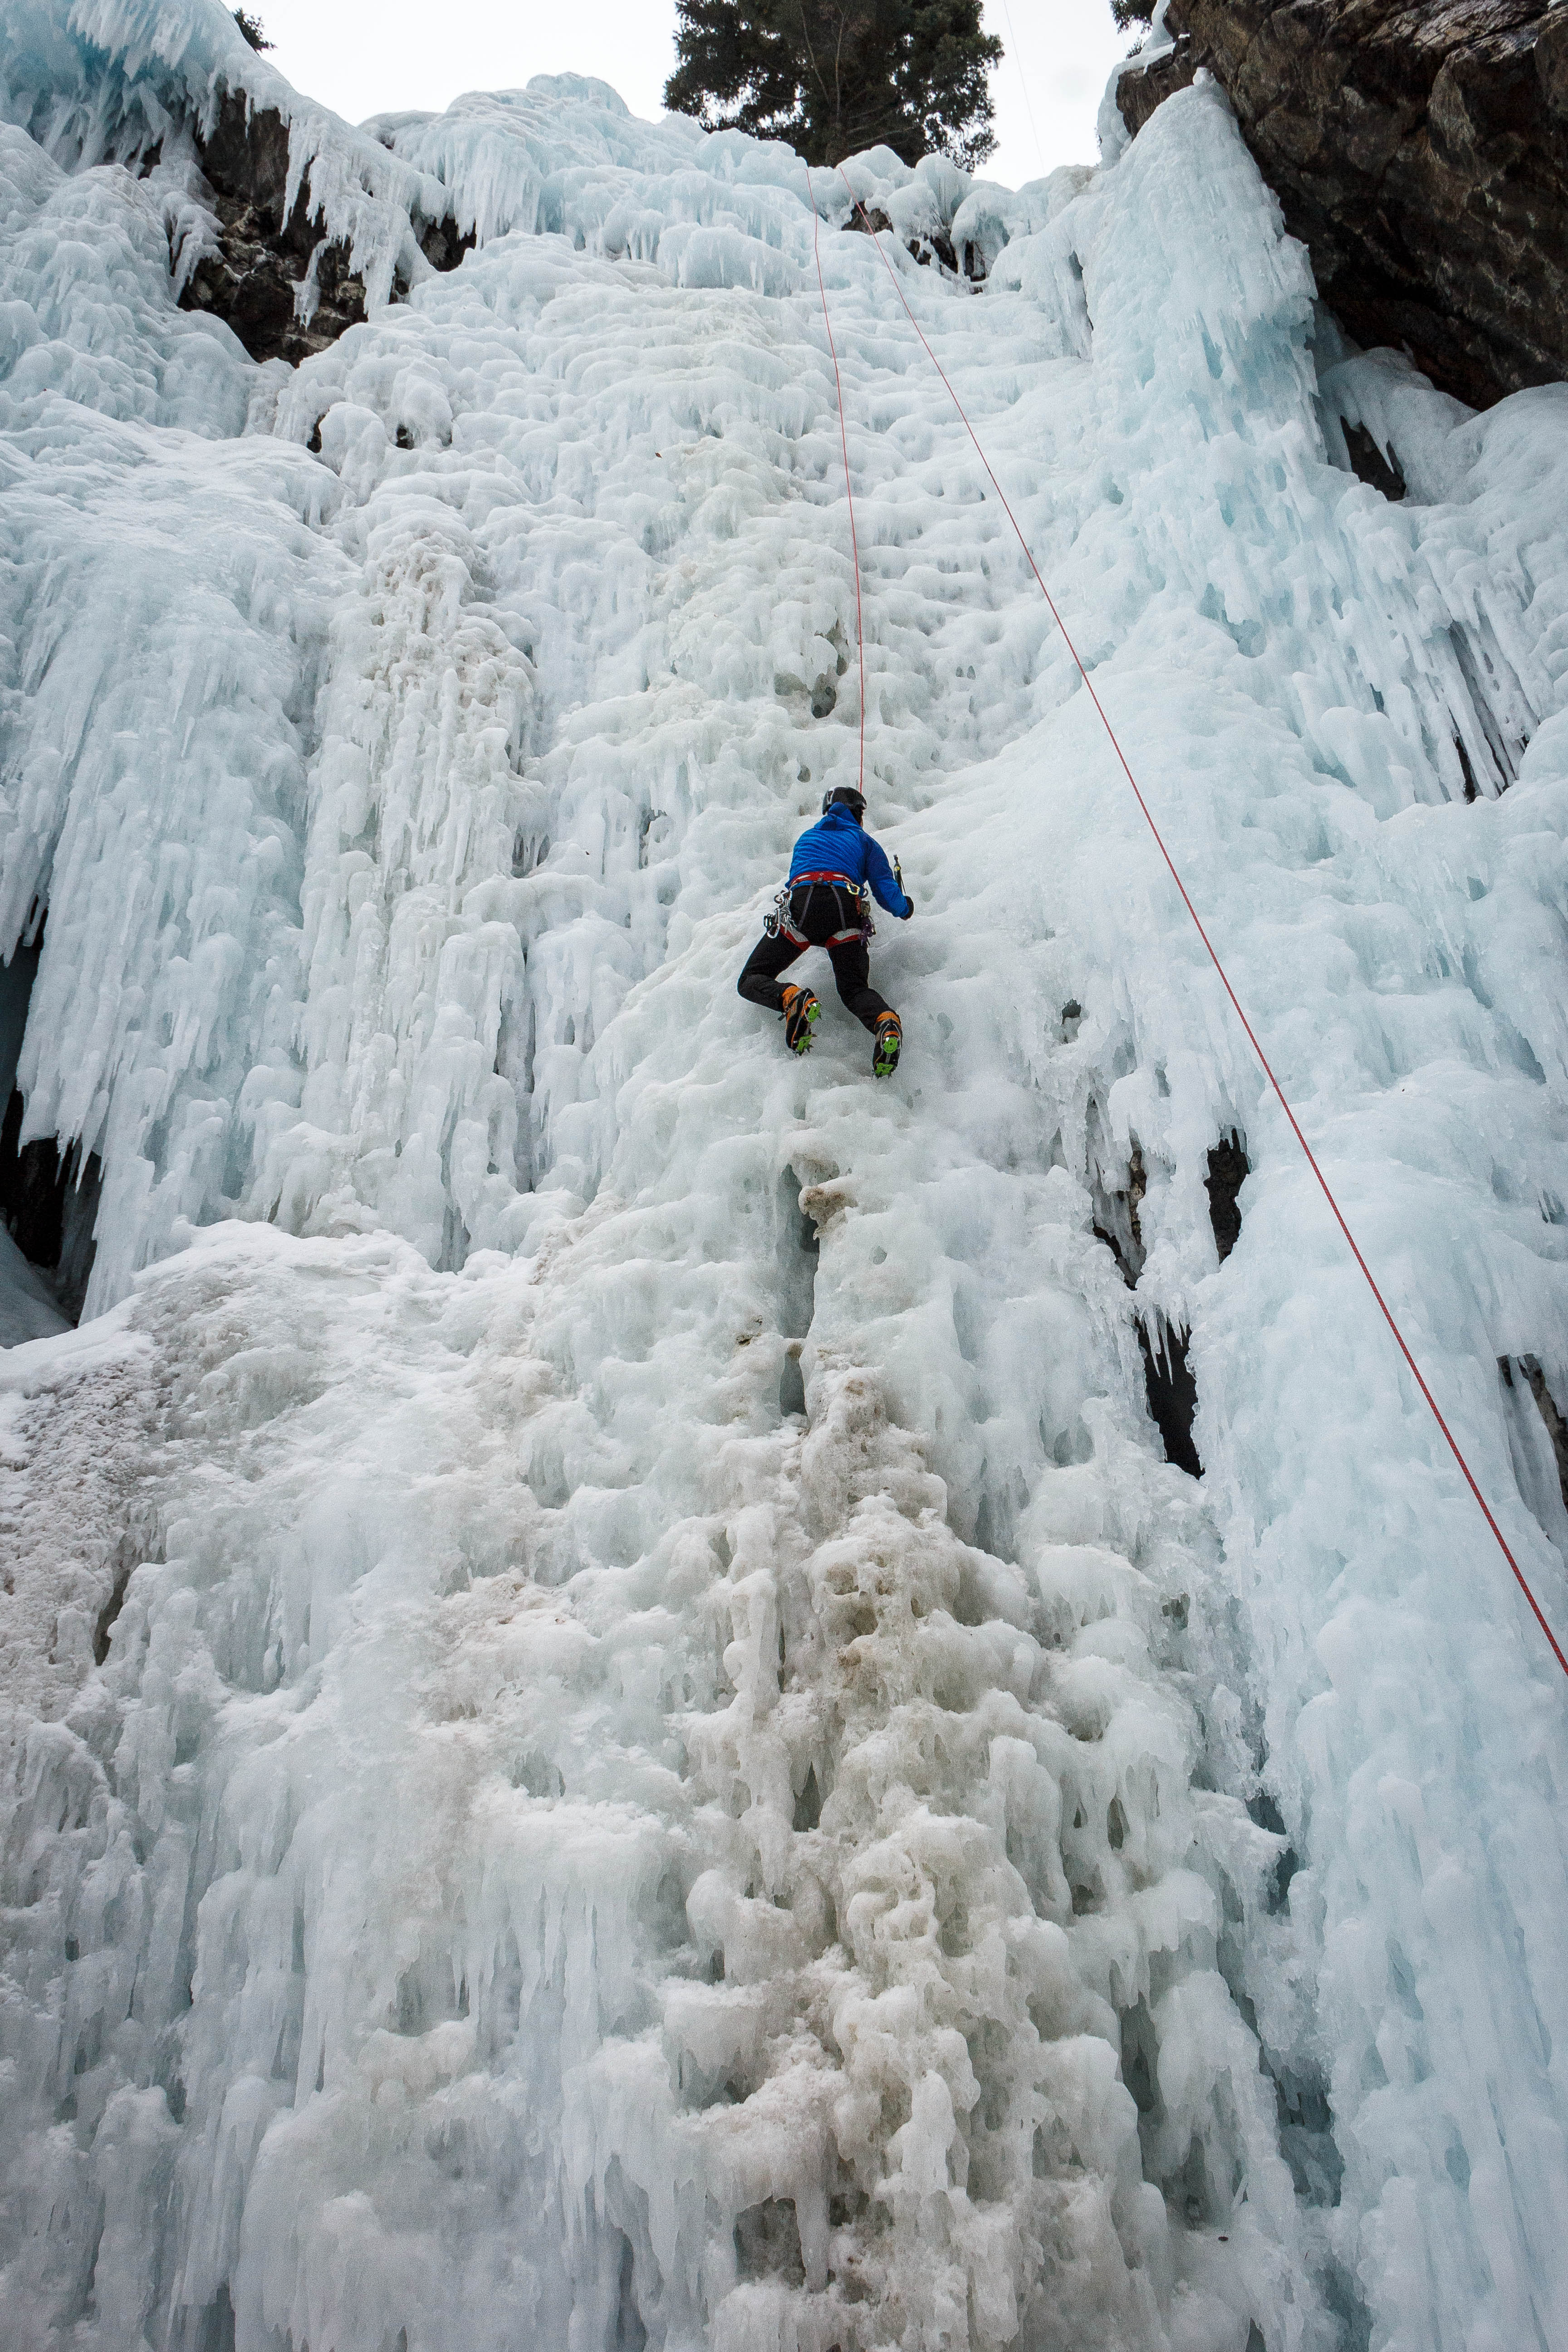
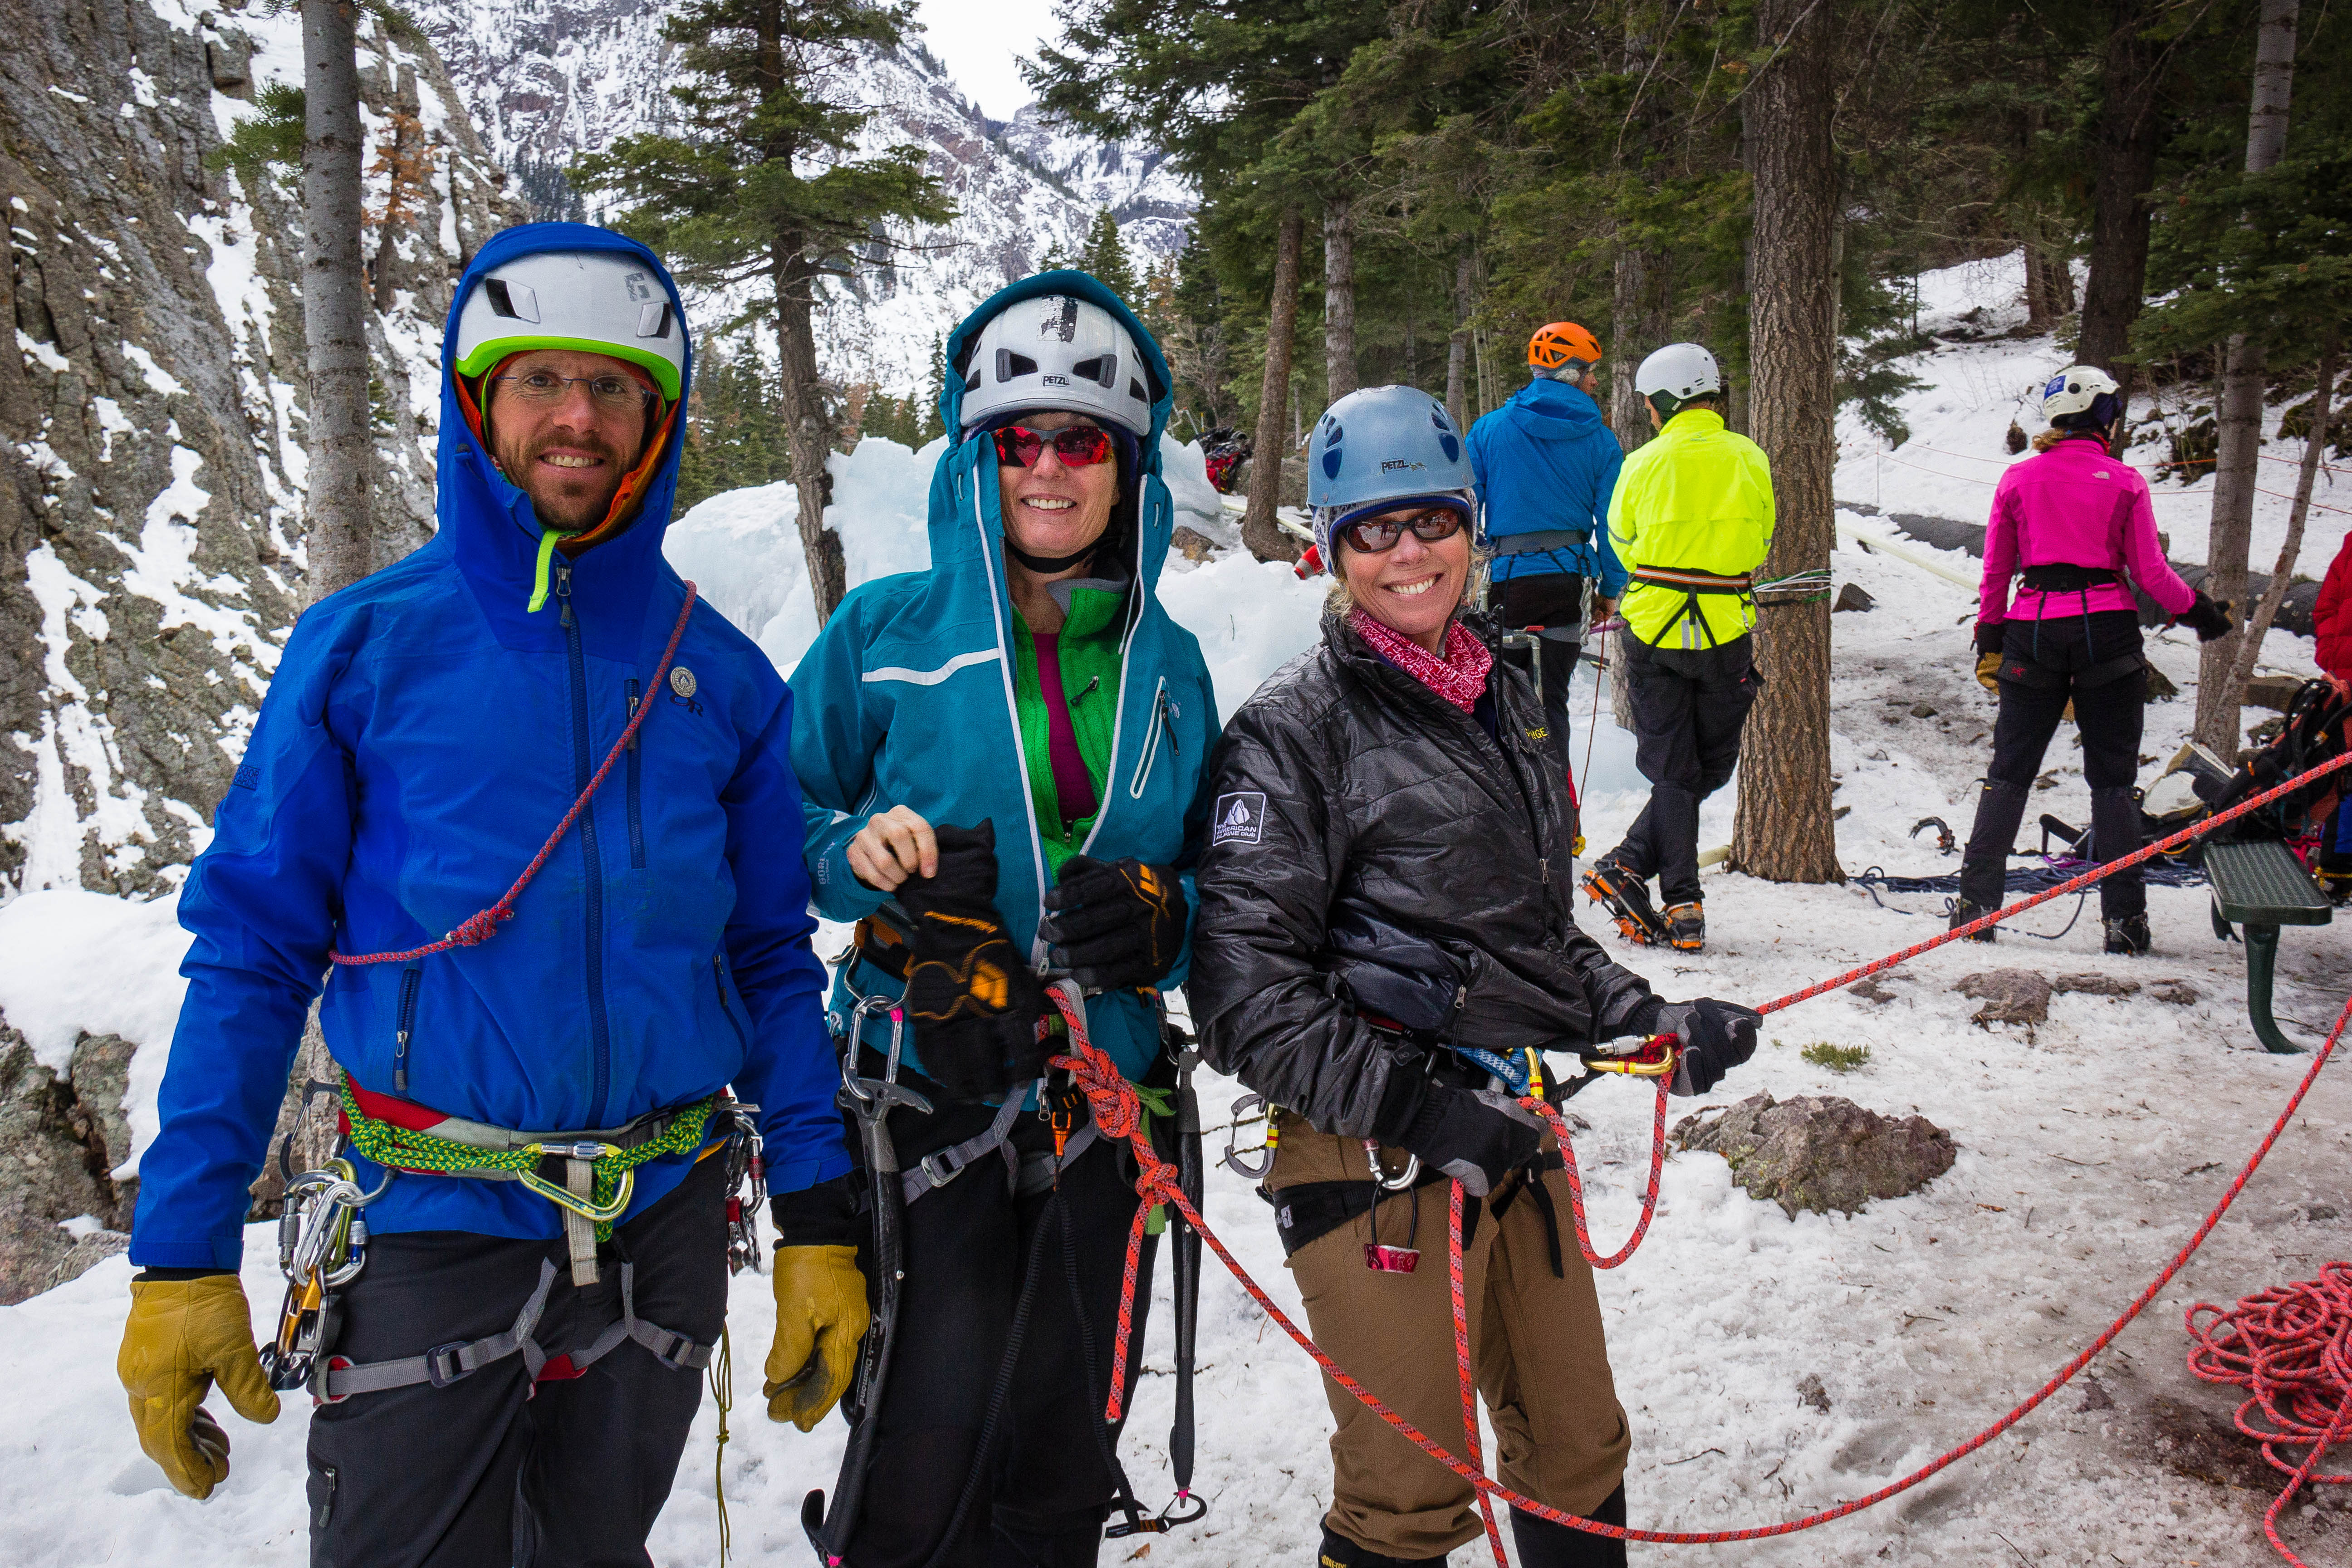
Day 3 – Guide Day! We headed to the San Juan Mountain Guides office at 7:30. We met our guide, Gary, and then found out Gary would have a shadow guide for the day, Jeff. Jeff is already a guide but is working towards his IFMGA Mountain Guide certification. Gary is already a IFMGA Mountain Guide, thus the shadowing. Sweet! This was shaping up to be a great day. Once again, we walked from the office to the park. We let Gary know that we have a couple of objectives: we wanted to build anchors in more challenging areas, climb steeper ice, and work with lowering a climber into to the canyon and then belaying the climber from the top. We started above an area called Alcove. We located a bolt/chain anchor on Route 79 “Dream Team” M4. Setting up the anchor would mean stepping down the slope and clipping in to the chain with our Personal Anchor Systems (PAS) because the master point would be towards the bottom of the chain. First Karen and then I stepped down on to the groove that the chain was in. It wasn’t as steep or difficult as it looked and I felt quite comfortable once I took the first step. Gary handed Karen and I a variety of anchor materials and said, “ok, show me how you’ll build an anchor.” We consulted each other and then set up a very nice anchor based on a Super-8 master-point. Once we were done Gary pointed out that we had left the rope up on the top of the slope. Neither Karen nor I had even thought about the rope. Luckily Jeff was there to hand it to us! Rope in the master-point lockers locked, rope tossed over the edge and we were ready to set up the next anchor. This one was Route 77 “Flamenco” WI4 and involved stepping out  on to an exposed slope to anchor off a tree. We had considered this route on Day 1 but the exposure getting to the tree and the need to rappel into the climb had changed our mind. Today it was much easier! Gary showed us how to approach the tree safely and we had no problem setting up the anchor off the tree. Soon we were rappelling into the Alcove and it was time to climb.

IMG_8037

Jeff climbs in the Alcove.
Photo credit: Terri Barry

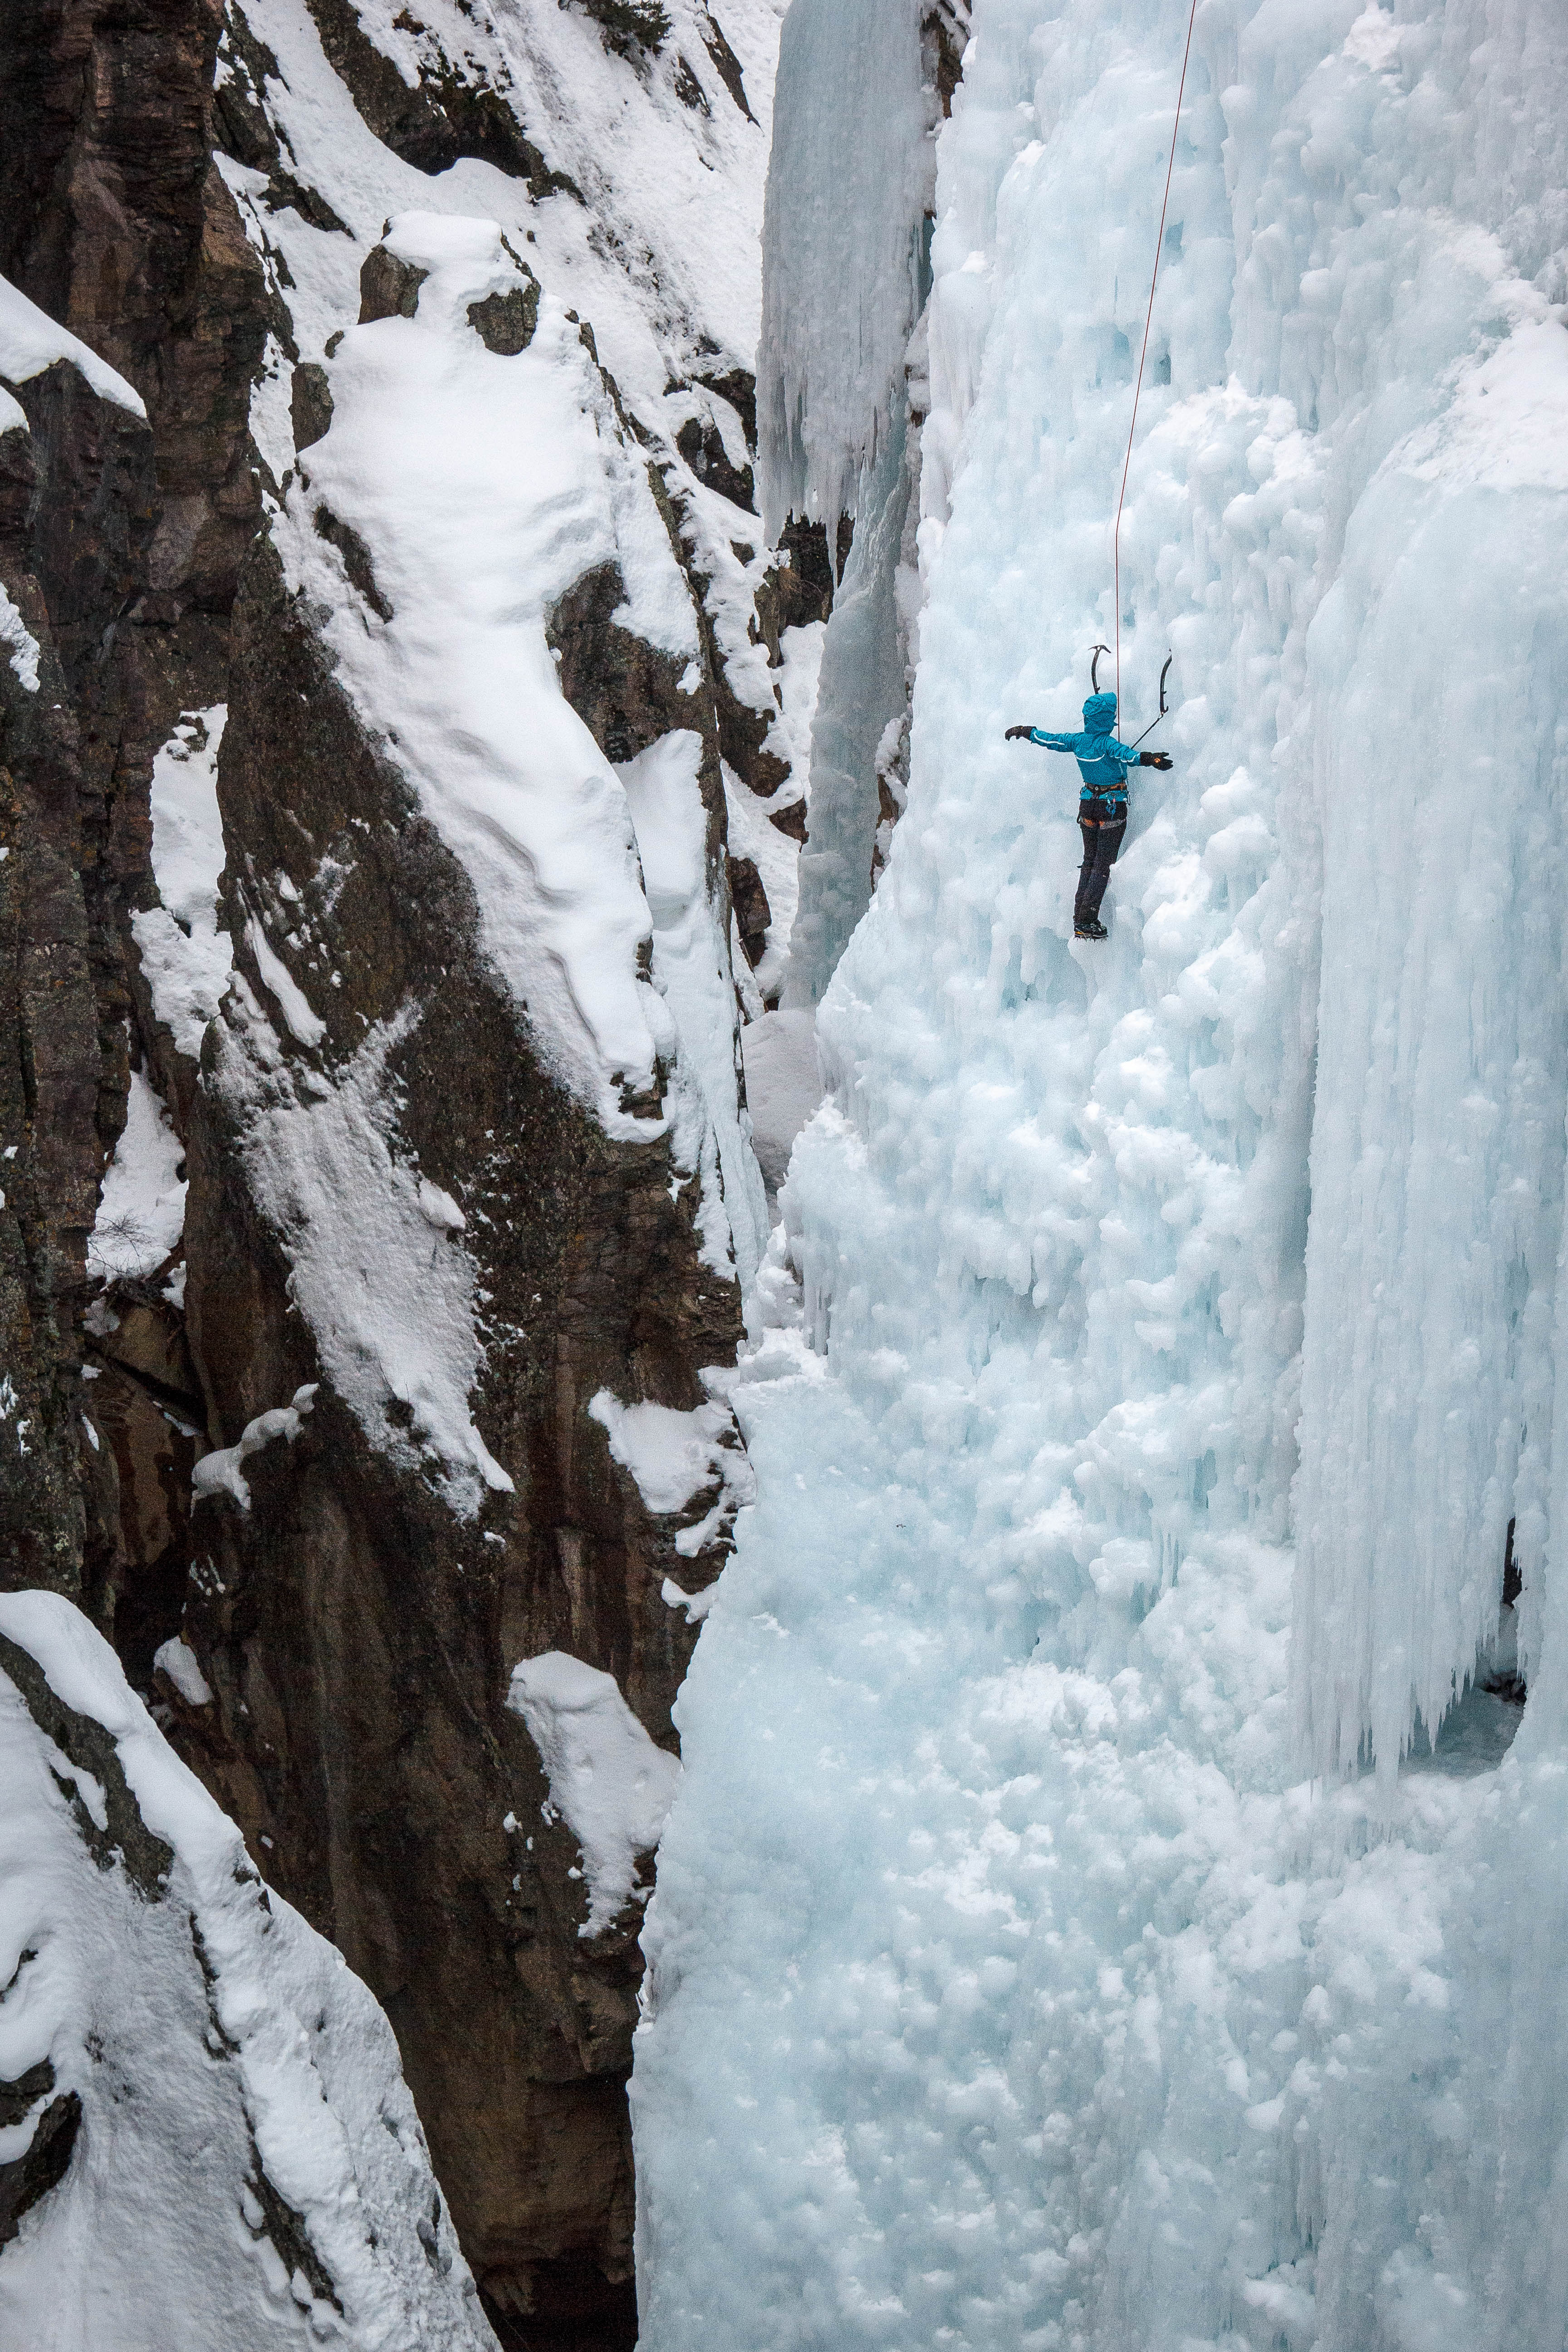
On Flamenco, Gary showed us a demonstration, the delicate ice climbing dance. He moved so fluidly it was fun to watch. Once we started to climb I found that, although I could climb long WI4 pitches relatively easily, my footwork definitely needed improvement. I concentrated on the pattern of tool work and footwork that Gary had demonstrated. I already had the “monkey hang” down from my very first route 2 years ago – it just came very naturally for some reason. But that was Karen’s lesson to work on. She ended the day with a very natural looking “monkey hang.” She remarked how much easier it was to climb once she got the hang, as in “monkey hang,” of it!

IMG_8081

Karen looking good climbing in the Alcove.
Photo credit: Jeff Witt

While we were climbing Jeff had set up a line off Route 79 that was all ice rather than a mixed route. It was a very interesting line that started with a shelf to be gained a couple of moves into the route, then some fancy footwork to move to the right and up on to some very steep ice. It was very fun and a little challenging. Perfect way to step up the difficulty. Both Karen and I learned quite a bit on that climb. Once we were finished with that line it was time to move on to the next area. Jeff climbed out on Flamenco and belayed us from the top so Karen and I could climb out side-by-side. We needed to stay level with each other so we had to work together. It was a great challenge for both of us. I actually had an unexpected fall because I wasn’t paying attention to my tools while I waited for Karen. I felt secure while I waited but the ice was softer than I realized due to the warm day and my tool left pulled straight out of the ice towards me while I had my hand off my right took shaking out. Luckily I didn’t get a tool in the face! That was a lesson learned.

IMG_8091

Gary, me, and Karen at the top of Pic O’ the Vic. I’m ready to be lowered it!
Photo credit: Jeff Witt

Once on top we disassembled the anchors, coiled the rope and headed to the next climb. This is where we would work on lowering a climber in to the canyon and then belaying from the top. We would do this on the classic route, Route 93 “Pic ‘O the Vic” WI4. We set up our anchor slinging a large tree using the climbing rope and a Follow-Through Figure 8. Then we worked on the lowering setup and how to change to the belay from above, off the anchor set-up. I had done both before but this was new to Karen. She picked it up very quickly and soon Gary was asking me if I was ready to climb. After spending the day together he had (correctly) sized me up as ready to be lowered into the canyon and climb out. Of course I was!!! I was hoping to get on one of these long, steep climbs. Pick ‘O the Vic is 45m. We worked out our signal system since we wouldn’t be able to hear each other. Loud whoops and/or rope tugs. I step backwards toward the edge as Karen lowered. I couldn’t see the bottom for probably the first 10m. Then it finally came into view. It was awesome! So far down there. Karen lowered me smoothly. Towards the bottom the ice disappeared and a giant chasm opened up. My feet were suddenly free in the air. I had to keep myself right and aim for a stable point on the ground as it came up to me. Standing on the ground I though, “uh oh, how do I start this climb?” Then I remembered that Gary said that my route and the route immediately to the right started in the same place. There to my right was a giant pillar. Whew!

IMG_8102

That’s me in the blue jacket. I’m climbing Pic O’ the Vic. So, so fun! Gary checking my progress from the top.
Photo credit: Jeff Witt

I made my two whoops but heard none in return. So I waited for rope tugs. When I though I felt them I made a couple of move off the ground but I had slack in the rope that wasn’t pulled up. So I down climbed back to the ground and waited. Then I felt two distinct tugs and the rope stayed taught. Ok, time to climb! It was a joy to climb that route. I couldn’t see the top from the bottom, just as I couldn’t see the bottom from the top. So much ice! And the climbing was easy, even though it was relatively steep. I was having the time of my life. I practice my ice dance, rested, and danced some more. If I could do nothing but climb long, steep ice the rest of my life I would be happy. At one rest as I shook one hand out, then changed to the other, I realized I could do a both hands off the tools shake. It was absolutely awesome – and Jeff, who was on the bridge taking pictures, got me taking my both hands off rest!

IMG_8119-2

Hands off rest! It felt great. Pic O’ the Vic is an amazing climb.
Photo credit: Jeff Witt

As I move closer to the top I saw Gary peaking his head over the edge, checking my progress. I yelled up a big “Hi, this is awesome!” When I reached the top I was sorry it was over but so happy I got to do that route on this trip. Before the day was over I practiced lowering Jeff into the canyon and belaying him up. That was a perfect way to wrap up the day!

Drone#2

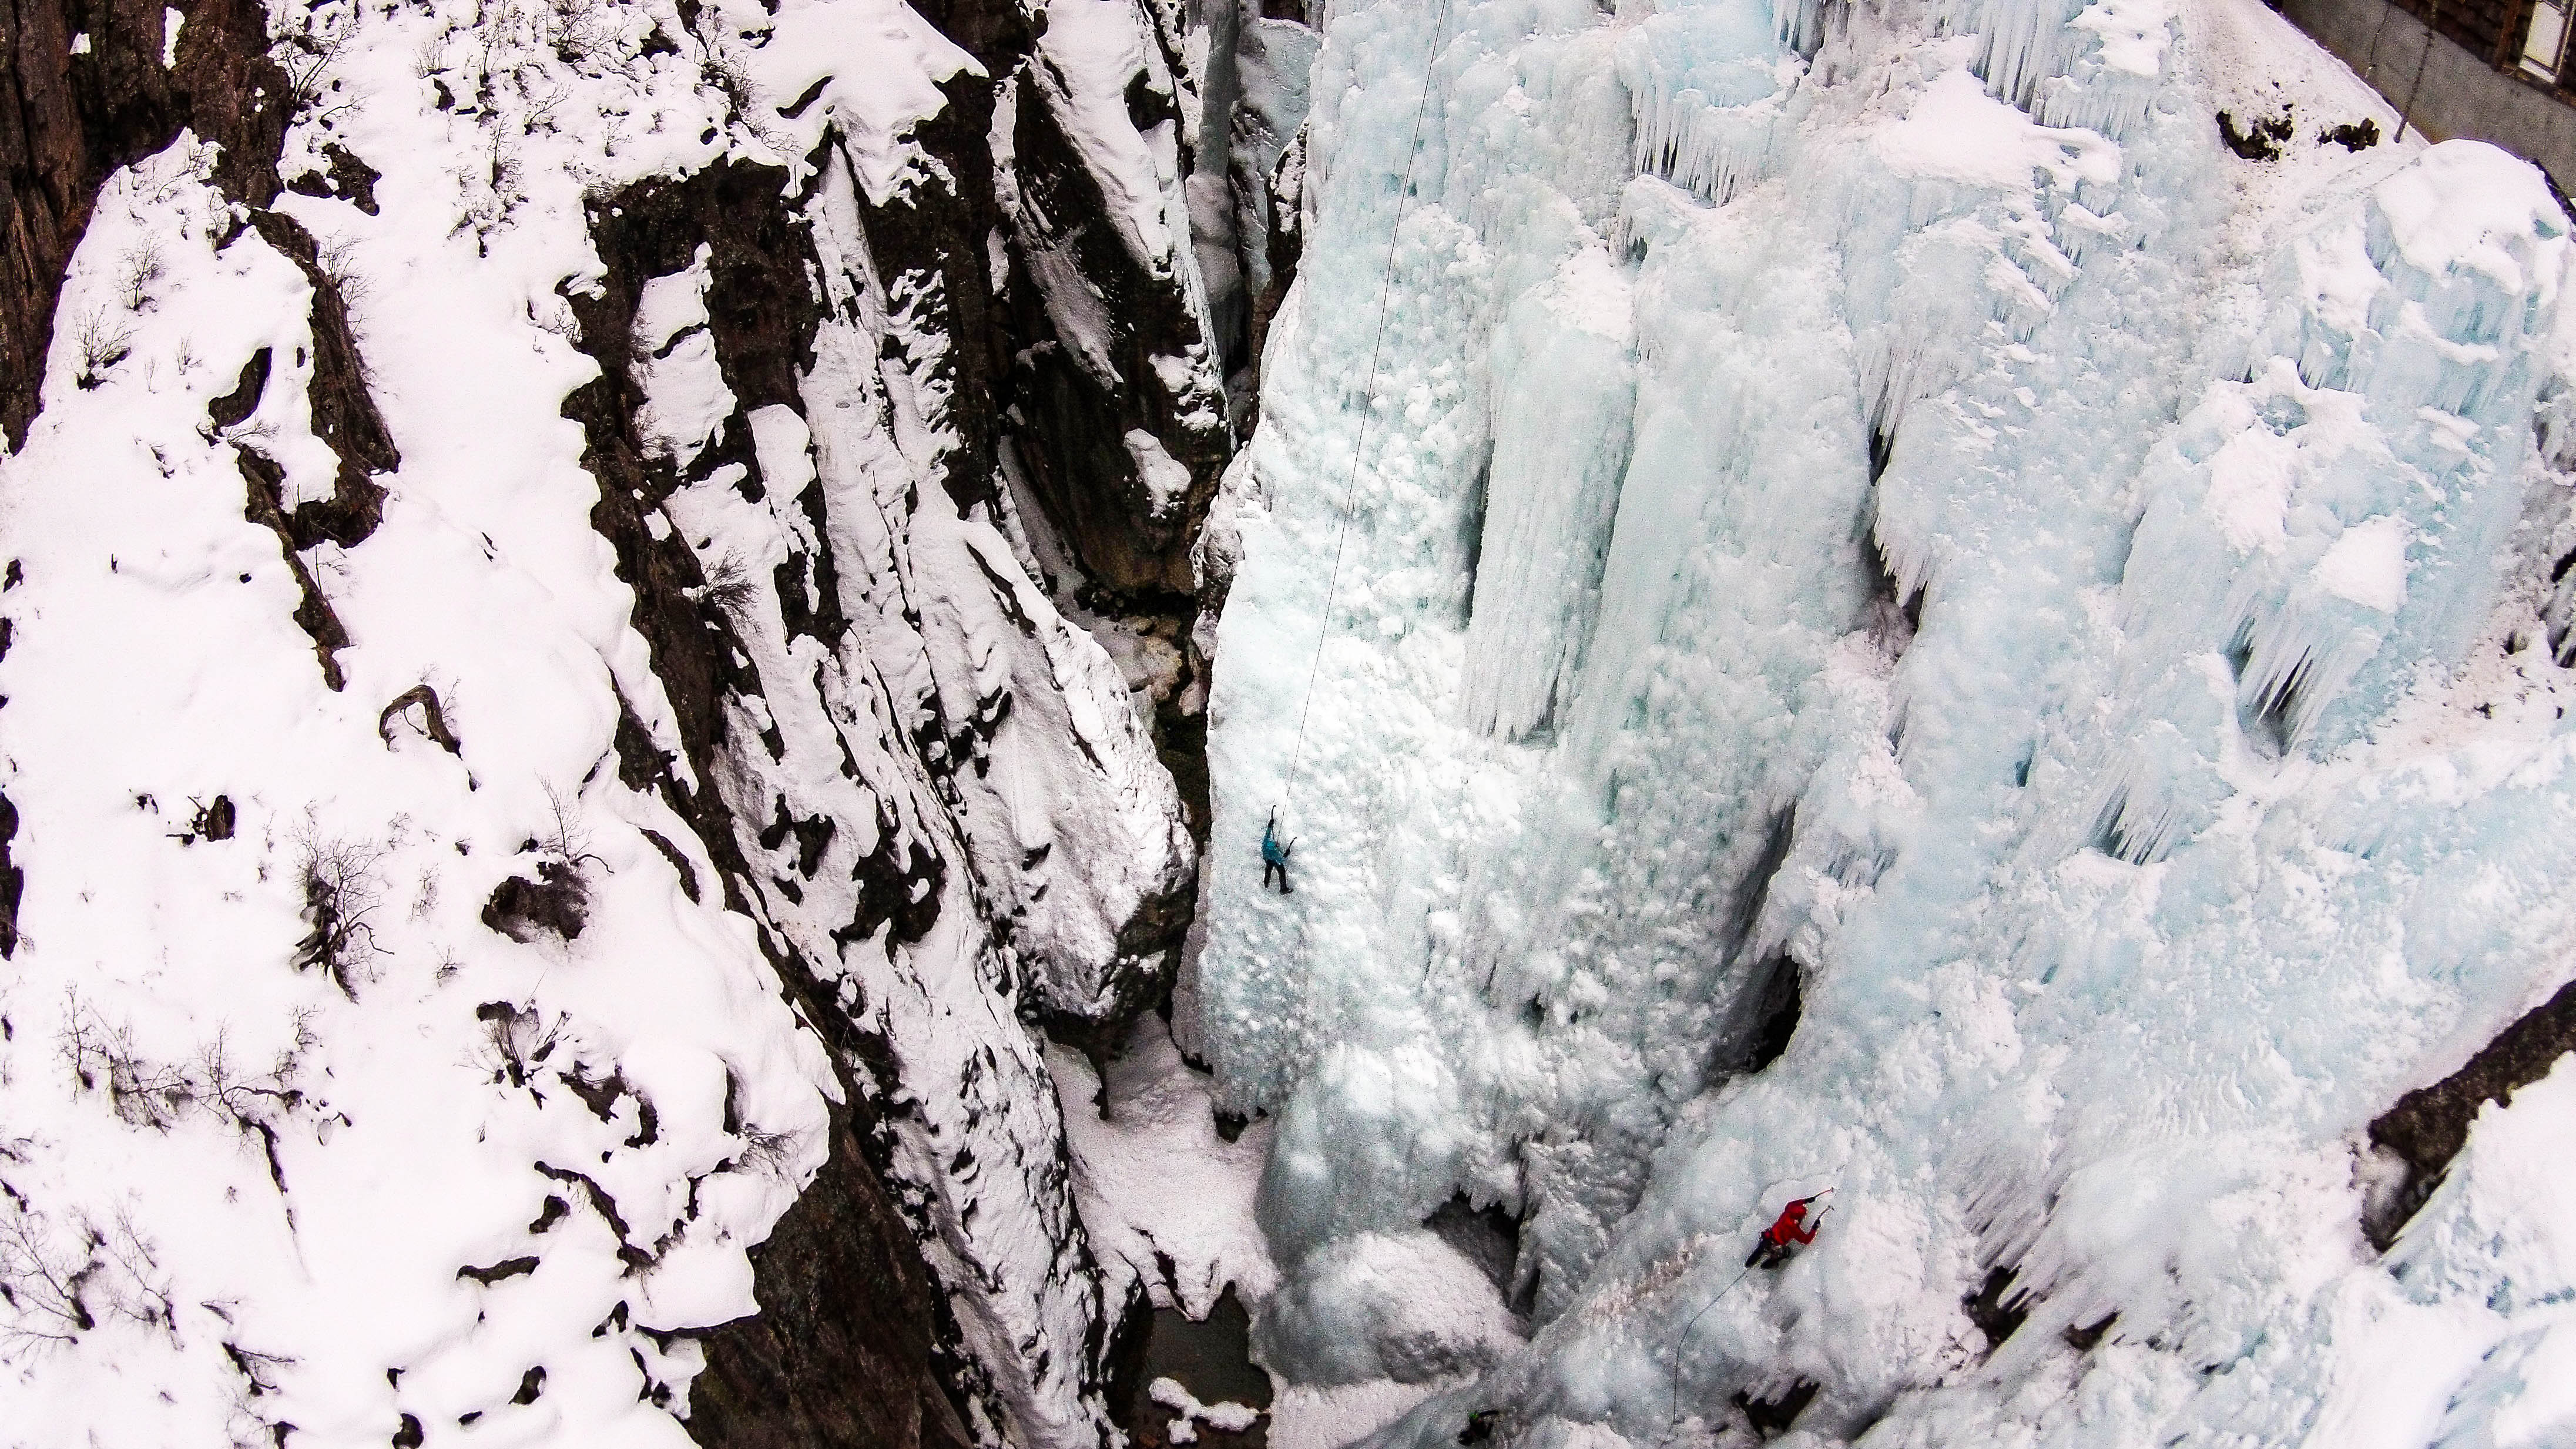
The drone photo of me on Pic O’ the Vic. I’m on the left in blue.
Photo credit – Kevin Koprek

We found out as we left the park that the park manager, Kevin, got some photos of me with the drone he flies each day. I was pretty excited to get those photos in addition to the ones Jeff took from the bridge. Plus Jeff posted a photo of me on the San Juan Mountain Guides facebook page. That was a nice surprise when I came across it as I scrolled through my facebook feed.

That night we headed to Montrose for dinner with Diane and Charlie Winger. I was very excited to meet Diane and Charlie “In Real Life.” Diane and I had become good Twitter friends, then facebook friends, over the last year or so. I knew of the Wingers even before that because of their excellent climbing guide “The Trad Guide to Joshua Tree: 60 Favorite Climbs from 5.5 to 5.9.” They have a great website with quite a few books that they have written together and separately (link). Karen and I met Diane and Charlie at a Thai restaurant in Montrose. We had a great meal and talked up a storm. Charlie and I talked ice climbing practically non-stop, interjected with talking about Chicago since we had both grown up there. But we also talked about the novel Diane had just released on Amazon called “Rockfall,” and Diane and Charlie’s adventures as part of the Highpointers Club (link) which is a group dedicated to bagging the highest point in every stated. Diane has 49 peaks – she says “Just say NO to Denali.” Charlie has all 50, plus all the highest points in every county in Colorado, Utah, Nevada, and Arizona. So, it was a wonderful evening and I feel fortunate that we were able to get together on this trip.

Day 4 – Way too soon it was our last day of climbing. But Karen and I were excited to put our lessons learned on our day with Gary and Jeff to work. We decided to head to South Park, the furthest reach of the park from town. This would give us an opportunity to see the entire park before we left. The hike was a little longer but beautiful.

IMGP4171

Karen walks along the trail with South Park in view to the left. Another very busy place!
Photo credit: Terri Barry

When we arrived at South Park there were already a lot of people there. But we found the anchor open for Route 14 “Not Without My Anus” WI3 (yeah, that’s the name… in keeping with the South Park TV series theme). Note, there is also a second set of bolt anchors just a few feet to the north that are not in the book. Karen wanted to set this anchor up on her own so I observed and took photos of the area (and Karen) while she worked.

IMG_8137

Karen setting up her very first anchor.
Photo credit: Terri Barry

Once she was finished we headed down to the bottom of the canyon via the rope hand line trail. The canyon was full of people but everyone was sharing ropes so that meant we could all climb lots of climbs without moving anchors.  In addition to multiple lines on our rope, we also climbed the unnamed route on the anchor next to our rope, Route 13 “Mr Hanky” WI2, Route 15 “C.H.T” WI2, Route 16 “Super Fun Time” WI4 (it was a super fun time!). The routes were easy enough that we could work on the technique pointers Gary had given us the day before. By mid-afternoon we had climbed a whole bunch and were ready to call it a day. We resisted the urge to climb one more line and hiked back to town. The trip ended on a definite high note!

IMG_8154

The sun came out finally for our walk back. Ouray Ice Park is beautiful!
Photo credit: Terri Barry

IMG_8162-2

Walking past Schoolroom on our way out. This is the catwalk with all the bolts on the left. Climbs are to the right.
Photo credit: Terri Barry

The next day we departed Ouray at 5am. The weather was beautiful so we decided to take Hwy 50, The Loneliest Highway in America. After a detour due to a cattle drive in Utah we arrived in Truckee around dinnertime. I dropped Karen off and headed home to Sacramento. I was home before 9 pm. Another 16 hour drive under my belt. I can’t wait to head back to Ouray at least once next year!

Photo-2

Seriously, this was the detour off Hwy 6 in Utah for the cattle drive!
Photo credit: Terri Barry

My full Ouray photo set can be found here.

#JTreeTweetUp 5!

The view south from Hidden Valley Campground. Joshua Tree National Park. Photo Credit: Terrell Barry

The view south from Hidden Valley Campground. Joshua Tree National Park.
Photo Credit: Terrell Barry

I love Joshua Tree National Park (JTree). I have lived in California since 1974 and have been all over the state, but I had never been to JTree until 2009, shortly after I started rock climbing outdoors in ernest. I have visited JTree many times since that first trip in January 2009.

My second climb ever in Joshua Tree, 2009. Learning the fine are of friction climbing.

My second climb ever in Joshua Tree, 2009. Learning the fine art of friction climbing. Photo credit: Emily Barry

This last November I attended the 5th Annual JTree Tweetup (#JTreeTweetUp). Yes, it is just like it sounds, a gathering in Joshua Tree of climbers who met on Twitter.  I had no idea when I started using Twitter that it would be my most productive climber network. I met Eileen (@rockgrrl), the originator of the #JTreeTweetUp, early into my Twitter life. She is very friendly and helpful and has a great website. Three years ago she encouraged me to come to a #JTreeTweetUp. So, off I went for the first time to climb with a group of climbers I had never met in-real-life. I had a great trip and I have returned every year for the #JTreeTweetup. For this #JTreeTweetup, we were met with fabulous weather and awesome climbing! We spent some time in favorite areas like Thin Wall, but also climbed areas that I had never been to before. This trip was about more than climbing, though. For example, my husband (the Huz), Sport, and I spent a week camping in Ryan campground with our new R-Pod trailer. In 33 years of marriage we always camped in tents or backpacked, but finally decided this year we would upgrade to a trailer. I may never camp in a tent again! I slept well, cooked actual meals, and stayed remarkably clean. I’m sold!

Sport love our new R-Pod. We occasionally let him up on this bed... unlike at home! Photo Credit: Terrell Barry

Sport loves our new R-Pod. We occasionally let him up on this bed… unlike at home! Photo Credit: Terrell Barry

I had several other objectives for this trip. First, I am a 2013/2014 Stonewear Designs Ambassador, and brought several pieces along to product test and review. I had hiking, running, and climbing plans for product testing. Second, I wanted to devote some serious time to using my Cannon 60D camera. The Huz & Sport went off to the Colorado River for a few days so I had some time alone before the TweetUp. I brushed up on my photography skills by taking a hike up Ryan Mountain at sunset to take photos. The hike up Ryan Mountain was great, I highly recommend it. I returned by headlamp as it was getting dark. That alone made for a wonderful hike.

Sunset from atop Ryan Mountain.  Photo Credit: Terrell Barry

Sunset from atop Ryan Mountain. Photo Credit: Terrell Barry

My last objective was to get some serious running in while on the trip since I was training for the California International Marathon in December. A friend suggested taking Keys View Road for my long run, which was a great workout. Except for a few spots, the grade is not too steep, just enough to get your attention. I wanted to run on a road because I was alone. In addition, many of the trails in Joshua Tree are sandy, so running can be a bit of a challenge. This route was beautiful and just about perfect for what I had in mind.

Beautiful run on the Key View Road in Joshua Tree National Park. Photo Credit: Terrell Barry

Beautiful run on the Key View Road in Joshua Tree National Park. Photo Credit: Terrell Barry

That night I met up with Eileen’s group to get the climbing schedule. People came and went according to their own schedules, but climbing was planned for each day Friday through Sunday. We started Friday at Atlantis Wall, which was exciting since the year before we were unable to climb that wall, but climbed Minotaur Wall instead. The climbs at Atlantis Wall were great – I climbed Solar Technology (5.6), Men with Cow’s Heads (5.5) and Wet Pigeon (5.8) and I attempted Ceremony (5.10c). I will definitely be back to this area on a future JTree trip!

#JTreeTweetUp folks climbing on Atlantis Wall, Joshua Tree National Park. Photo Credit: Terrell Barry

#JTreeTweetUp folks climbing on Atlantis Wall, Joshua Tree National Park.
Photo Credit: Terrell Barry

We spent most Saturday at Thin Wall. I’ve climbed at Thin Wall more than anywhere else in JTree, but I always enjoy the routes.  Plus, it was verging on hot in the sun but chilly in the shade so the shade was very welcome! The route difficulty ranges from 5.6 to 5.11a. I’ve climbed or attempted to climb every route on this wall, so each trip I have a comparison to make. I was very happy with how familiar the routes felt. Part of our group spent the afternoon at Brown Wall and climbed Captain Kronos 5.9 and Brown and Serve 5.11a.

Thin Wall, right side. Joshua Tree National Park. Photo Credit: Terrell Barry

Thin Wall, right side. Joshua Tree National Park. Photo Credit: Terrell Barry

Thin Wall, left side. Joshua Tree National Park. Photo Credit: Terrell Barry

Thin Wall, left side. Joshua Tree National Park. Photo Credit: Terrell Barry

Sunday the group split with some going to Hemingway Buttress – East Face Left and my group going to Hemingway Buttress – East Face Right. This was a completely new area for both me and Eileen. We wandered around looking for it until we saw some of our group climbing on the routes. This part of Hemingway Wall is located in an alcove, almost like a grotto. It’s quiet and hidden, pretty fun on a very busy and crowded day in JTree. The routes were really fun, but be warned, we all agreed that the ratings on this wall seemed a little sandbagged. We climbed For Who the Poodle Tolls 5.9, A Farewell to Poodles 5.9, and Head Over Heals 5.10a.

Hemingway Wall - East Face Right Side. Joshua Tree National Park. Photo Credit: Terrell Barry

Hemingway Wall – East Face Right Side. Joshua Tree National Park. Photo Credit: Terrell Barry

Eileen on Head Over Heals 5.10a Hemingway Wall - East Face Right Side. Joshua Tree National Park. Photo Credit: Terrell Barry

Eileen on Head Over Heals 5.10a Hemingway Wall – East Face Right Side. Joshua Tree National Park. Photo Credit: Terrell Barry

This was my first time at JTree as a Stonewear Design Ambassador and I was really looking forward to testing out my selections. I brought my Lola Hoody, Alpha Hoody, Crossback Top, Rockin’ Pants and Sprinter Capris. It turned out that I basically lived in my Stonewear Designs clothing this trip, especially my Rockin’ Pants, Crossback Top, and Alpha Hoody which I wore every day to climb. These pieces were so comfortable and perfect for the weather that I just didn’t want to change! It was chilly in the shade so I needed layering and a warm – but not too warm – top. The Alpha Hoody layered with a silk weight thermal was perfect. Joshua Tree rock is rough, like really rough sandpaper, and I tend to use my elbows and knees to brace when I climb in general, but neither the  Alpha Hoody nor the Rockin’ Pant pilled or tore and the dirt brushed off  really easily. I have to add that the Alpha Hoody/Rockin’ Pant combination is also great for hiking in chilly weather. It was perfect for my sunset Ryan Mountain hike.

My first self portrait with my Cannon 60D and my tripod. My Alpha Hoody and Rockin' Pants were perfect for this hike! Photo Credit: Terrell Barry

My first self portrait with my Cannon 60D and my tripod. My Alpha Hoody and Rockin’ Pants were perfect for this hike! Photo Credit: Terrell Barry

From Left: Thin Wall climbing rocking the Alpha Hoody and Rockin' Pant. Photo Credit: Jeremy Shapiro Ready to climb in my Alpha Hoody and Rockin' Pants! Photo Credit: Eileen Ringwald

From Left: Thin Wall climbing rocking the Alpha Hoody and Rockin’ Pant.
Photo Credit: Jeremy Shapiro. Ready to climb in my Alpha Hoody and Rockin’ Pants!
Photo Credit: Eileen Ringwald

When it was warmer I put on my very favorite Lola Hoody. And, as my earlier review of this top said, it continues to perform like a champ. I did my long run in my Sprinter Capris, and Crossback Top. I have found that the Crossback Top is so comfortable that I it feels like it was custom made for me. It has become my long run go-to sports bra. I always make sure it’s ready to go when I have anything over 6 miles to run. It has been washed and washed and washed countless times, yet it still looks and feels new. The Sprinter Capris are lightweight and breathe well. They also have a pocket in the back that is perfect for a key + one container of Gu. That outfit was a perfect combination for the weather that was unseasonably warm in the sun. Ladies, have a look at the Stonewear Designs catalog. Great clothes perfect for climbing, running, and hiking. And, it is important to me that the their clothes are assembled in the US.

Me and Sport on a run at home - not Joshua Tree but I wanted to show off my Lola Hoody and Sprinter Capris! Photo Credit: Dan Ledesma

Me and Sport on a run at home – not Joshua Tree but I wanted to show off my Lola Hoody and Sprinter Capris! Photo Credit: Dan Ledesma

This was one of my best trips to JTree. I didn’t necessarily climb many routes, but I enjoyed what I did climb. I got to visit with my #JTreeTweetUp friends. I explored new areas, I did several really nice runs, the hike up Ryan Mountain was beautiful and I learned new photography techniques.  I look forward to the trip every year now!

Campfire fun! #JtreeTweetUp 5 Photo Credit: Terrell Barry

Campfire fun! #JtreeTweetUp 5 Photo Credit: Terrell Barry

Check out my post on climbing in Indian Creek with Eileen in March 2013!

I’m a WFR!!!

Me and Emily. Garnet Lake. Ansel Adams Wilderness. 2007.

Me and Emily. Garnet Lake. Ansel Adams Wilderness. 2007.

My daughter, Emily, and I just finished our Wilderness First Responder course taught by Dave Yacubian of ReadySF under the Wilderness Medical Institute (WMI) curriculum. Both Emily and I are now certified Wilderness First Responders (WFR)!  My journey to earning my WFR certification began in October 2008. I was sitting at the first belay of my very first outdoor rock climb. It was a multi-pitch climb on the Hogsback formation at Lovers Leap near Lake Tahoe, California. As my climbing partner took off to lead the second pitch, leaving me alone at the belay ledge it occurred to me that I had absolutely no idea what I was doing. I was totally dependent on her, even though, in fact, I had her life in my hands. The climb was scary, we were not on the route we planned to climb. It was difficult but when we were finished it was satisfying and I wanted to do it again and again. However, I also committed to take classes to learn to be a self sufficient partner.  I took a rock climbing anchors class, climbing self rescue, and wilderness first aid (WFA). At the end of the WFA course I think I knew eventually I would take the WFR course. Then, I climbed Snake Dike on Half Dome in Yosemite National Park with a group from the ClimbOn! Group of MeetUp. The climb was awesome, all five of our parties summited and we and a celebration that night in the Little Yosemite Valley backcountry campground. On the hike out the next day one of our party fell. We were hiking in the middle of a cold thunderstorm and she had on a very heavy pack. It was easy to see she had sustained a tibia/fibula fracture. It was not open but the bone was clearly visible just under the skin. I was the only person in the group with any first aid training and the group looked to me. I put my WFA training into action that day.  I remembered the importance of assigning specific tasks to specific people.  We set about getting her as warm and comfortable as possible.  We found a passerby with a working cell phone to call for help. Then we waited for the rescue personnel to arrive. We were only about 2 miles from the trail head on a very well traveled trail. There was intermittent phone service. I decide not to splint her leg since it was so close to being an open fracture and we were so close to medical help. This was a best case scenario. I wondered about the same injury but a day or more from the trail head. I knew at that moment I would take the WFR. The question just was when.

The “when” happened earlier this year. My daughter, Emily, expressed interest in getting wilderness first responder training. I had no idea she was interested! So, I told her we should take it together. We enrolled in the 10 day/80hr class given by Dave at the Marin Headlands. It’s a beautiful location and close to home – although a too far to commute daily. We would stay at the Marin Headlands Hostel. (Be forewarned about the hostel, many school outings stayed there during our stay. Lots of kids, some groups as large as 30 kids plus chaperones, so it was a chaotic at times.) The class is 8am to 5 pm for 9 days. There two evening session and one day off. So, obviously, we would be busy.

Our class room for 9 days. The YMCA SF - Point Bonita.

Our class room for 9 days. The YMCA SF – Point Bonita.

Emily and I arrived bright and early the morning of May 24. Our instructors for the next 10 days would be Dave and Becca. It turns out this was Becca’s first time teaching the class. That was not apparent at all during the course! Her infectious enthusiasm and detailed instruction were excellent. Dave, the seasoned veteran, was also excellent. Not only does he know the WMI protocols cold and is a patient and thoughtful instructor. He also had many firsthand stories from his experiences in the backcountry to round out our instruction. The first thing we saw in class was Dave and Becca going through the steps of caring for an injured person they come upon in the hiking trail. They were so smooth and seamless, it was hard to believe we would be even close to that skill level at the end of the class. But, spoiler alert, we all had the protocol down pretty well at the end of 10 days! A testament to Dave and Becca’s teaching.

Our class had 29 student with ages varying from 17 at the youngest to 56 (me) at the oldest. Most students were in their 20’s and 30’s. Many were in the class because they had employment working as guides or assistants in youth programs. A few, like Emily and I, were in the class because we wanted personal training. We would all end up getting to know each other pretty well, between the roll-playing scenarios and the studying at night. It was a great group!

Our gorgeous break & lunch view.

Our gorgeous break & lunch view.

The course format was introduction of a topic or topics, then outside for a scenario related to those topics. Typically during a scenario a third of the class was victims (complete with realistic looking makeup) and the remaining two thirds divided up into two person teams. We occasionally did scenarios with half the class victims and the other half the rescuers so we could learn how to do all of this if it was just one us alone and a victim. The first thing we learned was the “12345ABCDE” method of initial assessment. The 12345 is the scene size up protocol, principally meant to prevent the rescuer from becoming another victim. The second half is meant to discover any “life threats” present in the victim that need to be dealt with immediately. This would include airway blockage (the “A” for airway) or sever bleeding (the “C” for circulatory). The “D” is for decision about the spine – hold the head or not.  We spent much of the course learning about spinal injuries and how important it is to be very aware and careful about those injuries.  Basically, fall from height, at high velocity or associated with loss of consciousness are modes of injury that can lead to a spinal injury.  I never thought I would remember what that all stood for but eventually it came naturally, except the “E” (which stands for expose the chief complaint) seem to evade me until the second half of the course. The scenarios at the beginning covered the initial assessment and any other topic we had just cover, such as splinting or wound care. Next we learned the Head-to-Toe exam, the important vitals to take (early and late changing), and the patient history interview (SAMPLE). Between these three new steps in the patient assessment and all the new aliments and injury care, my head started to swim in details. Thankfully, it all began to come together for me after the Wednesday break day but up to that point I really didn’t think I would be able to remember everything.

 Trauma injuries were covered first in the class. We learned how to clean and bandage wounds. Irrigate with drinkable water and nothing more. Use sterile tweezers to carefully remove debris. And bandage.

A well dressed wound. He can probably "stay and play."

A well dressed wound. He can probably “stay and play.”

The simulated burn was particularly real looking. Pour cool water over the wound to cool down the skin. Then evaluate the depth of the burn. The burn below would be full thickness. That’s immediate evacuation time.

Serious burn. Cool it down immediately!

Serious burn. Cool it down immediately!

Dave showing us the basics of litter setup.

Dave showing us the basics of litter setup.

We had a beautiful “classroom” to spend part of our time in. When we learned backboard and litter use we had a lovely view of the Pacific Ocean. We learned our backboard lesson well, our patient allowed us to turn him completely upside down and he didn’t move at all! Dave said that was a really good job because some movement is expected. We managed that without cutting off circulation!

Patient all secure on the backboard!

Patient all secure on the backboard!

Let's check... looks he doesn't move at all!

Let’s check… looks he doesn’t move at all!

We also learned to roll a patient, both with two people and by ourselves. It was much easier than I expected but there is technique to master to make it “easy” on both the patient and the rescuer. One thing I wish I had brought was my pair of knee pads. The head holding job is harder than it seems. I thought I was the only one but several other classmates also said their knees hurt.

Becca demonstrates a one person patient roll.

Becca demonstrates a one person patient roll.

On Monday we had our first of two night sessions. That first night session we learned how to fashion a splint out of just about anything. A good splint needs to be rigid. Immobilization of the joint above and below the break is required. No splint? Do you have hiking poles? Sticks/wood found on the trail? The frame from a backpack? Sleeping pad? The list goes on. Padding? Unneeded clothing (the key there is “unneeded,” never use clothing you may need to keep yourself or the patient warm) or an extra sleeping bag is perfect. Clothes can be shredded for tying. A jacket the patient has on can be zipped and folded up towards the shoulders to start constructing a sling

A sling  fashioned out of my jacket and a triangle bandage.

A sling fashioned out of my jacket and a triangle bandage. I’m good to self evacuate now.

Improvised lower lef splint.

Improvised lower leg splint.

We learned to be creative. The patient’s shoe can be turned upside down and placed against the foot to stiffen a leg splint. The most fascinating backcountry splint was the traction splint for a mid-femur break. After this class I think I will always bring my hiking poles.

Improvised traction splint.

Improvised traction splint.

Emily taping my ankle.

Emily taping my ankle. I’m being a good patient, assisting by holding my foot at the proper angle.

Our first of two outdoor scenarios was at the beach near our classroom. It was a “mass casualty scenario” and those of us who were not victims were assumed to be part of a search and rescue team. We had an incident commander, assistant commander, and a gear management person. The rest of us were broken up into teams.

On our way down to the beach

On our way down to the beach for the mass victim scenario.

When we got to the beach we found 7 victims of a fishing boat wreck. Two of the victims were either in the water or very close to it. One person was running around with only a mark on her head yelling that we needed to help her friends. Shortly after that she dropped to the sand and became unresponsive. My partner and I were assigned to a person who had lost his eye.

Me attending to my patient on the beach.

Me attending to my patient on the beach. Notice I’m stabilizing his head. Photo credit: Dave Yacubian.

Yes, it looked real. And he behaved as if it was real. He asked for his wife, he kept trying to touch his eye, yelling, “where’s my eye!!! I can’t see.” He kept asking about his friends and whether they would be ok, who’s that down in the beach? Is he going to die? Could he work again? It was very realistic. We got a lot of practice calming him down and not giving answers that would lead him to believe everything would be ok. That is really important. We said we were taking good care of him and his friends and nothing beyond that. We did our complete patient assessment, including a Focused Spinal Assessment and we bandaged his eye. Meanwhile, the other groups were attending to the other victims. There was a mid-femur fracture victim who was down near the water. Both the victim and the rescuers ended up overrun by the surf

A moment of back turned towards the ocean can be serious.

A moment of back turned towards the ocean can be serious. Photo credit: Dave Yacubian.

A lesson in don’t turn your back on the ocean – someone always must be watching. Apparently, just about every class that happens. Good learning experience. It was amazing that after just three days were able to evaluate and treat all 7 victims in about 90 minutes. Dave asked us to consider what we would have done if this scenario was on the very first day. I pictured total bedlam.  I guess we were learning quickly after all. Once the main part of the scenario was over we decided to carry the mid-femur fracture patient all the way from the beach to the parking lot in the litter. That included up stairs and then a 1/8th mile hike on the trail. It was very hard work and illustrated why it takes 18 people to evacuate a victim on foot.  We used the passing technique to negotiate the stairs, then hiked the rest of the way. It went very smoothly but it was clear that carrying out a victim even a short distance is very hard work.

After trauma we covered environmental hazards. This included heat, cold, altitude, lightening, and critters (snakes, spiders, etc.). We learned how to make a hypothermia wrap which is a sleeping bag wrapped inside a tarp. The victim is gently placed in the bag after wet clothing is removed. We also learned it is more effective to place warm water bottles in the sleeping bag (inside a sock) than another person. We even watched a clip from David Letterman! It was with Dr. Popsicle and it was fascinating. I couldn’t find the video but click here for a NOLS link. It turns out that a person does not become hypothermic immediately upon falling into cold water. The key is taking a minute or two to calm down and keep your head above water. The saying is “1 minute, 10 minutes, 1 hour” which means control our breathing in the first minute, you have about 10 minutes to move slowly in order to get out of the water before cold incapacitation occurs (if possible, lightly kick your legs to get into swimming position to climb out), and it is 1 hour before we are gravely hypothermic. So, there is time to get out, don’t panic! Dave told us a story about a person who got just his upper body from the shoulders up out onto the ice. His beard actually froze to the ice and kept his head above water. He was successfully rescued!

The hypothermia wrap.

The hypothermia wrap.

The last major area we covered in class was medical illnesses. While some of these topics were mundane (e.g., garden variety stomach ache), these are also the most common things that occur on a trip. It was important to learn how to distinguish the garden variety from the must evacuate variety. We spend quite a bit of time on how to tell the difference. The diabetes section was very interesting. I will always remember to consider diabetes if I come upon someone who is very groggy or unresponsive.  We also got very thorough coverage on cardiac issues to go with the CPR training we received on Day 2.

On our way up into the hills for our night scenario.

On our way up into the hills for our night scenario.

I think my favorite part of this course was the second night session. This was a night scenario out in the Marin Headlands. I can’t give away details on this one, but I will say that it had to be dark before we started. We were told to bring only what we would take on a day hike under the forecast conditions. Fortunately (or unfortunately depending on how you look at it), the weather was absolutely gorgeous.

sunset2

Beautiful sunset over the Pacific Ocean. The calm before the night scenario storm…

It was clear and we saw a beautiful sunset, then the lights of San Francisco after dark. None of us knew what to expect. Once the scenario was underway it was wild. I would recommend the course just to do the night scenario. I learned so much about being prepared and how to manage an evolving crisis. That’s all I’ll say about it other than brought the class together in our common experiences that night. Those of us staying at the hostel enjoyed hot chocolate and each other’s company when we returned to the hostel that night.

One really important part of the course wasn’t actually anything to do with the “nuts and bolts” of how to care for a patient. Instead, it was how to be a good partner in care for a patient. The patient in the back country is totally dependent on the person caring for him or her. Sometimes this can be a period of days. That’s what really distinguishes wilderness emergency care from urban emergency care. Being a supportive and considerate caregiver was stressed, no matter how dire or unpleasant the situation. The patient will need to urinate or defecate, they may vomit. They won’t like it any better than you. But they need your help. Once the responsibility is accepted it should be carried out with compassion. What is said around the patient should be mindful, including unresponsive patients. We talked about the fact that some unresponsive patients can hear and remember what is said around them. Most importantly, no complaining. The injured patient already feels bad enough. Being made to feel like a burden is not something that needs to be added to that. Dave also continually stressed the concept of slow down to go fast. Hurrying for hurrying sake leads to mistakes and tragedies.  In the wilderness there is time.

So, that’s my story of becoming a certified WFR. Emily is also a WFR! I recommend this class for anyone who spends time in the backcountry. It is a big chuck of time and a little expensive but well worth both the time and dollars. You may save a life.